
Anchor Point June 21 , 2004
Anchor Point Effects In FCP

Anchor Point June 21 , 2004
Anchor Point Effects In FCP
By Andrew Balis
By manipulating the Anchor Point setting of a video or graphic clip, you can create some interesting motion effects. But you may not consider this option at all when designing an effect because it doesn't seem like something easily applied or what types of situations it would most benefit to use this option. We'll explore a few unique effects created by using the Anchor Point and how we can alter it in a graphic and friendly way.
But what is the Anchor Point? If you open a clip into the Viewer, and click on the Motion tab, you'll find the Anchor Point setting just below the Center setting.
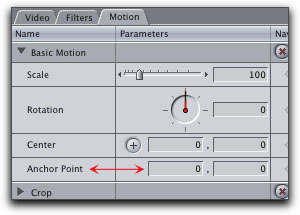
Similar to the Center setting, the Anchor Point is a set of coordinates. But that's as far as the similarities extend. The center point determines where on the screen the image is positioned. The Anchor Point, on the other hand, is a point that determines around which an image will rotate or scale.
Now unless you plan on animating/keyframing some motion property, like rotating or scaling an image over time, then there is no use for altering the Anchor Point, as it would have no effect at all.
Changing the Anchor Point only changes how other motion effects will behave.
Let's take a look at an example of a motion effect created by keyframing Rotation 180 degrees. The image is a simple graphic of an arrow. For these demonstrations, it is surrounded by a green border so we can easily discern the whole image's rotation, not just the arrow.

Unless the Anchor Point is modified, then the image will always rotate around the center of the image, as it did in the previous examples.
This is good for some scenarios, but sometimes it makes more sense for an object to rotate around another point that you designate. This arrow is a good example. In the next examples, the image is also rotated. However, the Anchor Point is set to the very tip of the arrow-head. Now the image rotates around the new point, the tip of the arrow, instead of the center of the image.

Additionally, the Anchor Point changes how the image scales up or down. In the next examples, the Anchor Point is set to the bottom right corner of the image. The Center setting is left alone. The image is then scaled from 100% to 40% with keyframes.

Instead of the image ending in the center, it ends up in the corner. This could be a nice way to transition from a full screen shot to a 4-up split screen, as seen next.
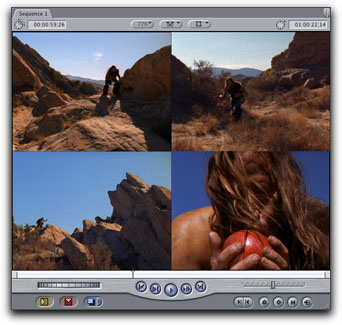
Altering the Anchor Point
If you were to attempt to alter the Anchor Point in the Motion tab, it seems as though you require an innate understanding of the math of the image. Don't fret. We'll look at a much easier way to change the Anchor Point. For just this purpose, FCP also gives us the option of using a tool from the Tool Palette: the Distort tool.
To see how this works, place a video or graphic clip in the Timeline. Then set the Canvas to Image/Wireframe by choosing it from the View pop up menu.

Then select (single click) the image in the Timeline or the Canvas to highlight its wireframe (an X will cross through the image).
With the standard Selection tool (A), scale down the image somewhat in the Canvas by click/dragging on any of the corner points. This will give us some flexibility to move around the screen.
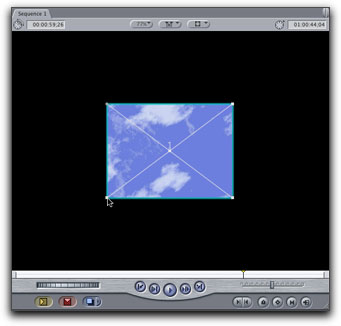
Next, select the Distort tool from the tool palette (D).
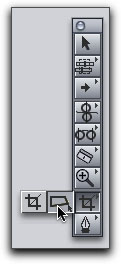
Move your cursor to the Canvas and place it directly over the center of the wireframe. The Distort tool's symbol will appear when you are over the center.
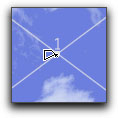
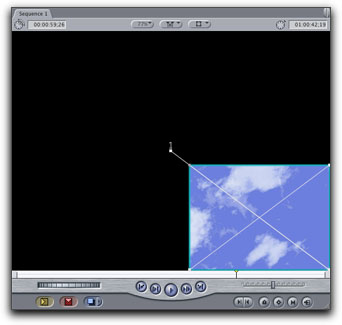
Then, click and drag away from the center. A white line will extend in two directions. The small white square, on the end of the line that is under the cursor, is the new Anchor Point.
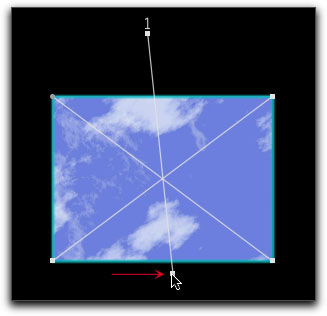
To test this out, switch back to the standard Selection tool (A). Place your cursor over one of the green sides of the wireframe. It will become a rotation symbol.
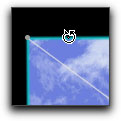
Click and drag to rotate the image. It will rotate around the new Anchor Point. If you were to set keyframes for rotation, then the animation will rotate around this Anchor Point.
To make any changes to the Anchor Point after its initially moved away from the center is fairly simple. With either the Selection tool or the Distort tool, click and drag on the Anchor Point again.
We haven't yet talked about the big elephant in the corner of the room. I'm referring to the line that was generated when the Anchor Point was moved. This line has points on both sides. If the point on the side we drag out is the new Anchor Point, then what about the point on the other side of the line? It not only ends with a point, but a number is seen directly above it (the number represents the Timeline track for this clip). This point is the new center point of the image. Sort of. Its actually a representation of where the center of the image will be if the image is at 100% Scale. This line is basically a representation of the relationship of the Anchor Point to the Center setting at the current Scale and Rotation.
If this is starting to sound like an obscure rant, and you're thinking about closing the article, hold on. There is a reason why this line is a helpful guide, and it leads us into another other type of effects that can be created with the Anchor Point: scaling an image up or down by a point other than the center of the image.
To test this out, let's start out with an un-affected clip. If you want to use the same image as before, start out by Control-clicking over the clip in the Timeline and choosing Remove Attributes from the drop down menu. Or simply click on the red X in the motion tab to return all settings to default.
Then make sure the clip is selected to highlight its wireframe. Grab the Distort tool and click/drag on the Anchor Point from the center of the Canvas. This time, notice that the line extends out only in one direction, to the Anchor Point.
Place the Anchor Point right over the bottom right corner point of the wireframe and let go.
Next double-click on the clip (from the Canvas or Timeline) to open it in the Viewer and click on the Motion tab. Click on the Scale slider and drag left to scale the clip down.
You'll notice the clip does scale down, but is scaling from the new Anchor Point.
Next, drag the Scale slider slowly back toward 100%. Notice that as you do this, the center of the wireframe moves in the direction of the line back toward the point that represents Center. With this line, you can easily determine the direction the image will follow when scaling. To sum this up, if you make the image smaller, the image moves toward the Anchor Point and if you make it larger, the image moves toward the Center point along the white line that joins the two.
Also, when working on these effects, you can adjust motion properties in any order you want. For instance, you can Scale or re-Center the clip first, then change the Anchor Point, or you can change the Anchor Point first, then Scale or Center. This is also mostly true when keyframing these settings as well.
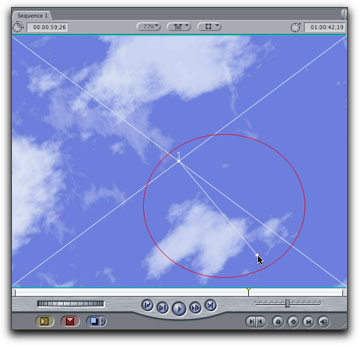
One last note when working with Anchor Points. When keyframing either Rotation or Center, you will notice other lines in the Canvas, straight or curved, depending on the type of animation. Here are a few examples.

Keyframes for Rotation
Anchor and Center

By Andrew Balis
copyright © www.kenstone.net 2004
© 2000 -2004 Apple
Computer, Inc. All rights reserved. Apple, the Apple logo, Final
Cut Pro, Macintosh and Power Mac
are either registered trademarks or trademarks of Apple. Other
company and product names may be trademarks of their respective
owners.
All screen captures, images, and textual references are the property and trademark of their creators/owners/publishers.