
White Paper - Audio in FCP 4 July 14, 2003
Audio in Final Cut Pro 4.0
"For The Working Editor"
By Dan Brockett

White Paper - Audio in FCP 4 July 14, 2003
Audio in Final Cut Pro 4.0
"For The Working Editor"
By Dan Brockett
The Sound for Picture Facts of Life in 2003
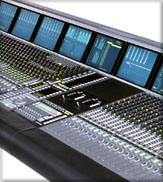
You can say it once, "Video editing programs are not made for editing audio". You can say it again, "Why would you try to edit your audio in your video editing program?" but no matter what you say, or how you feel about it, the fact remains that a lot of programming we see and hear lately has never been subjected to a final audio mix by a professional sound editor on a Pro Tools system or other high-end digital audio workstation.
 In this day and age, with the advent of the DV
Revolution and lower budgets, fewer producers and editors are able to
afford the relative luxury of finishing their projects with a
professional audio post session. The downside is that until now, Final Cut Pro has been audio challenged, to say the least. The "it works for some people", not for others implementation of the sync adjust movie function for Canon camcorder owners, the rudimentary audio rubber band only level control, the none - RT audio filters, the relatively poor sound quality from FCP's audio filters all left a lot to be desired when it came to Final Cut Pro's audio capability.
 In the not so distant past, the programmers and manufacturers of video editing tools were never too concerned about effectively implementing high quality, efficient audio tools because frankly, the audio portion of very few professional projects were produced using NLE's audio tools. Professional projects were typically exported to a separate digital audio workstation (about 90% of the time, a Digidesign Pro Tools system) and the mysterious black art of audio post production was applied to the project by some audio guru. As most of us are aware, sound in visual media means everything. Sound carries most of the emotional content and in most cases; a lousy soundtrack means a lousy project.
The Birth of Video Editor "Do-It-Yourself" Audio
Today, with the exception of high budget programming, high end post facilities are mostly a thing of the past and while audio post is still a popular and intelligent option when you have the budget and time to use it, more and more projects have their soundtrack either final mixed within the video editing application or are output and edited on a separate audio software application, like Deck, Logic or Digital Performer, many times on the same physical computer system, often with the same person who edited the video pulling double duty as the audio editor. Many video editors, especially editors with experience on other video editing systems like AVID, have commented in the past about Final Cut Pro's weak audio tools and audio implementation. AVID's audio implementation has never been world class but at least AVID has had a real audio mixer in the software for years. The old school way of thinking was, "why put killer audio tools into a video editing application when most of the work gets exported to audio post and digital audio workstations?" Video editing applications used to be mainly just for editing video. Enter Final Cut Pro with fairly sophisticated compositing and motion graphic tools and you can see how the world of video editing has changed. After sitting through a presentation of Apple's introduction of FCP 4.0, I can tell you that Apple's vision of what a video editor does is radically changing the traditional world of production and post-production. Today, video editors are often required to be doing everything from design, compositing and motion graphics to audio post, besides just editing picture. I want to clarify going into this overview, that in my opinion, that if you are a typical video editor, you will still need to turn over your project's soundtrack to an experienced sound mixer in order to end up with the absolute best quality soundtrack possible. But for those times when there is not the budget, time or talent available to perform audio post, let's take a look at how Apple has improved the audio portion of Final Cut Pro in the new 4.0 release.
A History Lesson?
Before we get very deep into all of the new audio features of FCP 4.0, we should discuss what Apple has really done with the audio architecture of FCP 4.0. As you are probably aware, FCP 3.04, the most current version of FCP before 4.0 was introduced, had a lot of "legacy code", meaning code that was left over from older versions of FCP. The biggest challenge of making FCP 3.04 work as well as it does was figuring out how to implement code that was lifted from OS9 work reasonably well in OSX. Most of us will agree that Apple did a pretty good job, from a software engineering standpoint with 3.04. I have been running three dual 1 Ghz Quicksilver systems with FCP 3.04 on a daily basis for almost a year with very few crashes or glitches. But the fact remains that FCP 3.04, from a software engineering standpoint, was somewhat of a hack, in that it had to perform well in both OS9 and OSX environments and the OSX version was largely based off of OS9 code. FCP 4.0, in case you haven't heard, is an OSX only application. This means that Apple overhauled and basically re-coded FCP with this release and it shows. The basic audio architecture of FCP 4.0 is totally different than previous versions.
The Big Changes
Here, in no particular order, are what I consider to be the most significant new audio changes in FCP 4.0. Hold your horses, gang, some of this stuff we have been dreaming about and requesting now for years. These features really do prove that Apple is listening to users.
What is Core Audio?

One of the biggest changes in FCP 4.0 is the implementation of Core Audio. We won't go into the "bloody details" of Core Audio and how it works because it's beyond the scope and length of this article, but suffice it to say Core Audio is basically Apple's new OSX audio substructure. Remember all of those weird acronyms and terms that Mac audio people dealt with in OS9 and older versions of the Mac OS like ASIO, ASM (Apple Sound Manager), Carbon Lib, etc.? Well, you can forget about all of those because Core Audio is Apple's modern, all-inclusive implementation of audio systems within the OS, hardware and application software. What this means in practical terms is that if you are running a Mac with OSX, the entire computer and software is optimized for outstanding quality audio. One of the not so great things that people in the past on Macs running audio interfaces and other audio software had to deal with was system latency. Latency is basically the delay that the audio in system has in syncing monitoring audio signals that have gone in and out of a Mac for processing. Core Audio, because it is native to the OS and the hardware, supports higher bit and sample rates than ever before and has very low latency. You don't really need to know too much about Core Audio and how it works. Just remember that Core Audio is a very good thing for your ability to work with professional quality audio and your Mac.
Quality Improvements
Up until now, FCP's basic audio quality has not been the greatest, although it has been typical for a video editing application. In FCP 4.0, all of this has changed radically. Final Cut Pro now mixes the audio in your program at 32-bit internal resolution, even if your source audio is 16 bit. Since all audio calculations are made with higher precision to maximize the quality of your program's audio, using 32-bit internal processing for the audio portion of the signal preserves quality. Since all DV decks and camcorders are still 16 bit, you must still dither the signal down to 16 bit to output to these sources, but you can import and export up to 24 bit sources. So those of you bringing in music or sound effects from 24 bit applications or devices are now in luck.
Real-Time Audio Mixing
FCP 4.0 can now mix and play back multiple audio tracks in a sequence in real time, even when setting dynamic levels, stereo panning, and adding audio filters. The number of tracks that can be played back while being mixed and filtered depends on your hardware capabilities, including:
- Your computer's processor speed
- The seek time and sustained transfer rate of your hard disk
- The amount of RAM available to Final Cut Pro
- The Audio Playback Quality setting in the General tab of the User Preferences.
Bye, Bye S.A.M?
 As you are probably aware, Canon camcorders, for some odd reason, record their digital audio at a non-locked, non-standard audio sample rate. When you capture footage that was shot on various Canon camcorders, and check the sample rate in the browser, you often see an audio sample rate of something like 47,997 KHz, instead of the standard 48KHz. This results in the audio losing sync with the picture. This loss of sync is progressive, in other words, the longer the clip, the more out of sync the audio becomes as the clip progresses. FCP 3.04's Sync Adjust Movie (or S.A.M.) is supposed to compensate for this non-standard sync rate. As you go through all of the preference, audio and video and sequence preset menus in FCP 4.0, you will notice that the S.A.M. or Sync Adjust Movie preset is now gone. This function is now detected automatically. Time will tell how effective this new approach works with non standard audio sample rates.
Okay, How About Audio Plug-Ins?
 FCP 4.0 has support for Audio Units. What are Audio Units? Well, they are related to Core Audio and are Apple's way of finally "somewhat" standardizing how audio filters can be implemented into audio applications and some video applications like Final Cut Pro. Besides the regular audio filters that were present in FCP 3.04, FCP 4.0 includes a set of Audio Units filters that you can use to adjust your audio clips. The Audio Units format is now the standard Apple audio plug-in format for Mac OS X applications. We'll go over these in greater detail later on.
FCP 4.0 will finally work with external audio plug-ins. Apple does have some specific requirements for Audio Units plug-ins so not all AU plug-ins will work in FCP 4.0. The implementation seems to run parallel with how FCP has always handled AE plug-ins. Some work and some don't. I feel confident that this will improve considerably once Audio Unit plug-in authors realize what a huge potential audience they will have in FCP 4.0 users. Several plug-in authors have told me that the re-write to comply with FCP's implementation of Audio Units is not terribly difficult but time will tell if this is really the case.
A Mixer?
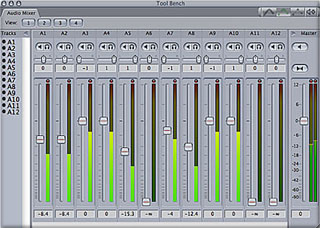
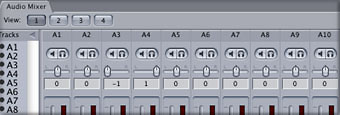
Yes, it's true, FCP 4.0 does finally include an Audio Mixer! One of the most requested features for quite a while, FCP's new audio mixer is fairly basic, as it should be, considering that FCP is a video editing application and not an audio workstation. The apparent simplicity does hide the fact that it is also fairly powerful. The new Audio Mixer tab in the Tool Bench has controls comparable to those of a basic, automated hardware-mixing console. Each audio track in the currently selected sequence is represented by a track strip, complete with solo and mute buttons, a stereo panning slider, and a volume fader. You can make fine adjustments to the audio in your program by manipulating these controls in real time while you listen to your program play back. Yes, you can now make real time pans and fades while listening and playing back, as it should be. Final Cut Pro records the adjustments that you make with the mixing controls, adjusting the levels of clips in your sequence accordingly. Adjusting the levels of your tracks this way as you listen to them play back allows you to create mixes more quickly than does directly manipulating a track's volume overlays. The new Audio Mixer features the following controls:
- Track strip controls allowing real-time mixing and automation recording for volume and panning levels
- Mute and solo monitoring controls
- Master level, master mute, and mixdown controls
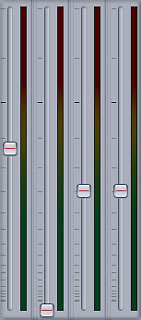
- Individual track audio meters (this one has been requested since we got the master mixer level meter in 2.0)
- Master output meters showing mixed levels for each assigned audio output

#1 |

#2 |
#3 |
#4 |

#5 |
Keyframe Recording for Audio?
![]() Yes, FCP 4.0 does have real-time keyframe recording in conjunction with the adjustments that are input using the new Audio Mixer. When the Record Keyframes checkbox in the Audio Mixer tab or in the General tab of the User Preferences window is selected, Final Cut Pro records all changes you make to audio controls during playback as keyframes in the corresponding parameter overlay of the audio clip you are adjusting. This is referred to as recording mixer and effects automation. You can record automation in real time during playback for:
Yes, FCP 4.0 does have real-time keyframe recording in conjunction with the adjustments that are input using the new Audio Mixer. When the Record Keyframes checkbox in the Audio Mixer tab or in the General tab of the User Preferences window is selected, Final Cut Pro records all changes you make to audio controls during playback as keyframes in the corresponding parameter overlay of the audio clip you are adjusting. This is referred to as recording mixer and effects automation. You can record automation in real time during playback for:
- Volume and panning levels using the fader and pan controls in the Audio Mixer tab
- Audio effects parameters using audio filter controls in the Filters tab of the Viewer
In tests I conducted, FCP 4.0's audio keyframe mixer automation worked flawlessly. It was liberating experience to merely hit the "record keyframe" button and mix in real time with FCP automatically setting audio level, panning and muting keyframes in real time. This feature alone is a quantum leap over how previous versions of FCP handled audio and brings FCP 4.0 up to parity, if not beyond AVID Xpress DV's mixer capability.
The Smaller Changes
Just as lots of new, small thoughtful features abound in FCP in the picture-editing portion of the program, there are several new audio features that may not be apparent at first glance. While many of these new smaller features will be great for most editors, several of these features are aimed more at editors working with film-based material or for more advanced users in multi-workstation environments but they are exciting developments nonetheless.
What The Heck Is Keyframe Thinning?

This is a new feature that is easier to understand when you see it in action rather than read about it. The new Audio Keyframe Thinning pop-up menu in the General tab of the User Preferences window allows you to control how detailed the keyframe automation is when recorded using the Audio Mixer or audio filter controls. There are three choices:
- All: Records the maximum number of keyframes possible while you move a track strip's fader or panning slider. The end result is a precise re-creation of the levels you set using the Audio Mixer. The drawback to this option is that you might end up with an extremely dense cluster of keyframes in the audio level overlays of the affected clips that can be difficult to edit later.
- Reduced: Reduces the number of recorded keyframes that are created when you move a track strip's fader or panning slider. The resulting level or panning overlay in the Timeline or Viewer is an accurate reproduction of the levels you set, but is easier to edit using the Selection or Pen tool.
- Peaks Only: Records only the minimum number of keyframes necessary to approximate the levels you recorded when moving a track strip's fader or panning slider. Keyframes recorded using the Peaks Only option reflect only the highest and lowest levels that were recorded. This is primarily useful when you want to record a minimum number of keyframes to edit later in the Timeline or Viewer.


Reduced

Peaks Only
If you are a power user, you will see how manipulating the keyframe thinning in your audio automation tracks can benefit you in the smoothness and precision needed to make your soundtrack work more transparent. For the rest of the less experienced or "deadline challenged" editor, this feature may be too complex or may require too much work to pay an audible dividend in your end product. But regardless if you use it or not, it's great to have choices.
Support for Multichannel Audio Output
Notice how this headline only says
'output'? So far, FCP 4.0 doesn't accept more than two channels of audio input at a time input but it's nice to see that Apple has officially built support into Final Cut Pro 4.0 for audio output via up to 24 outputs using "Mac OS X-compatible audio interfaces". So far, the only officially supported audio I/O device I have seen is the Aja I/O, although, hopefully other companies such as Mark of the Unicorn and Metric Halo will certify their multi-channel audio interfaces for use with FCP. The Audio Outputs tab of the Sequence Settings window allows you to define the number of audio output channels that are available to tracks in your sequence via the external audio interface connected to your computer. All audio tracks in a sequence can be assigned to specific pairs of audio outputs using the shortcut menu in each audio track header in the Timeline.

If you are using a Mac OS X-compatible audio interface, you can now output up to eight audio channels while using the Edit to Tape command. The number of audio tracks that can be recorded to when using the Edit to Tape command depends on the number of audio tracks your video or audio recording device supports. The Audio Mapping pop-up menu does not automatically detect the number of audio tracks your video or audio recording device is capable of recording to. You need to choose a configuration based on your recording device's capabilities.
You can sync a video clip with up to 12 stereo or 24 mono audio clips (merged clips can contain a total of 1 video and 24 audio items) using their timecode, in points, or out points. After a group of clips has been synchronized in preparation to create a merged clip, you select them all and choose Modify>Merge Clips.

A New Way to Make a Preset for Multi-Channel Audio
New support is available for specifying Mac OS X-compatible audio interfaces for capture and output in the Audio/Video Settings window. New settings in the Audio Outputs tab of the Sequence Settings window allow you to define the number of audio output channels that are available to assign to audio tracks from your sequence, using whichever external audio interface or third-party video capture card is connected to your computer. By default, a stereo preset is enabled, and will work with the audio output built in to your computer, as well as with most DV camcorders and third-party video capture interfaces. If you have a more sophisticated audio interface specified in the Audio/Video Settings window that supports more than two channels of audio output, you can create a new preset to define these additional audio output channels.
Audio Outputs Tab
The Audio Outputs tab contains a list of presets that allow you to define the number of audio output channels that are available to your sequence via external audio interfaces connected to your computer. The selected audio output preset is automatically assigned to all new sequences and projects you create. Each sequence in your project has its own individual audio output settings. After a sequence has been created, any future changes to its audio output settings must be made in the Audio Outputs tab of the Sequence Settings window.
Another Long Requested Feature
This is huge. FCP has always required a re-render of audio effects if a parent or merged video file is moved or modified. Audio and video render cache files are now managed separately. Modifying video edits and making changes to video effects that overlap audio effects no longer affects rendered audio render cache files, and vice versa. Audio and video render cache files are preserved when clips are duplicated or copied and pasted. New item level rendering of audio clips now lets you render
just single clips individually. So if you are just working with one
audio item at a time and don't want to 'render all' or 'render
sequence', you can just render the highlighted clip alone.
Separation is a Good Thing?
Capturing audio and video to separate files now creates true merged clips.
When you capture video and audio to separate files, two sets of media source files are saved on your hard disk, but the clips appear in your project as merged clips. Capturing your video and audio as separate files allows you to divide the workload between two scratch disks, maximizing the performance of each scratch disk you're using so that you can capture your video at the highest possible data rate. Video and audio media files that have been captured separately are no longer dependent on one another. I'm not sure if this is now recommended for DV material and it may have something to do with the new G5's implementation of ATA serial drives.
Finally In-Sync
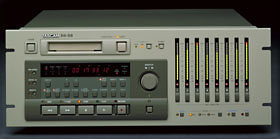
This mainly applies to users who may be pulling in audio from a separate sound source like a TC DAT or DA-88 type of device and professional DVCAM or DVCPro/HD types of decks that accept genlock. When capturing audio intended to be synchronized to video from a separate source, it's important that your device-controllable audio deck be synchronized to your computer via a common video timing signal, such as a blackburst generator (also referred to as house sync). This is true even if you're capturing your audio via a dedicated audio capture interface. This can be accomplished by connecting a blackburst generator to both the genlock connector (also called external sync) of your audio deck and to the genlock connector of an external video capture interface connected to your computer. When capturing audio from a genlocked audio deck, you need to select "Sync audio capture to video source if present" in the General tab of the User Preferences window.

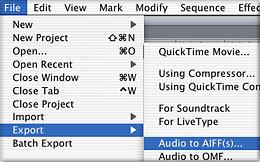
Export multiple audio outputs to AIFF files
The Export Audio to AIFF(s) command in the File>Export submenu allows you to export every audio output channel that's defined in the Audio Outputs tab of your sequence's settings as a separate AIFF file. You also have the option of saving each exported AIFF file at 24-bit resolution.
What About The New Audio Filters?
Since I have already written a fairly comprehensive overview of how FCP's audio filters operate and are implemented, I will concentrate here mainly on how the new Audio Units filters operate and sound. As we discussed earlier in this article, Audio Units are Apple's new file standard protocol for audio filters and plug-ins. All of FCP's new Core Audio/Audio Units filters are preceded with the abbreviation "AU".
AUBandpass
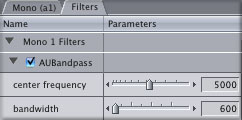
This bandpass filter is designed to modify a single frequency band. A low bandwidth value gives less accentuation and wider audibility across the band. A high bandwidth value focuses more sharply on the center of the band, screening out more of the frequencies above and below it. By choosing its center frequency, you can modify the boost or cut level. You can modify the bandwidth value to narrow or widen the frequency range that is heard and the level of accentuation at the center of the band. It can be used to quickly attenuate a range of frequencies in a clip.
AUDelay
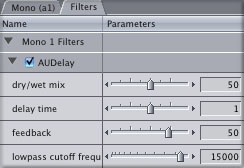
Adds a series of repeats to the selected audio. You can adjust the mix of the original source signal with the repeating echo. You can also set the level (amount) of the effect, brightness, feedback (duration of repeats), and delay (time between repeats.) Use the AUDelay filter to lend a "slapback" or "canyon" effect to the selected audio. Can also be fun with music or short, staccato types of sounds.
AUGraphicEQ
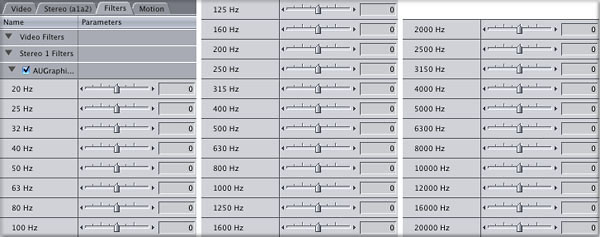
Divides the audio spectrum into 31 frequency bands, ranging from 20 Hz to 20,000 Hz. You can set the center frequency for each band. This filter is especially versatile because it applies equalization in 31 bands of your clip simultaneously, rather than requiring you to apply multiple filters. A big improvement over FCP's previous three band EQ.
AUHighShelfFilter
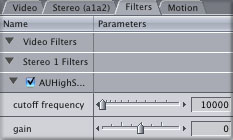
Similar to a AUBandpass filter, but the upper end of the frequency range is sharply cut off, while lower frequencies are allowed to pass. You can use the gain setting to boost or cut the volume at the upper end of the frequency range. I didn't notice much apparent difference between this series of filters (the shelf and pass filters) and FCP's original ones.
AUHipass
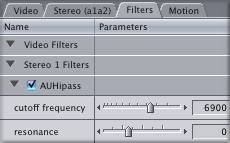
The AUBandpass filter is optimized to reduce low frequencies, leaving high frequencies alone. This filter is useful for reducing traffic rumble or airplane noise in a clip.
AULowpass
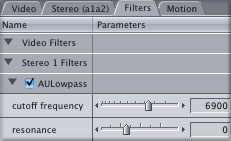
The AUBandpass filter optimized to reduce high frequencies, leaving low frequencies alone. This filter is useful for dulling down a sound that is too "bright," reducing things like tape hiss and machine noise from a clip. Can also be used to tame the "harshness" out of cheap mics although it's easy to use too much.
AULowShelfFilter
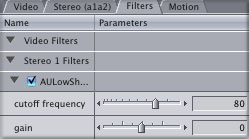
Similar to an AUBandpass filter, but the lower end of the frequency range is sharply cut off, while high frequencies are allowed to pass. You can use the gain setting to boost or cut the volume at the lower end of the frequency range. Useful for taming low end rumble like HVAC or elevators in office interiors.
AUParametricEQ
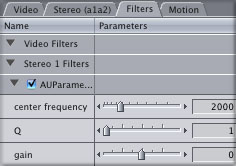
Parametric EQs differ from graphic EQs in that parametrics adjust larger portions of the frequency range at once, with varying degrees of rolloff in either direction from the center point. Easier to hear the difference rather than explain it. Hardware parametric EQs are usually more costly than graphic EQs and are used more often to deliver more natural and or musical EQ.
AUPeakLimiter
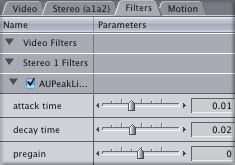
Smoothes out inconsistencies in volume levels over time, on all frequencies. Compression of volume reduces the dynamic range so that it does not become too loud. The attack and decay settings specify how fast this effect should adjust the volume level in response to the beginning and end of a change in levels.
If you want to install third part AU Core Audio plug-ins, Final Cut Pro only works with Audio Units filters that are capable of accepting mono audio as input, and can output a mono signal. Also, certain Audio Units filters that don't support certain properties required by Final Cut Pro for real-time playback will require rendering before playback.
The Surround Big Question?
No, FCP 4.0 does not support any surround sound mixing, encoding, decoding, matrixing or bass management through it's mixer, although with FCP's multiple outputs, at least multiple tracks can be output from the mixer to a digital multitrack recorder, where said audio can be input to a DAW that does support surround sound authoring. In due time, I would not be surprised to see surround sound implemented into FCP although Apple is mum on the subject at present.
A Simple Mismatched Audio Sample Rate Real World Test
For all of the discussion out there about audio filters, audio sample rates and real time, it must be noted that one of the most common user errors in DV editing is mismatched audio sample rates. From a design standpoint, it would probably be better if FCP probably didn't even accept mixed sample rate audio. Check any FCP user group or FCP board on the web and probably twenty to forty percent of all of the audio issues you read and hear about are caused by mismatched audio sample rates. Digital audio and video has been around for quite a few years now and you would think that users would have began to understand about mismatched audio sample rates, but based upon what we read and see on the boards and at user groups, this is still probably the most common audio mistake that digital video editors make.
During the unveiling of FCP 4.0 at the Los Angeles Final Cut Pro User Group, Apple stated that audio sample rate mismatches would not be an issue for FCP 4.0. I wanted to see if this proved to be true on my own system so here's what I did. My system, while decent, is nowhere near state of the art and is probably a good representation of an "average" system that many FCP 4.0 users will be editing on. I performed this test on a dual 867 G4 with 1.25 GB of ram, so this is not by any stretch of the imagination, a super fast G4. I loaded a 48Khz standard DV sequence with a 32Khz audio sample rate video clip (in past versions of FCP, this would be a fairly good guarantee of pops and clicks). It played back perfectly, as Apple said it would. Then, to really make things more interesting, I added four tracks of 44.1 KHz CD audio. So let's examine what the G4 and FCP 4.0 are being required to do in this situation, the sequence is setup for 48Khz audio sample rate so when the G4 and FCP encounter the 32Khz footage audio, in real time, they convert that 32Khz audio to 48Khz. While the quality wasn't great, I attribute this more to the 32Khz sample rate than anything FCP was doing. Once again, I heard no pops, clicks, glitches or dropouts. Then, FCP and the G4 were required to sample rate convert four tracks of 44.1 KHz audio to the 48KHz sequence sample rate also at the same time and keep the video stream constant enough to not drop frames. Once again, no glitches, pops or clicks, Very impressive. Not to say that you cannot bring FCP 4.0's RT audio capabilities to its knees, you can. You may experience different results on your system, of course, but it is impressive that I could play back five tracks of mismatched audio sample rate audio in real time with no audio artifacts. Your mileage may vary.
Overall Impression of Audio In FCP 4.0
As we discussed in the beginning of this article, the expectations for video editors are changing and Apple is rising to meet the challenge. We all know that the days of most programming going out for professional sound design and a final audio mix are diminishing. In the real world, video editors are being expected to take a show, film or project through the entire postproduction process by themselves more and more often. The new audio tools and enhancements in FCP 4.0 are a major improvement over previous versions of Final Cut Pro. When combined with exciting new tools like FCP 4.0 companion loop-based music composition program, Soundtrack, and exciting new hardware interfaces like Aja's I/O, FCP 4.0 represents a quantum leap forward in audio capabilities.
Apple's vision of the future of video editing finally includes decent sound capabilities built into the video editing application. Seasoned audio editors will probably not be too impressed with FCP 4.0's audio tools and capability in comparison to specialized digital audio workstations, but in comparison to most other video editing programs, FCP 4.0's approach to audio is head and shoulders above what the competition offers on the Mac platform. The additions of Core Audio, Audio Units plug-in support, internal 32 bit processing, the ability to import and export 24 bit sound files, a real time, fully automated mixer, multi-channel audio output and Soundtrack mean that, with the proper skills, fairly high quality audio can be created by Final Cut Pro editors without going to an external audio post production workflow. Keep in mind though, as in all forms of art mixed with commerce, the end result is dependent on the skills, creativity, artistry and experience of the editor. At least now the basic tools are in place.
By Dan Brockett
Big Little Films, Inc. ™
5235 Mission Oaks Blvd - Suite 373, Camarillo, Ca. 93012 USA
(805) 388 4689 E-Mail: dan@biglittlefilms.com
copyright © kenstone.net 2003