
January 5, 2009
Speeding up Compressor 3
By Tom Stitzer
If you are using Apple's Compressor to encode your files, then you know that it's a
process that can take quite a lot of time. You can easily boost your Compressor speed
by making sure all of your available cores are enabled and being used by Compressor. The tutorial works with Compressor 3 only.
When I first started using Compressor with my MacPro, I noticed I could still websurf, watch online video, Photoshop pictures, etc, all without any horrible slowdown as I had experienced on my old G5. The Compression time was noticeably shorter with the MacPro, down to about 8 hours from 36-48 hours with the old Dual 2.7 GHz G5. However, keeping an eye on MenuMeters (see notes below), I noticed the processors were running at about 15-20%. That seemed odd to me so I did some research and discovered that Compressor's default is to only use 1 core. One! I also found out, it's relatively easy to enable all 4, or 8 cores, depending on your Mac's configuration.
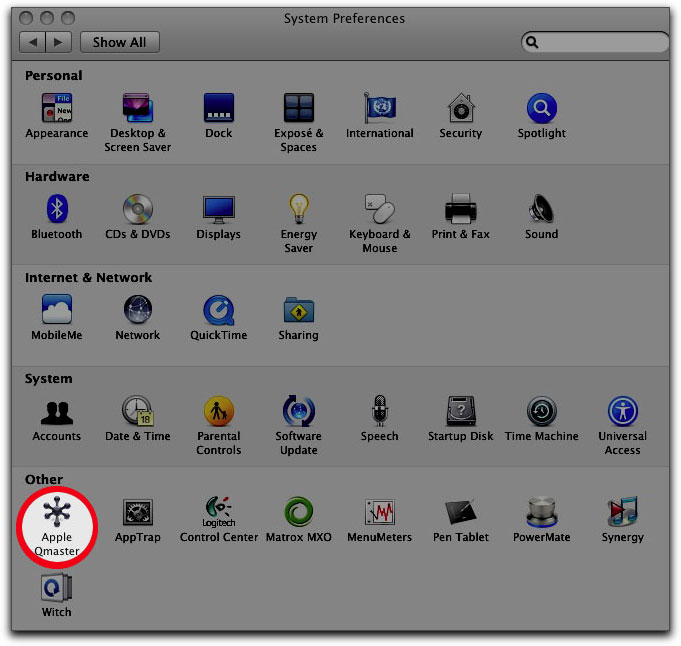
Open up System Preferences and click on Apple QMaster.
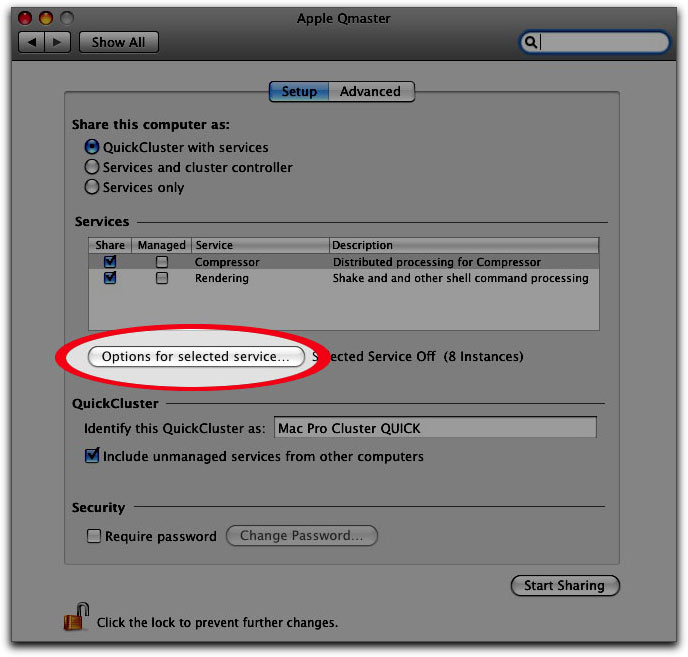
Click on Options for selected services.
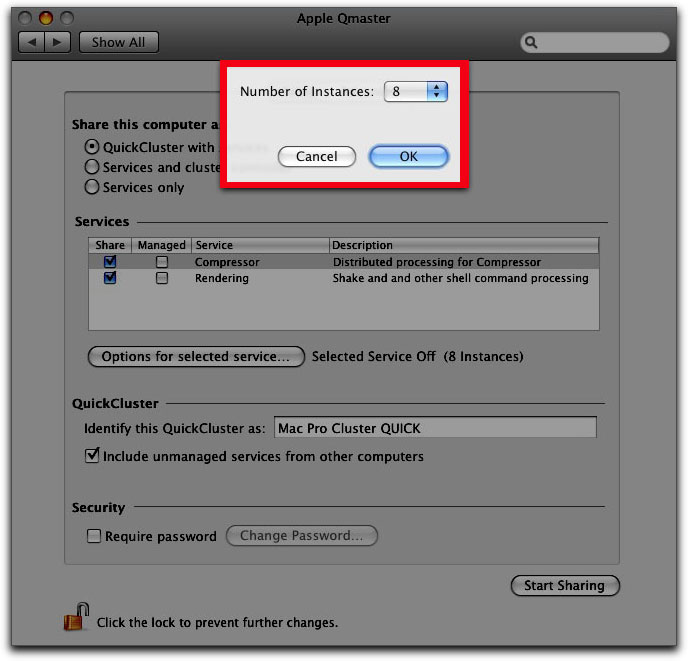
In this pop-up, you can choose the number of instances (processors) you want to enable for Compressor. I have a dual-Quad core Mac, so I have 8 to choose from. Your own mileage may vary (see my notes at the end of this article for more information regarding Instances and Cores).
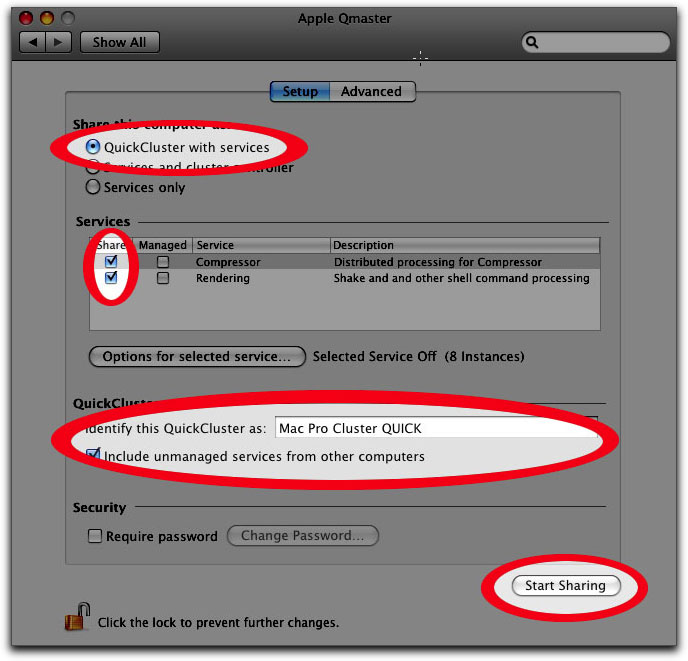
Next, you need to select the QuickCluster option, make sure there are checks in the boxes for Compressor AND Rendering, Type a name for your new QuickCluster, check the box titled "Include unmanaged services from other computers, and then click Start Sharing. WHEW!
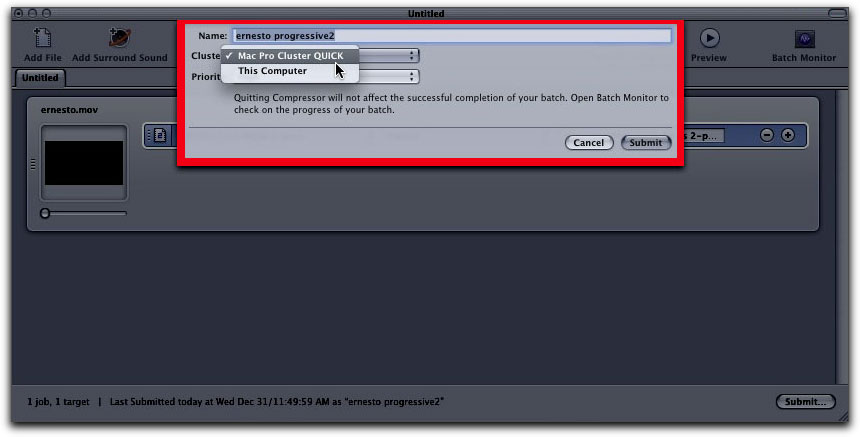
Inside of Compressor, drag your movie file in, select your setting (this is where I chose Two-Pass VBR best and the "BEST" setting for Motion Estimation. Click on Submit. In the resulting pop-up, click on "This Computer" and you should see your named QuickCluster in the drop down box. Select it, and then hit Submit. If you have MenuMeters, you should these kick up to around the 90% range or so.
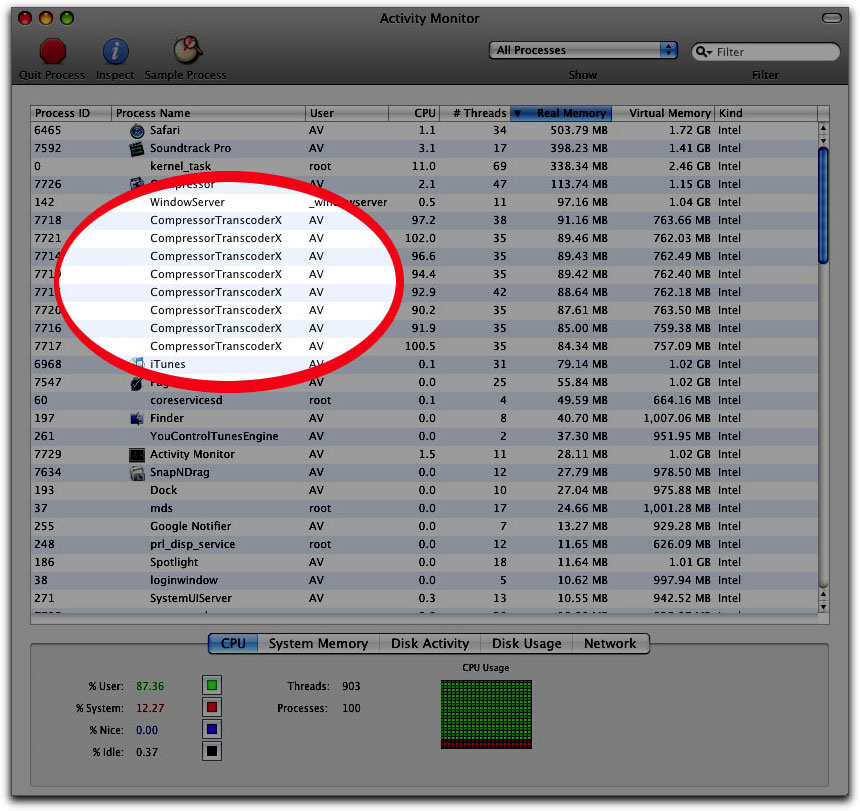
If you open up the Activity Monitor, located in you utility Folder inside of your Applications folder, you should now see 8 instances (or however many you chose) of Compressor.
Choose CPU Usage from the MenuBar and a small graphic will display, showing you all your cores lit up like a Christmas tree.

You can also open up Compressor's Batch Monitor, and discover much more information about the encoding process and how far along it is.
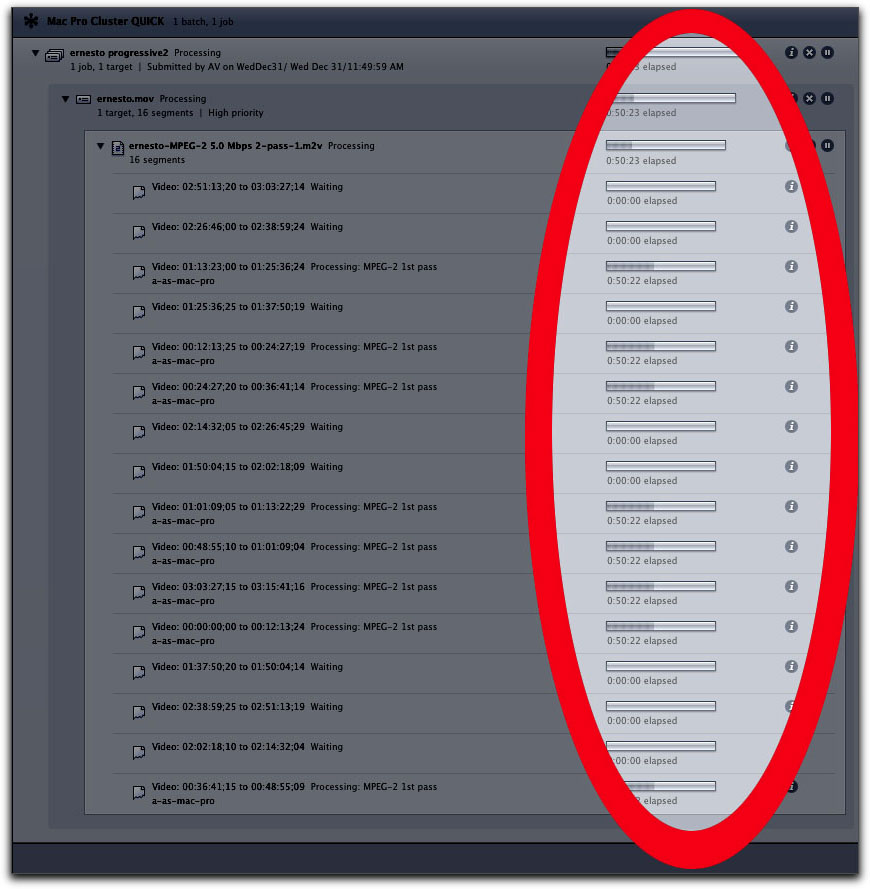
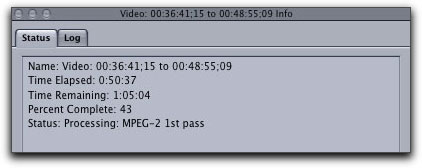
A few final notes: I mentioned MenuMeters several times which is found here. It's an extremely customizable processor/cpu usage tool that sits in your MenuBar, letting you see how much RAM is being used, or high your processors are running. Another similar app is called iStatMenus.
It is generally recommended that you don't enable ALL of your cores because doing that left no bandwidth for the OS to use. I do notice that when I am using all 8 cores, other tasks get slow. In my simple unofficial tests, there seems to be very little difference in choosing 8 over 7. With 8 instances, a 3 hour movie file was finished in just under 4 hours, while with 7 selected, it was just over 4 hours until completion. Mind you, this was with the "BEST" quality setting in Compressor's Quality Tab options. Choosing "Better" would result in even quicker times. It is also recommended that you have at least 1 GB of RAM per core that you are going to use for your QuickCluster. And finally, to read the official word about this from Apple, open Compressor and under the Help option, choose Distributed Processing Setup.
Tom Stitzer is the owner of Arizona-based Royal Sun Productions, delivering high-quality wedding videography at a cost that won't break your budget. For more information, please visit www.royalsunproductions.com
[Top]
copyright © Tom Stitzer 2009
are either registered trademarks or trademarks of Apple. Other company and product names may be trademarks of their respective owners.
All screen captures, images, and textual references are the property and trademark of their creators/owners/publishers.