
December 15, 2008
By Ken Stone
You can place clips of different sizes, frame rates and even codecs in a timeline and FCP will accept all of these clips, even though they don't match the sequence settings. A timeline with these types of clips in it will have render bars above those clips and will playback in RT and be rendered to match the sequence settings on Export and Printing to Video.
There will be times, when the video footage that you have to work with was shot at two different frame rates, often this happens by mistake. There are two different ways to handle this situation. The first would be to place all of the clips in the timeline and let FCP do the work. The second way would be to take the clips whose frame rates do not match and use Compressor to convert the frame rates to match the sequence frame rate. Why use Compressor if FCP can do the job? Because, while FCP can do it with little hassle, the truth is, that Compressor can do a much better job of converting frame rates using Frame Controls which is based on Shake's Optical Flow technology. Using Compressor does take extra work, so if you need a quick way to work with different frame rates in the timeline, and it doesn't matter if the footage is a little choppy, use FCP. We'll look at both ways.
The Truth about Converting Frame Rates
In a situation where you have two different frame rates and need to convert one to match the other, there are two directions that you can go. One will produce good results, the other not so good. Let's say that we have footage shot at 24P and 30P. If we convert the 24P footage up to 30P, the full 24 frames will be used and an additional 6 frames will be created, for a total of 30. In both FCP and Compressor, the additional 6 frames will be based on the information contained in the original 24 frames. This is the correct way to convert frame rates so they match.
The other way to go would be to take the video shot at 30 frames and reduce it down to 24 frames. This would not be the way to do frame rate conversions because, if you reduce 30 frames down to 24, you have to throw away 6 frames and those 6 frames contain an important amount of information (particularly regarding motion). Doing frame rate conversions in this manner will produce stuttery video. So, when doing frame rate conversions in either FCP or Compressor, always convert the lower frame rate up to match the higher frame rate.
Frame Rate Conversion in FCP
The example footage used in this article was shot on the Panasonic AG HVX 200, at both 30P (29.97) and 24PN (23.98). Remembering that we always want to convert frame rates up, the sequence will be set to 30P (29.97). There are a number of different 'Editing Timebase' formats, so some of the settings in this article will be different for you.
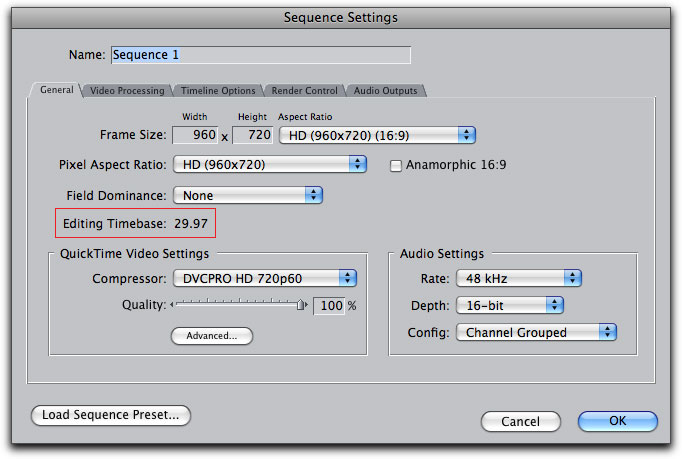
The timeline below, is shown with mixed frame rates, note the green render bar (hard to see) above the 24PN (23.98) video.

This is a quick and easy way to do your frame rate conversion and there may be times when the output quality will be 'good enough' for your intended use.
Frame Rate Conversion in Compressor
Because of Compressor's Optical Flow technology, Compressor will always do a better job at frame rate conversion than FCP, but this does involve gathering up your lower frame rate clips and moving them to Compressor and Batch processing them.
Drag your clip(s) into the Batch window.

After you have moved your 24P clip(s) into the Batch window, look to the Settings window. In the Advanced Format Conversions folder is the High Definition folder and inside that is the DVCPRO preset that we will be working with.
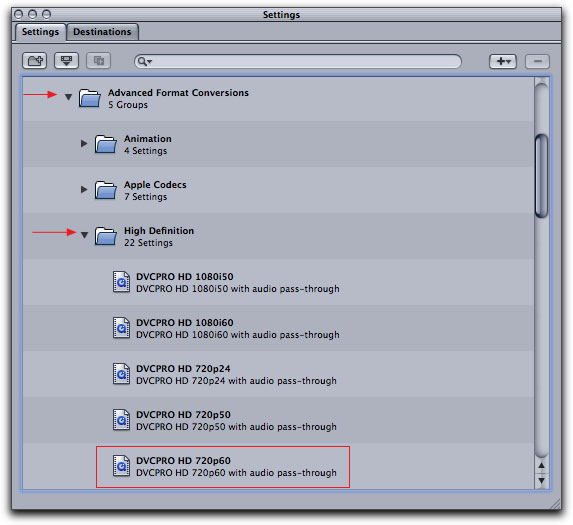
Drag the DVCPRO HD 720P 60 preset up to the Batch window. While often there will be two parts to a preset, video and audio, in this case, the audio is included in the one preset 'with audio pass-through'. What this means is that the original clip's audio will not be alter in anyway and will playback properly after the frame rate conversion.

The DVCPRO HD preset in place and selected.

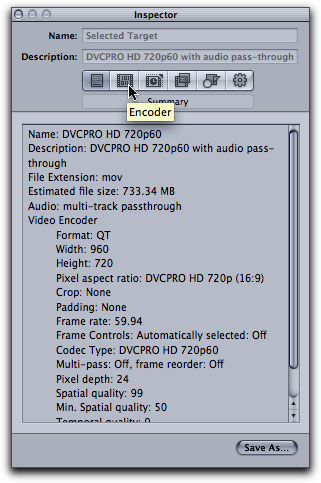
In the Inspector, click on the Encoder tab (below left) and then in the Encoder tab, click on the 'Video' settings button (below right). The 'Audio' Settings are set to Pass-through, leave this as it is.
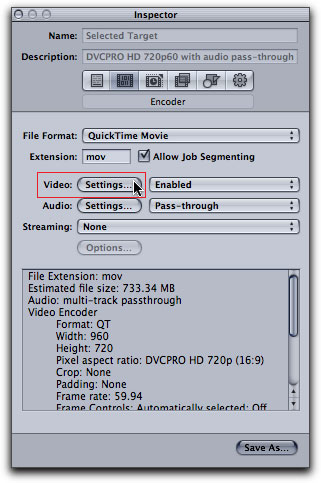
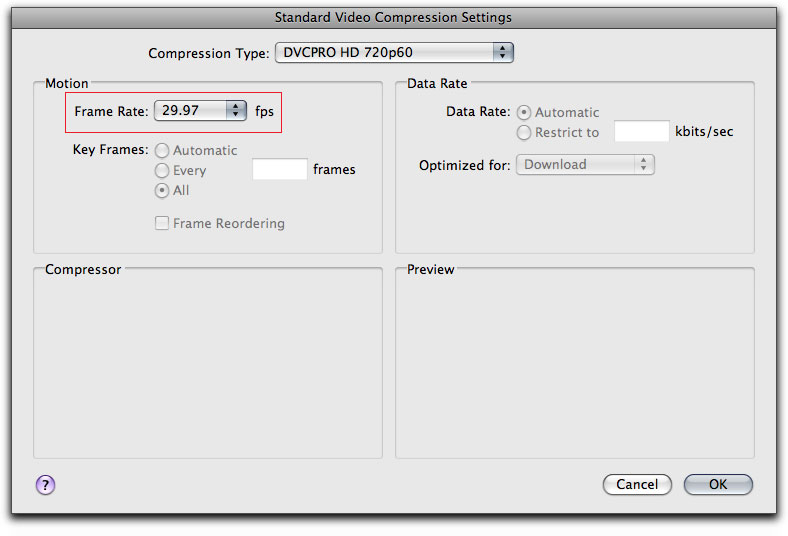
Clicking on the 'Video' Settings button will open the Standard Video Compression Settings window. Because we are converting 24P (23.98) video to 30P (29.97), select the 29.97 setting in the Frame Rate drop-down menu. Note that all of the other settings are grayed out and not available for adjustment. Click Okay.
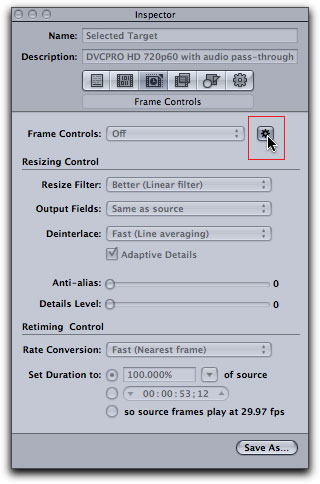
This will return you to the Inspector. Next, click on the Frame Controls tab, in the Frame Controls tab you will see that all of the options are grayed out (below left). We need to turn on Frame Controls by clicking on the small gear icon to the right of the Frame Controls setting (below center). After you have clicked on the gear icon, the Frame Controls drop-down menu will become active, select 'On', (below right).
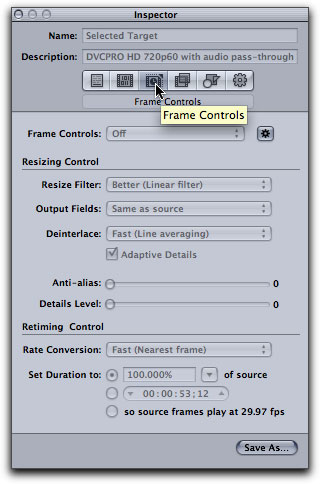
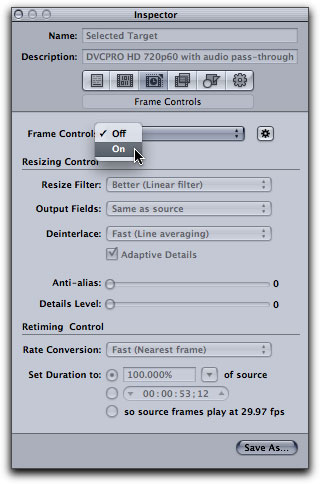
With Frame Controls now On, the rest of the items in the Inspector window become active. The controls are divided into two sections, 'Resizing Control' and 'Retiming Control'. The 'Resizing Control' would be used if we were changing the frame size of our video, but we are not doing that. So, even though this sounds strange, leave the 'Resizing Controls' section as it is, even if it looks like the settings might be incorrect. As we have not changed our frame size (we are only changing the Frame Rate) Compressor will ignore this section.
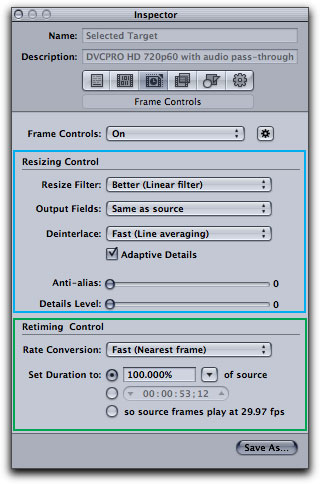
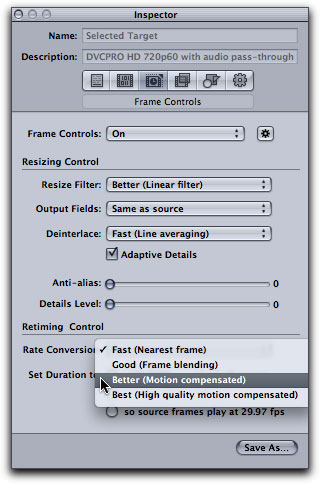
In the 'Retiming Control' section, there are four options in the Rate Conversion drop-down menu. There is a trade off with these settings, the higher the quality the longer it takes to encode. The 'Fast' setting is just awful. 'Good Frame blending' is what we get if we were doing this in FCP. Neither of these first two options employ Optical Flow technology which is why we came over to Compressor in the first place. So there are two choices left, both of which employ the Optical Flow technology. I would suggest that you start off with 'Better Motion compensated', do a test and check to see if the output is good enough, in many cases this will do the job. If you need higher quality yet, then pick 'Best High quality motion compensated'. Be advised that 'Best' can take forever to encode.
Just below the Rate Conversion menu is the 'Set Duration' setting. This defaults to 100.000% of source which is what we want. We don't want to change the duration of the video but rather the number of frames per second that are displayed, so leave these settings alone. Interesting point here. We have all used the Duration (Speed) settings in FCP to change the speed of our video, either faster or slower. If you have done this in FCP, you know that the results are not all that good. If you need to change the speed of a clip in FCP, bring it over to Compressor, enable Frame Controls, set your Rate Conversion method and the percentage duration of your clip. Compressor will do a much better job for you.
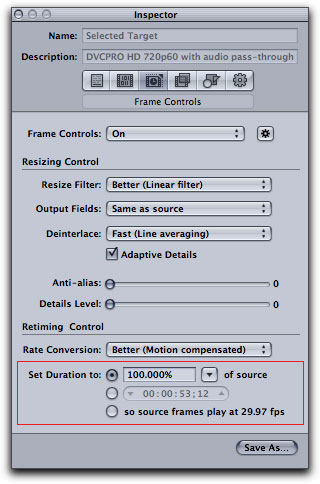
So that's it. In Compressor, in the Encoding tab, Video settings, set your new frame rate, then move over to the Frame Control tab, turn it on and set your Rate Conversion method. In the Batch window hit 'Submit'. Pretty straight forward.
A note about the Panasonic AG-HVX200 from the Apple FCP manual. "Camcorders such as the Panasonic AG-HVX200 allow you to record 720p footage onto P2 cards without duplicating frames. Because the footage is recorded at the intended frame rate, this method is called native frame rate recording and is often indicated by the letter N.
Enjoy,
--ken
copyright © www.kenstone.net 2008
are either registered trademarks or trademarks of Apple. Other company and product names may be trademarks of their respective owners.
All screen captures, images, and textual references are the property and trademark of their creators/owners/publishers.