August 22, 2011
Download the ePub iPad/iPhone version of this article.
By Ken Stone
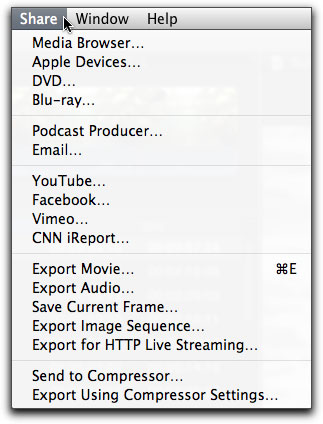
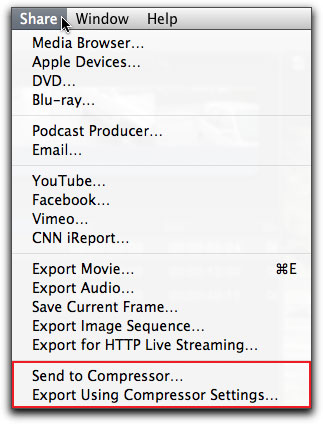
In FCP X we do all of our exporting from the Share menu, shown below. The export options include writing projects to our hard drives, email and to iTunes. We can send our projects to various social networks, export movies, audio, still images from the timeline, image sequences and videos optimized for web delivery. We can author and burn DVDs and Blu-ray discs from the Share menu. There is also 'Send to Compressor' and 'Export Using Compressor settings' for all the format and encoding options that Compressor has to offer, including Frame Controls (Optical Flow) for high quality transcoding. We can export from either the Project Library, by selecting the project, or from an active timeline. When exporting from the Project Library it should be noted that you can only export one project at a time. When exporting from the timeline the entire project will be exported, you can not set In and Out points nor can you apply Chapter Markers for use in making DVDs.
Media Browser- Apple Devices
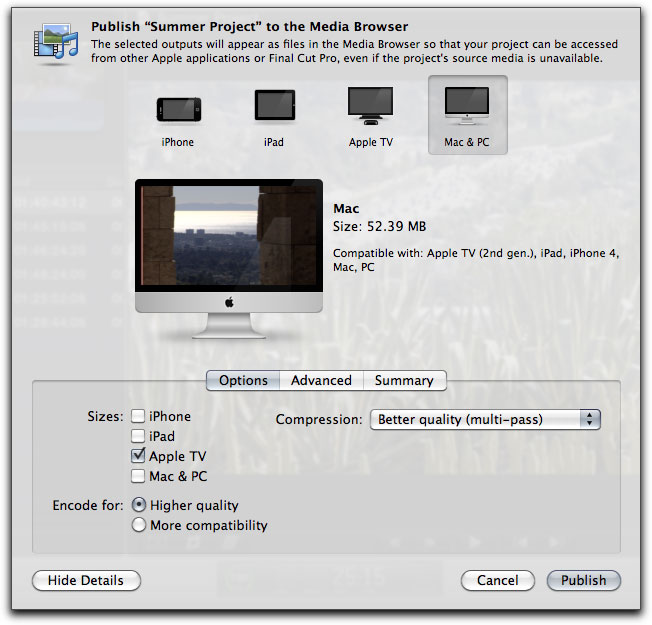
The first two options in the Share menu, Media Browser and Apple Devices are almost identical. The only real difference between these two options is where the outputted files reside. We'll start with Media Browser, shown below, which places the exported file into a 'Shared Items' folder on your hard drive. When the Publish window opens, click on 'Show Details' lower left of the window. With the 'Options' tab selected we can choose 'Sizes' which allows us to pick a target device for our output. Place a check mark for those devices you want to export to. You can choose all four if you want and FCP will generate a file for each of your selections. Beneath the Sizes section is 'Encode for' Higher Quality or More compatibility. Higher Quality would be used for the newest iPhones, iPads and ATVs. If you want to encode for all of the Apple devices, old and new, then you'll choose 'More compatibility'. To the right is 'Compression', Better quality (multi-pass) or Faster encode. If you place your cursor on the iMac screen in the export window, you can scrub through the movie that you are preparing to export.
The 'Advanced' tab offers Background Rendering on or off and Send to Compressor.

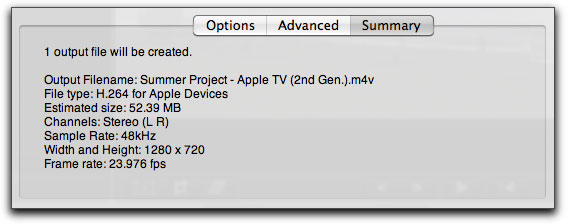
The Summary tab provides the details of your output.
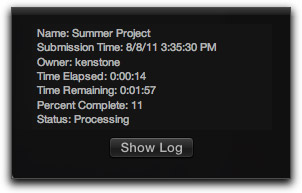
When you are ready click the 'Publish' button in the Share window. A processing window will open with a progress bar.

While the file is being processed you can follow it's progress by clicking on the 'Share Monitor' button which opens the Share Monitor window.

To the right of the progress bar are a pause, stop and info button.
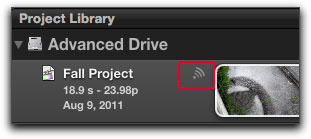
So, when the processing is done, where does FCP put the new file. First, open the Project Library and select the project that you are working with. You will notice that there is a 'Broadcast' icon, red box below. This icon indicates that you have published this project.

If there is an explanation mark next to the broadcast icon this denotes that the project has been changed since it was last published.

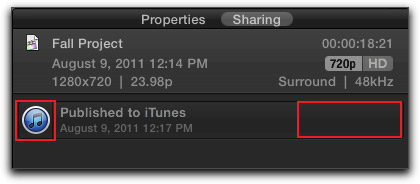
Select the project in the Project Library and look to the Inspector. Select the Sharing tab in the Inspector, below left and then click on Show. This will open a list of your Shared files, click on the magnifying glass
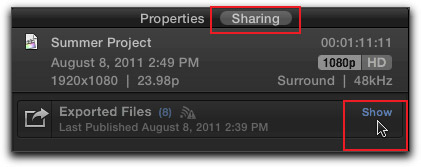
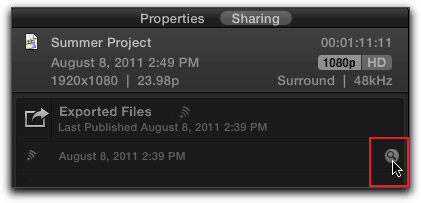
Clicking on the magnifying glass is the same as 'Show in Finder'. The Finder will open showing the path to your Shared file. Note that when you Share to Media Browser, the output file is always placed back inside the project folder that you are sharing from and is contained in the Shared Items folder.

The point to using the Media Browser export option is that when the exported files are placed in the 'Shared Items' folder, they become available to you through the Media Browser of Apple's iLife and iWork applications.
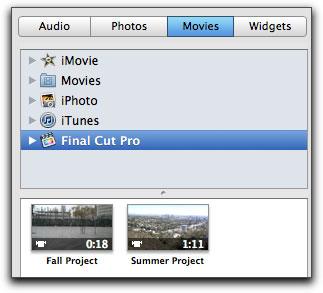
The second option in the Share menu is 'Export to Apple Devices'. As I said, this method is almost identical to the Media Browser' export, except that it has a few more options. There is an 'Add to iTunes' check box that when checked, enables us to rename the project and send it to iTunes. With the 'Add to iTunes' box unchecked we can select any destination for our exported files.
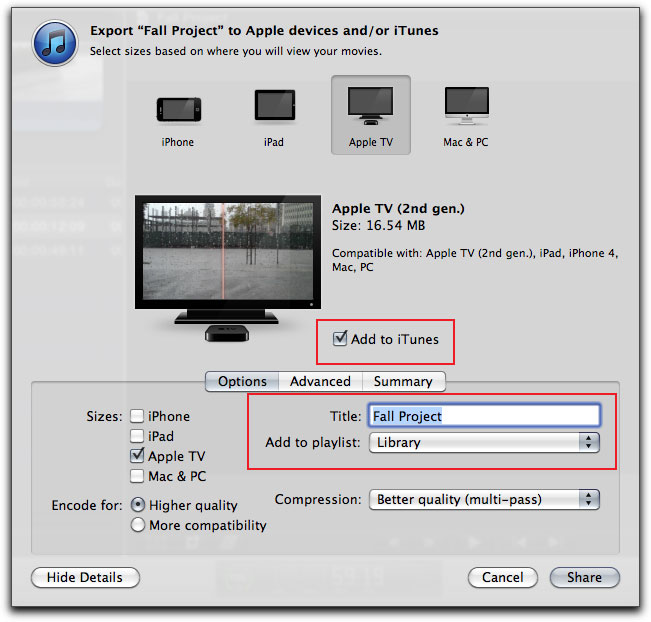
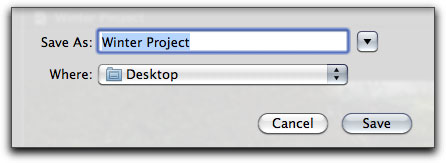
You will want to leave the 'Add to playlist' setting at 'Library', this way, iTunes will put the project in the proper place for you, in this case, 'Movies'.
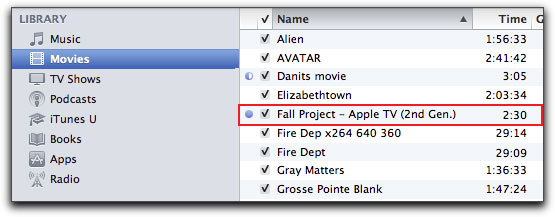
If you choose to uncheck the 'Add to iTunes' check box several things happen. The 'Title' and Add to playlist' items become grayed out and a 'Next' button is now available lower right of window.
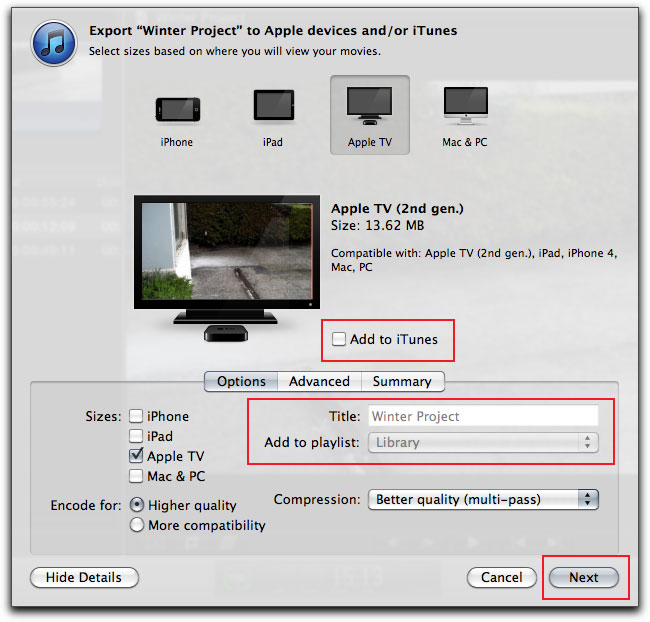
Clicking the Next button takes us to a 'Save As' box where we can rename our movie and also set the destination for the export.
Looking in the Project Library we can see the published icon next to our project, below left. With the project selected in the Project Library and the Sharing tab open in the Inspector, below right, we can see the iTunes icon telling us that the movie is in the iTunes Library, however, the 'Show' button (Reveal in Finder') is nowhere to be found, empty red box below.
DVD and Blu-ray
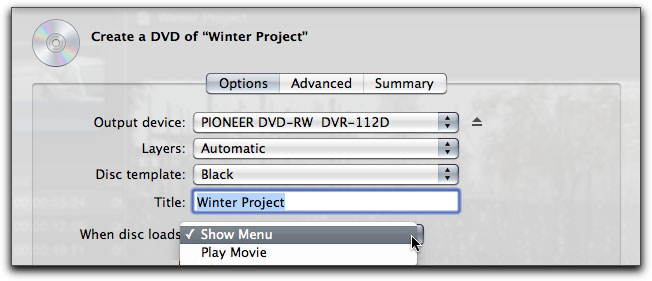
We can burn DVDs and Blu-ray disks directly from inside FCP X. The 'Create a DVD' window, with the Options tab selected, is shown below.
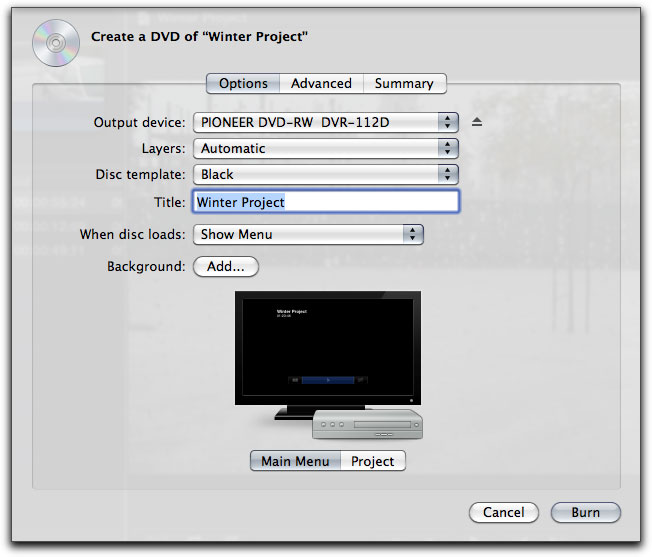
'Output devices' is used to select the burner you want to work with. If you have a Blu-ray burner attached to your Mac it will show up here. There is also the option to select, not a burner, but your hard drive. Selecting you hard drive will create a disc image that you can use to test your DVD in the Apple Desktop DVD Player before burning or move it to another location (Mac) for burning.

The Layers option is next. It is recommended that you choose 'Automatic'.

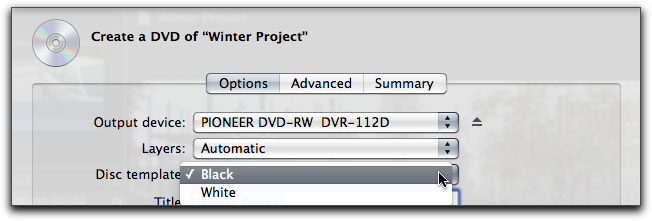
We are offered a choice of either a Black or White DVD menu template. These templates are very simplistic in nature and do not offer many of the features of a DVD created in DVD Studio Pro.
The next option is 'When disc loads. You can have your DVD open up on screen showing the menu or you can select 'Play Movie' which is like 'Auto Play' where the movie starts playing when inserted into the DVD player. Unfortunately there is no 'Loop' option to use with 'Play Movie'.
Next is the 'Add Background' button, which when clicked, opens the Finder where you can navigate to a still image for use as a background for your DVD menu. The 'Advanced' tab offers background render or the option to send to Compressor for more control over the encoding process.

Lastly there is the 'Summary' tab which lists the specifications for your DVD.
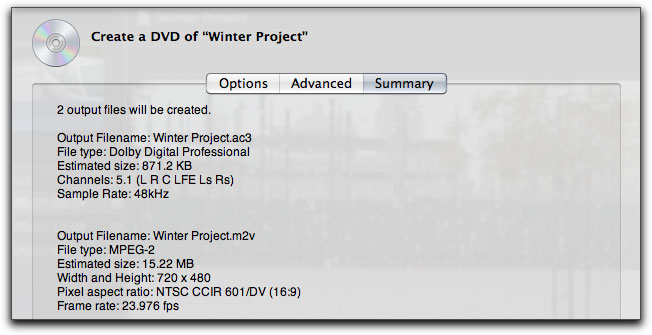
Exporting to Blu-ray opens a window very similar to the DVD window but with a few more options. First off there is an option to 'Include loop movie button'. Aside from being able to add a still image as the background for your Blu-ray menu, you can also add a 'Logo graphic' (bug) and a 'Title graphic'.
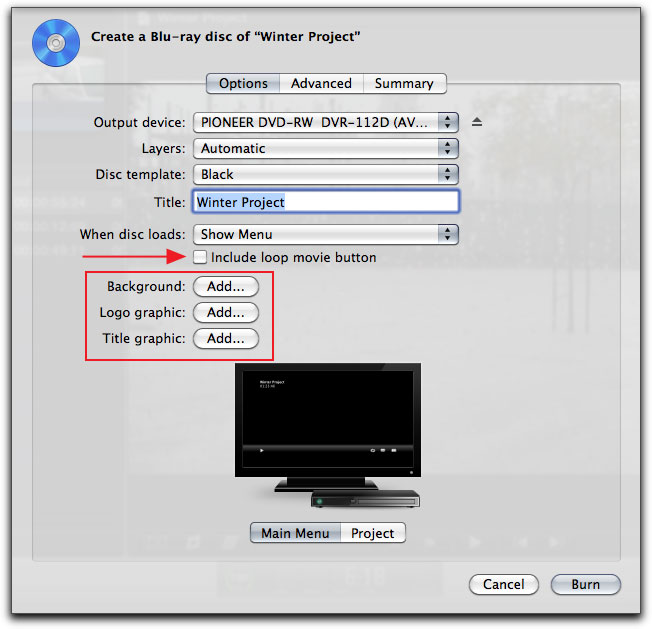
When choosing 'Output' device we have several options. If you have a Blu-ray burner attached, it would show up here. You can also select Hard Drive (Blu-ray) which will create a disk image which you can burn later or move to a Mac with a Blu-ray burner. But this is interesting. Even if you don't have a blu-ray burner attached, you can still burn a high quality Blu-ray disc. If you select your Mac's Superdrive (shown here as Pioneer DVD-RW - AVCHD) you can create what is called a 'red laser' disc that will play at Blu-ray quality in Blu-ray players that are AVCHD compatible. When creating a AVCHD (red laser) disc you will burn to a standard DVD-R blank disc, not to a Blu-ray disc. Because a standard DVD-R disc does not hold as much data as a Blu-ray, you'll find that you are limited to about 30 minutes (or a bit less) of Blu-ray video on a DVD-R disc.

In both the export as DVD or Blu-ray windows there is an iMac and just beneath the iMac are two tabs. You select the 'Main menu' to choose your settings. When you select the Project tab your video is displayed on the face of the iMac and if you put your cursor into the iMac window you can scrub and view your project right there.

Podcast Producer and Email
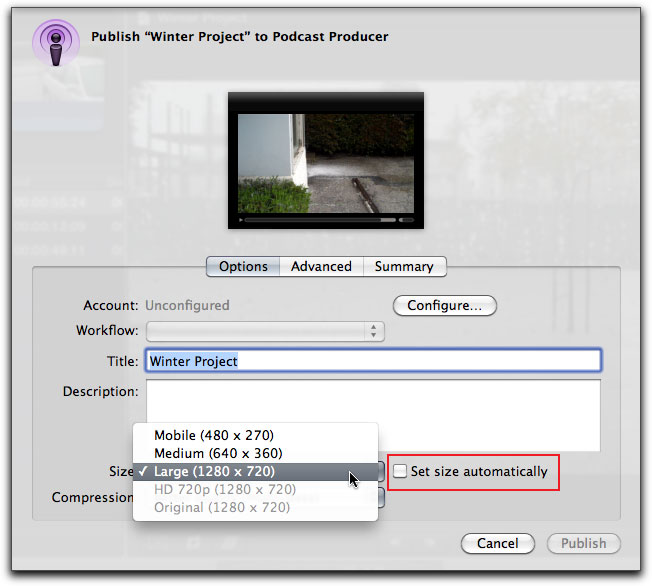
The next section in the Share menu offers export as either a Podcast or attached to an email. The Podcast Producer window is shown below. As I don't have an account set up the 'Workflow' box is empty. Once you have set up your account, it will show up in the Workflow box and you will not need to reconfigure your setup.
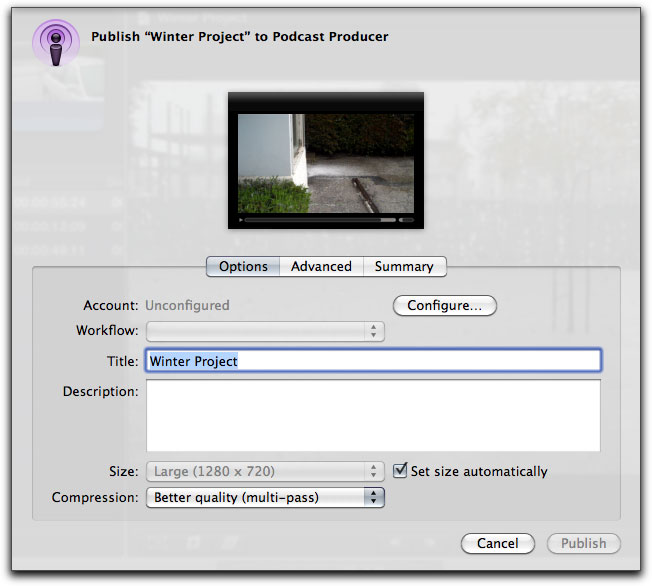
To set up your account, click on the 'Configure' button and fill in the appropriate information.

The 'Set size automatically' box is checked by default. Uncheck the box to access other size alternatives.
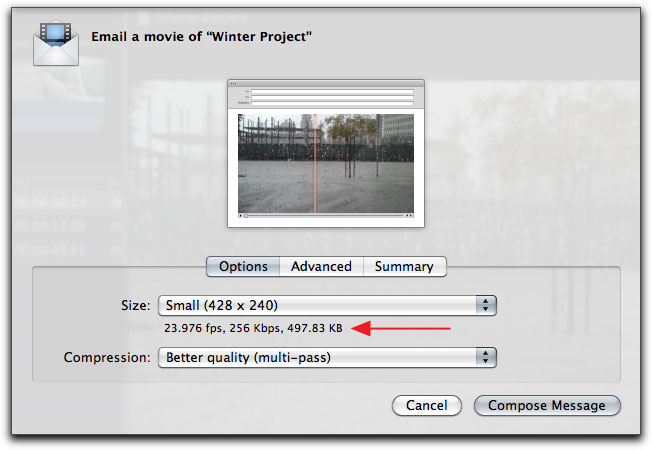
We can attach a FCP movie to an email from the Share menu, shown below. Just beneath the 'Size' drop-down menu is the file information. It is especially important to know the size of the movie file that we are attaching to the email, as many ISPs put a size limit on email attachments. With my ISP it's 10 megs.
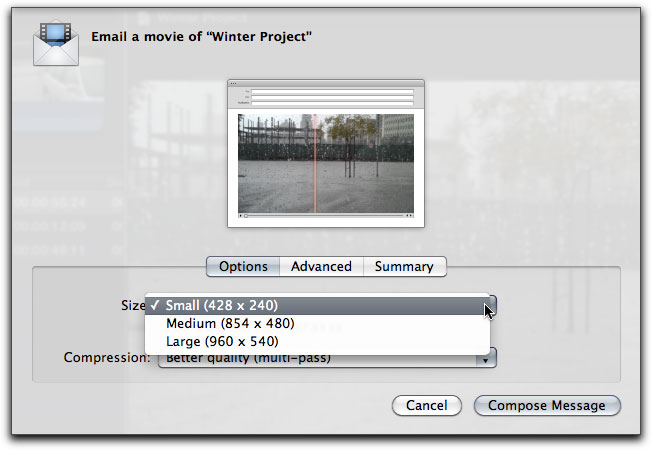
Click on the 'Size' drop-down to change the frame size of the movie that you want to attach.
Both Podcast Producer and Email windows offer the same Options, Advanced and Summary tabs that are found in the export options for Media Browser and Apple Devices.
Social Networks
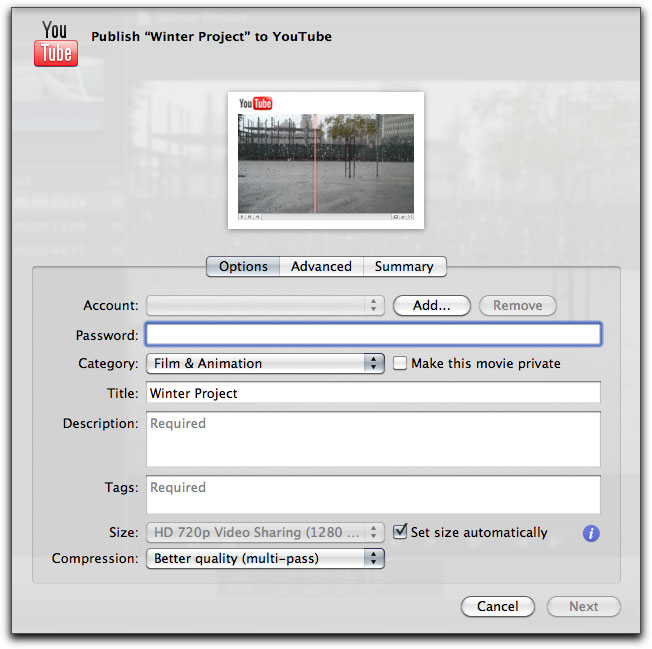
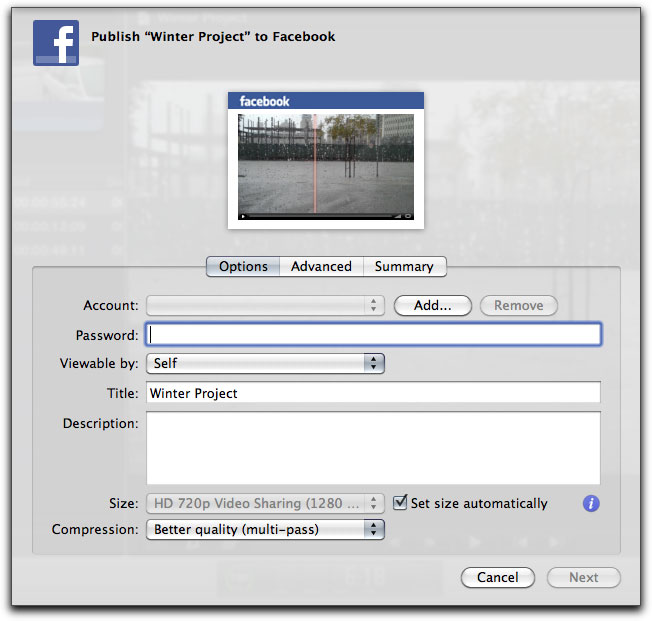
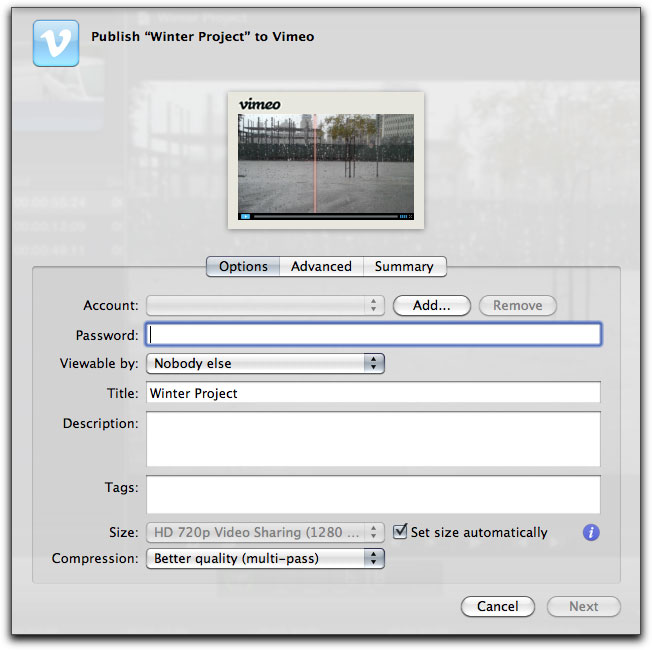
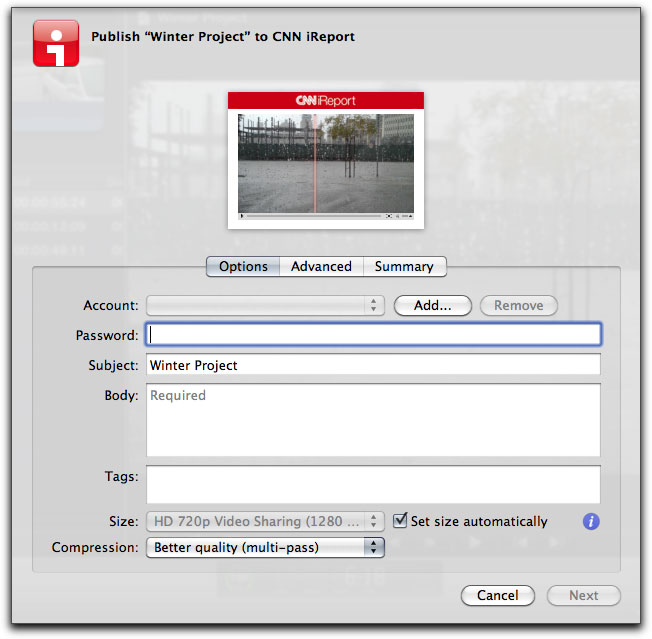
In FCP X you can directly export your video to four different social networks; YouTube, Facebook, Vimeo and CNN iReport. The export windows for all four social networks are identical. As with other export windows in the Share menu, you can scrub through your video, set the Compression quality and frame size. The 'Publish' windows for the four social networks are shown below.
Export Movie
'Export Movie' in FCP X replaces the 'Export QuickTime Movie' (make self contained, use current settings) feature found in legacy versions of FCP. Export Movie may well be the most often used export process and is the only item in the Share menu that has a keyboard shortcut, command E. The top item in the window is the 'Export' drop-down menu that defaults to 'Current Settings'. Beneath the menu is the informational line 'Export a movie in the same format as the original project'.
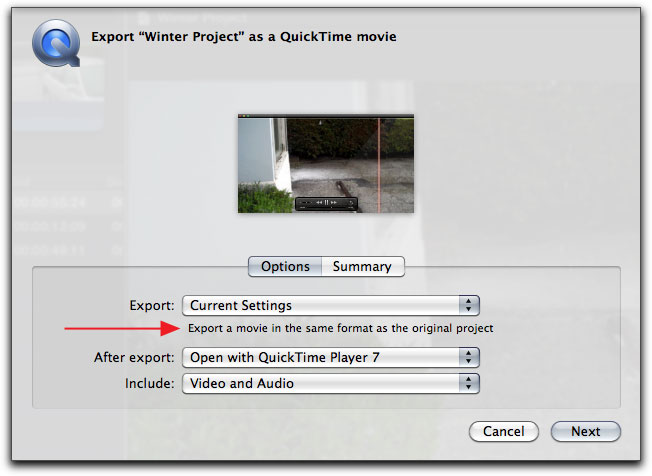
Okay, but what is the format of the original project? There are several ways to view the settings before you export. The fastest way is to click on the Summary tab.
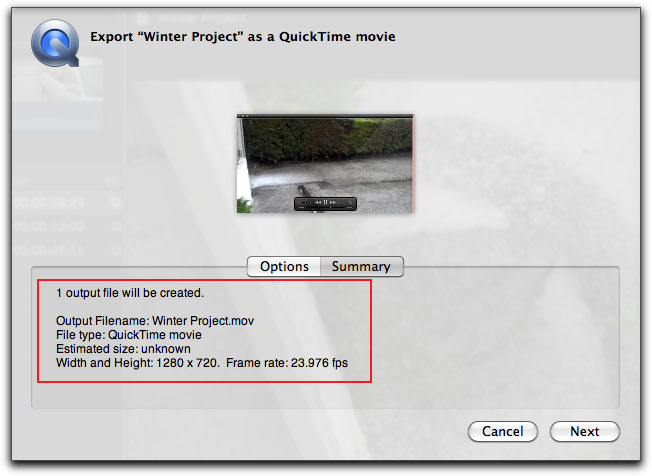
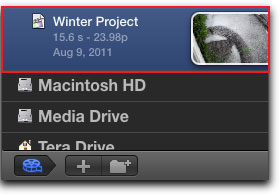
There is a second way to View and even change your original project settings if need be. Select your project in the Project Library and then, in the Inspector, select the Properties tab, click on the wrench, lower right hand corner.
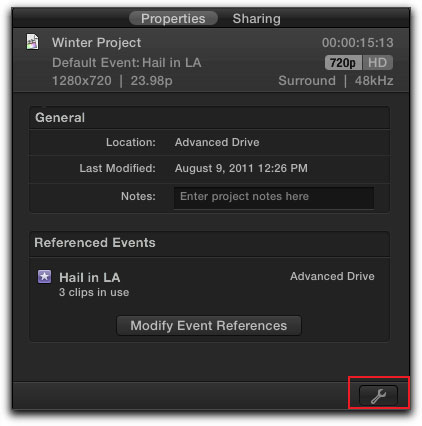
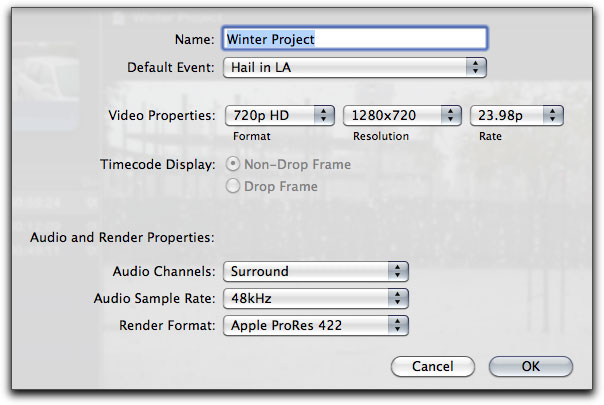
This will open the Project Properties window and what you see displayed here are the settings that will be used if you choose to use 'Current Settings' in the 'Export Movie' dialog box. You can change any of the property settings; Name, Format, Resolution, Audio Channels, Audio Sample Rate and Render Format. The one setting that you can not change is the frame Rate.
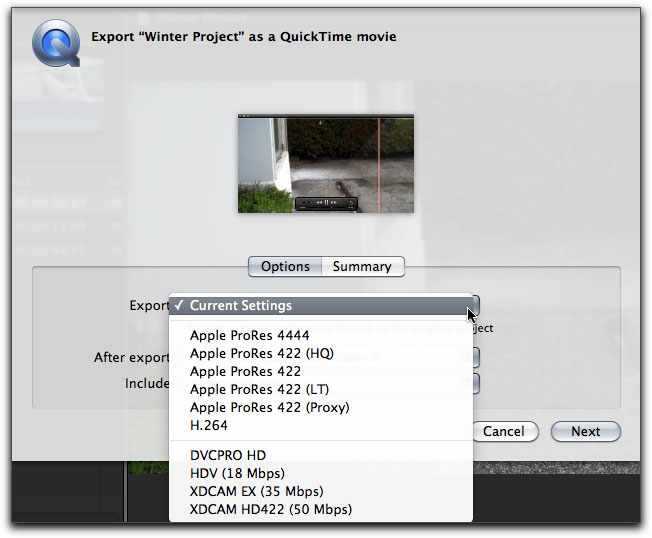
Back in the 'Export Movie' window the 'Export' drop-down menu offers a number of different codecs that you can use for export. You can change the codec here as opposed to making changes in the Project Properties.
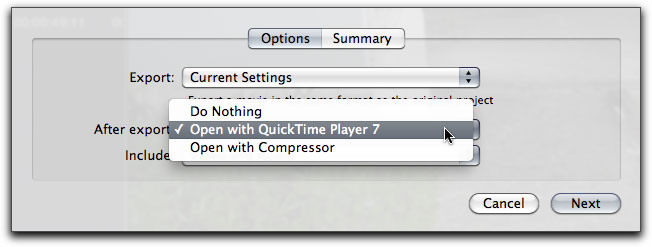
'After export' provides several options.
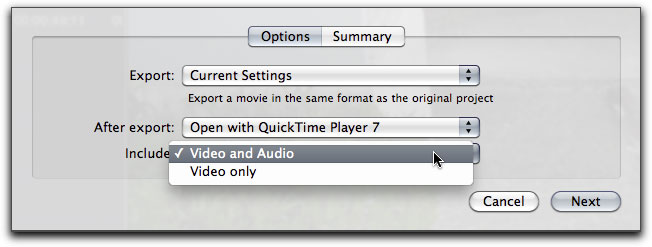
The last menu option is 'Include'; Video and Audio or Video only.
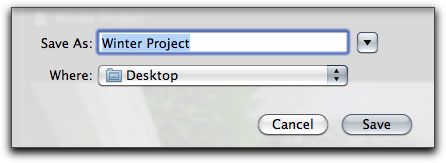
When you are ready to proceed, click on the 'Next' button which will open the 'Save As' dialog box where you can rename the project and select the destination for the exported file.
Export Audio
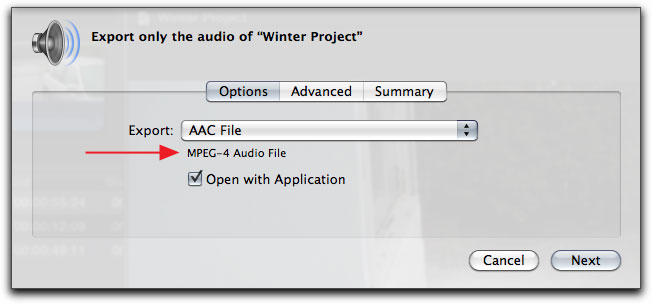
Export Audio (only) window offers a number of different audio formats for export. When you select an audio format in the drop-down menu, there is an accompanying description of the format.
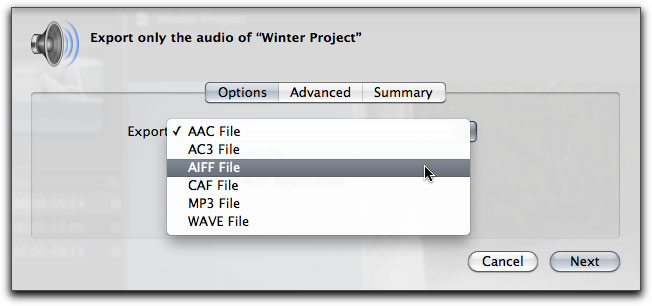
While we are offered different audio formats, there is no way to make changes to our exported audio; Mono, stereo, surround sound, or the audio sample rate, from this window. In this case I'm selecting AIFF audio.
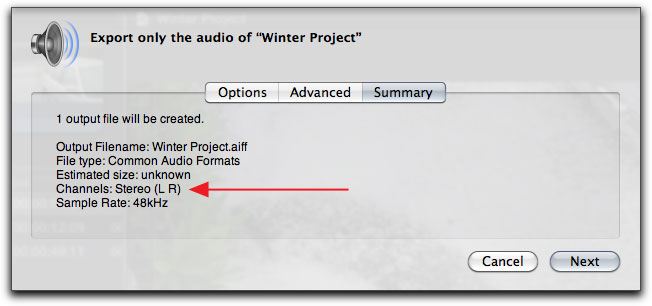
The Summary tab lists the specifics of our audio export. While my audio sample rate is correct at 48kHz, the Channels settings is for 5.1 (surround sound) is incorrect.

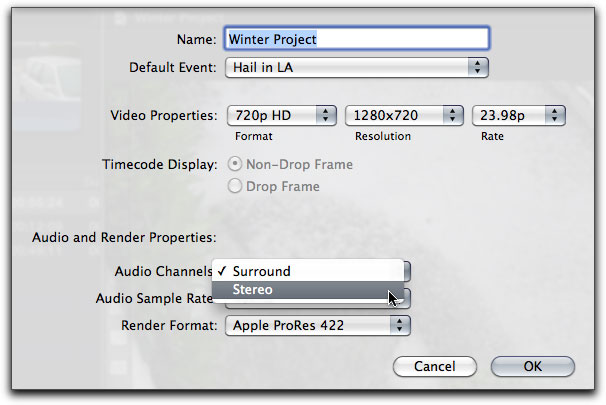
In order to change the Surround Sound to 2 channel Stereo, which is what I want, I'll go into the Project Library and select my project. From inside the Inspector, Properties tab, click on the wrench icon lower right of the window.

I can now change the Surround Sound to Stereo.
Now, when I go back and Export Audio and select AIFF as my audio format and look in the Summary tab I can see that my Channels is now set to Stereo. Click the Next button, name your export and select a destination for your export. Note, if you want your project to have Surround Sound, after export, go back into your Project Properties and reset the audio to Surround.
Save Current Frame
There are times when we need to save a still image from our FCP timeline for use as a background image in a DVD menu, art for web sites, posters, promotional material, etc. Easy to do. Park your playhead on the frame that you want to export and from the Share menu choose 'Save Current Frame'. A export window will open, the Options tab is selected.
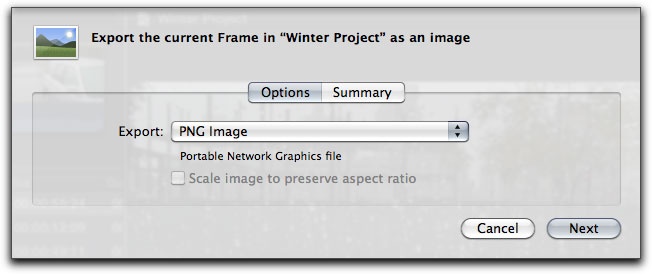
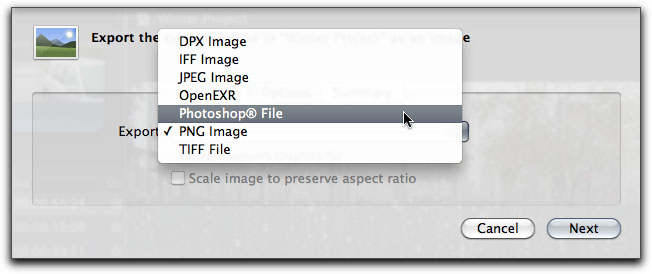
In the Export drop-down menu you can choose a format for your exported still image.
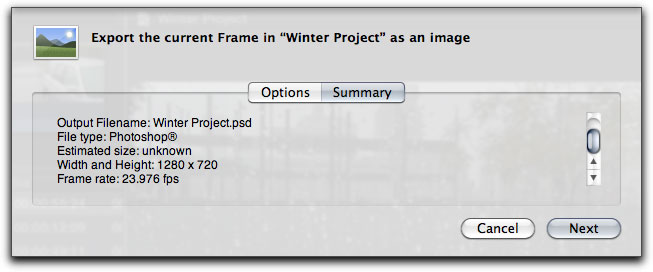
Click on the Summary tab to check the output settings for your export.
Click the 'Next' button, name and save your export.
Export Image Sequence
We can produce a series of sequentially numbered still images from our timeline video, a still image for every frame of video. There are times when we need to export as stills so that we can take them into Photoshop and 'batch process' the images, or maybe take the stills into After Effects for special effects work. With the timeline active, select 'Export Image Sequence' from the Share menu. It is important to remember that you can not set In and Out points in the timeline so you will be exporting the entire timeline as still images. When the Export window opens, select the format for your exported still images, I have selected the Photoshop format (.psd).
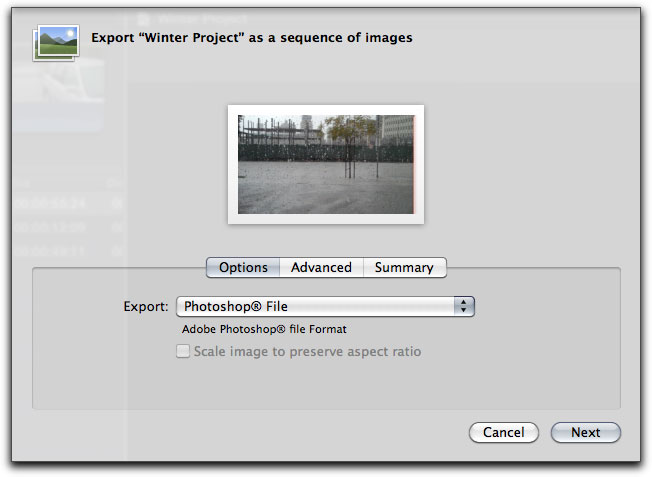
Click the 'Next' button. Now this is where some people run into trouble. What we are doing here is exporting a still image for every video frame on the timeline, which can add up to thousands of still images. If you don't want your desktop filled with thousands of loose images, it is essential that you designate a folder to save the still images into. Click on the twirl-down, red box below.
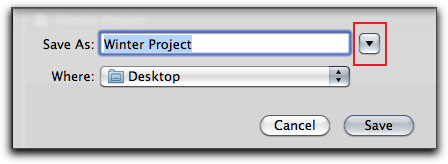
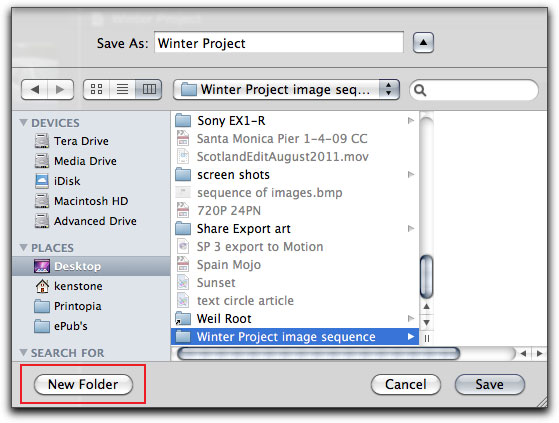
Navigate to an existing folder to hold your stills or click on the 'New Folder' button and create a folder for your stills, then select it.
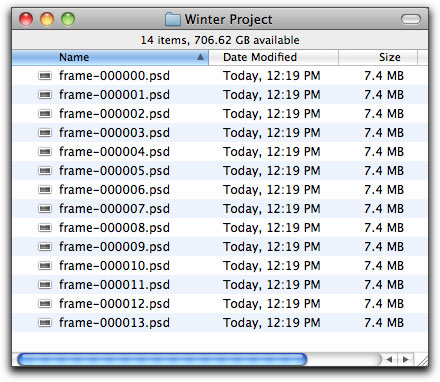
When you export you will have the option to check the 'Share Monitor' to monitor the progress of your export. When the process has been completed, you'll have a folder filled with still images from your timeline. Of course this folder could be filled with thousands and thousands of still images.
Export for HTTP Live Streaming
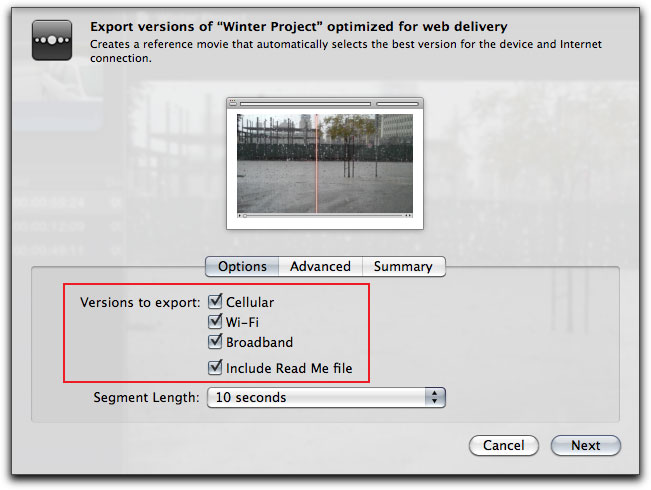
Using this export option we can create audio and video files that will 'live stream' to Apple's iPhone, iPad, iPod Touch and Mac. The export process will generate a number of files, with different bandwidth speeds, to match the different download speeds of the viewers connection; Broadband high and low, DSL, WiFi high and low, and Cell 3G high and low. This works with iOS apps and HTML5 web sites. Apple has a support document on 'HTTP Live Streaming'. Select your project and from the Share menu choose 'Export for HTTP Live Streaming', the Export window will open. I have selected all 3 versions and the Read Me file. There is an option to set the 'Segment Length', either 10 seconds or 30 seconds. This is what Apple says about Segments Length: "10 seconds: Allows the server to respond more quickly to changing connection speeds, at the expense of slightly larger files. 30 seconds: Creates smaller, more efficient files when you do not expect the server to need to respond to changing connection speeds."
Click on the Summary tab to view the export information.
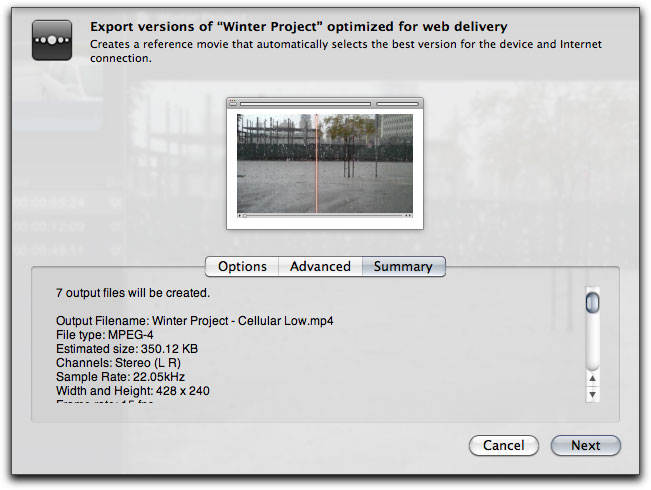
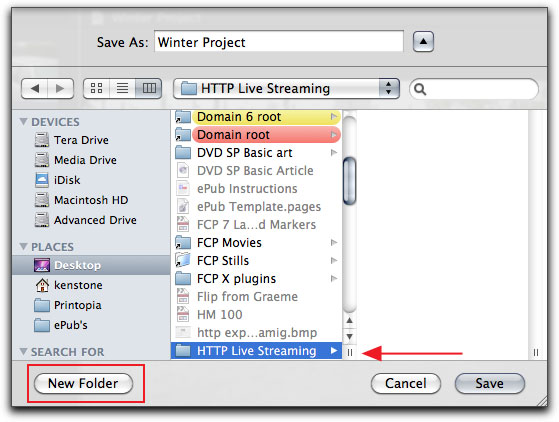
Clicking on the 'Next' button takes you to the Save window. Just as with saving an image sequence, you'll want to create a folder to export into, as there will be a number of files generated.
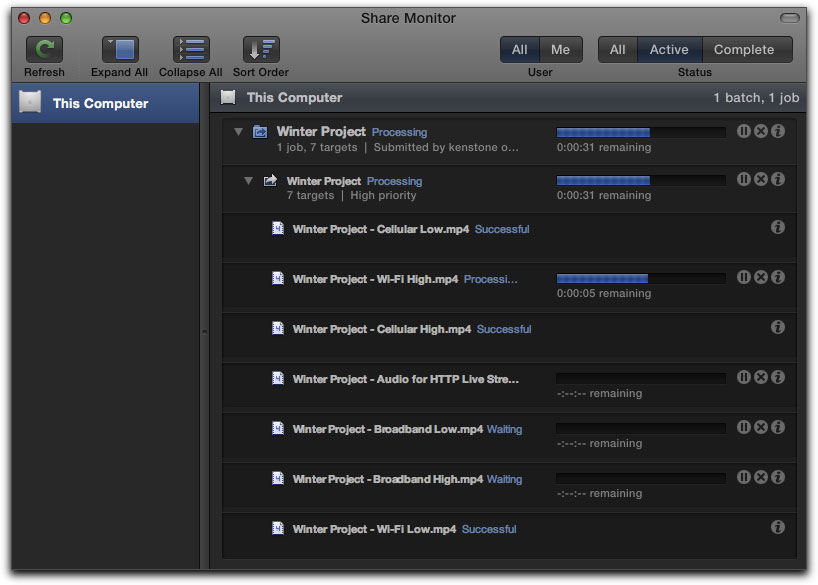
You can open the 'Share Monitor' to watch the progress.

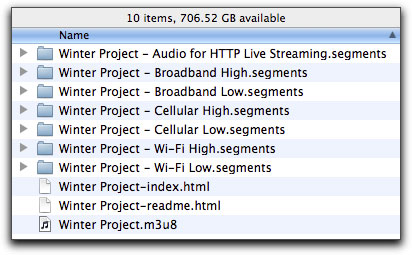
A look inside the export folder, which contains all the needed elements needed for live streaming.
It would be a good idea to check with your ISP to get their specification requirements for HTTP Live Streaming before you start this process.
Send to Compressor - Export Using Compressor settings
The last two items in the Share menu export to and through Compressor. You can export using either of these two options by selecting the project in the Project Library or from the FCP timeline.
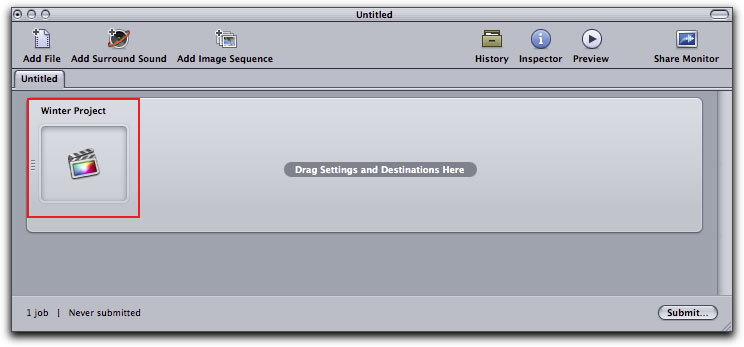
When you select 'Send to Compressor', Compressor launches and the FCP project file is loaded into the Compressor Batch window, red box below.
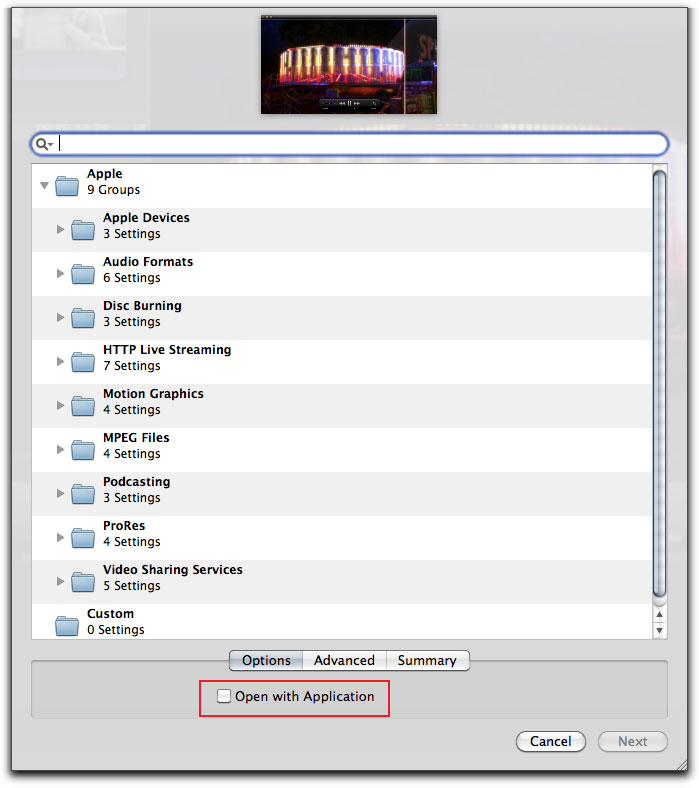
When you select 'Export Using Compresor Settings', the Compressor Settings window opens on screen. There is a Search field near the top of the window to quickly access a preset. All of the available Compressor presets are listed in the main window. There is an 'Advanced' tab for rendering and a Summary tab that shows the specifics of the Compressor preset that you have chosen. At the bottom of the window is a 'Open with Application' check box. When this box is checked, after export, the exported file will be opened by the appropriate application. If you're using an iTunes preset (Apple Devices) then the file will open in iTunes. Most codecs, like ProRes will open in the QuickTime 7.
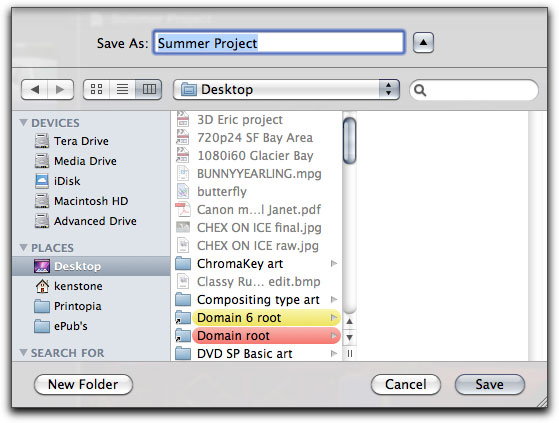
After selecting your Preset and clicking on the 'Next' button, a Save dialog box will open where you can name and set the destination of your exported file.
Thoughts
The first two items in the Share menu, Media Browser and Apple Devices are basically the same. They both export to mobile devices, Macs and PCs as well (H.264). The main difference is that 'Media Browser' exports to a Shared folder on your hard drive that can be accessed by iLife and iWorks applications. Apple Devices exports for the same mobile devices as Media Browser, except that exporting to Apple Devices allows you to select the destination of your exported file. If you are exporting a file for iTunes, then Apple Devices will automatically put your exported file into iTunes for you.
For FCP legacy users 'Export Movie' is most like the old 'Export QuickTime Movie', make self contained, use current settings export. Additionally in FCP X, you can change the output codec to all flavors of ProRes, H.264, DVCPRO HD, XDCAM EX and XDCAM HD422, so this is a bit like the legacy Export QuickTime Movie with Conversion, but in FCP X, the export codec options are limited. All exports from FCP X are self contained, no more 'Reference Movies'.
The last two items in the Share Menu, Send to Compressor and Export Using Compressor Settings are different in one regard. When we use Send to Compressor, Compressor launches with the file in the Batch window, we then select our preset and load it into the Batch window. In the Compressor's Inspector window we can modify the settings and even engage 'Frame Controls' (Optical Flow) if needed. When we use Export Using Compressor Settings, Compressor does not launch but rather the Compressor Preset window opens providing access to the Presets. The main difference here is that there is no access to the Inspector, thus, you can not change any of the settings of the Preset before you encode. However, if you have built Custom settings in Compressor (and set them up exactly as you want) then these custom settings will be available to you using Export Using Compressor Settings, so this process can provide a shortcut to your encoding chores.
Enjoy,
--ken
[Top]
copyright © www.kenstone.net 2011
are either registered trademarks or trademarks of Apple. Other company and product names may be trademarks of their respective owners.
All screen captures, images, and textual references are the property and trademark of their creators/owners/publishers.