White Paper - Film Look April 15, 2002
Film look Techniques For Video

White Paper - Film Look April 15, 2002
Film look Techniques For Video
By Dan
Coplan
http://www.race.com/dc/video

Achieving a film look with video is a hot topic.
Film has an aesthetic quality about it that can be described
as surreal, organic, or fantastical. Video, on the other hand,
may be described as harsh, sharp, and realistic-looking. One
of the reasons behind this quality difference lies in the way
in which film and video are recorded.
Film is recorded at 24 images per second (24fps). Motion blur is the blurred effect you get when exposing an image with movement. With a typical 180 degree shutter, the exposed image movement, and subsequent motion blur, is therefore recorded for 1/48th of a second.
NTSC video records 30 images per second, however, each image is divided into two separate fields that interlace to form a complete image. This results in 30 odd-field images and 30 even-field images recorded each second. Consequently, 60 separate half-resolution images are recorded every second. Movement and its associated motion blur are therefore captured at a much quicker 1/60th of a second with a negligible "off time" in between field exposures. The outcome is significantly less motion blur and a sharper image as the images are captured more frequently and for a shorter duration. This is more characteristic of human vision than film and one reason why video looks so real in comparison.
With a number of different techniques available for achieving more of a film look for video, I, as an independent video producer, set out with my Sony PD-100A to explore various low budget options. I also used a Canon XL-1 to test frame mode, a proprietary feature often used in achieving a film look (Note: the Sony was used for all testing with the exception of Canon's frame mode testing). Following each technique is an informational summary:
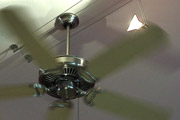
RENDER TIME: The amount of time taken to render footage on a 500Mhz G4 Tower (OS 9.2.2, 576MB RAM, IBM Deskstar media drives (120GB)). The clip used for this test was a locked off shot of a ceiling fan starting still and ramping up to full speed. Clip length was 1 minute, 15 seconds. As a side note, render times may vary with respect to the data being processed as well as the process itself. A locked down shot of a bowl of fruit requires less processing than a moving shot in which the information is different in every frame. This is relevant to tools that intelligently analyze picture information as opposed to processes that employ a straight forward routine regardless of content.
EDIT BLENDS: Two adjacent clips that go through a frame blending process. The result, rather than being a hard cut, becomes a soft cut as information from one clip is blended into the other clip. This may be desirable in some situations, but is a negative in my opinion as it's uncontrollable.
JAGGIES: Highly contrasting diagonal lines brought out the worst in stair-stepping artifacts. This footage was used to analyze how the various techniques dealt with this undesirable video effect. I use a 5-point system to rate the degree of jagginess, 1 being the most jagged and 5 being the smoothest.
PERFS: My overall rating based primarily on my opinion of visual appeal. 1 perf is the worst, 5 perfs may as well be 35mm Panavision!
It's important to note that while I did my best to maintain consistency and test objectively, my comments may be interpreted as subjective. As well, my reviews do not factor in considerations for transfer to film.
 Locked down shot - ceiling fan from off to full speed |
 Pan across high contrast diagonal lines |
 Full motion tracking shot of woman walking down sidewalk |
Sony Progressive -
1/60 shutter
One of the downsides to standard
interlace scanned video is only half of the available information
is captured at any point in time. Progressive scan captures the
entire image for both fields at the same time.
PROS: No rendering time. Doesn't cost you a thing.
CONS: Undesirable strobing effect. Frame rate is reduced
to 15fps in progressive mode.
RENDER TIME: n/a
EDIT BLENDS: n/a
JAGGIES: 3 - Obvious stepping, but doesn't noticeably
stretch/shrink with change of line angles.
COMMENTS: Very undesirable jitter which may be useful
as an effect (think opening to Private Ryan), but virtually useless
as a film look. Resolution chart exhibited slight loss of perceptible
resolution. Fine edges rendered relatively smoothly.
PERFS: 1
Sony Progressive -
1/30 shutter
PROS: No rendering time. Doesn't
cost you a thing.
CONS: Undesirable strobing effect. Frame rate is reduced
to 15fps in progressive mode.
RENDER TIME: n/a
EDIT BLENDS: n/a
JAGGIES: 1 - Awful, blatant, very steppy edges that
noticeably shrink/stretch with change of line angles.
COMMENTS: Very stroby. Actually works well with fast motion,
but slower movement is unusable as anything other than an effect.
Resolution chart exhibited some loss of perceptible resolution.
Fine edges rendered a bit chunky.
PERFS: 1.5
30i (interlaced video
shot at 1/30th of a second shutter speed)
Video cameras record images at
1/60th of a second. Many cameras will allow you to adjust this
shutter speed and control the rate at which each image is exposed.
By setting the shutter speed to 1/30th of a second, the camera
will expose each image longer resulting in a rate that closer
approximates the shutter speed of film and captures significantly
more motion blur.
PROS: No rendering time. Doesn't cost you a thing.
CONS: Vertical resolution is cut in half reducing fine
detail.
RENDER TIME: n/a
EDIT BLENDS: n/a
JAGGIES: 3 - Moderate amount of stepping that noticeably
stretches/shrinks with change of line angles.
COMMENTS: I like this look. It's right there in the camera
so what you see is what you get and no rendering required. Very
filmy looking despite a slight strobing effect. Resolution chart
exhibited some loss of perceptible resolution. Fine edges rendered
a bit chunky.
PERFS: 3.5
Frame Mode
Frame mode is a technique used
by some manufacturers including Canon in cameras such as the
GL-1 and XL-1. It's similar to progressive mode, however it employs
pixel-shift technology which allows the red and blue CCD to capture
information in one field while the green CCD captures information
simultaneously in the adjacent field.
PROS: No rendering time. Doesn't cost you a thing.
CONS: Slight loss of vertical resolution.
RENDER TIME: n/a
EDIT BLENDS: n/a
JAGGIES: 4 - Very smooth. Steps are small - not
quite as small as 60i standard video, but close.
COMMENTS: A very nice image. Similar to 30i, which I liked,
but not as soft - bordering somewhere between a video and
film look. Resolution chart exhibited some loss of perceptible
resolution. Fine edges rendered smoothly.
PERFS: 4
DVFilm Maker
[$95 + shipping]
DVFilm is a company that specializes in transferring video to
film. As a benefit to both clients preparing their footage for
transfer and those people who want a film look without transferring
to film, DVFilm offers a standalone film look utility.
PROS: Small, standalone utility means you don't need to
own an expensive NLE or effects program to give your video a
film look.
CONS: Long render time.
RENDER TIME: 52 mins., 31 secs.
EDIT BLENDS: No
JAGGIES: 3 - Moderate amount of stepping that noticeably
stretches/shrinks with change of line angles.
COMMENTS: A nice, smooth quality similar to frame mode.
Very natural looking. Resolution chart exhibited some loss of
perceptible resolution. Fine edges rendered a bit chunky.
PERFS: 4
Frame Blending
This AfterEffects trick interprets
video by its separate fields and blends adjacent information
between frames. Footage is then rendered using 3:2 pulldown which
simulates what you get when you run video through a telecine
process in transferring to film. Here's how you do it:
1) Import your footage into AfterEffects. In the File menu, choose
"Interpret Footage" and "Separate Fields"
- lower fields for NTSC DV.
2) Bring your footage into a new composition. Turn frame blending
on by clicking the frame blending icon in the composition window
and click on the frame blending checkbox next to your footage.
Choose "Make Movie" in the Composition menu.
3) In Render Settings make sure Frame Blending is active. Turn
on Field Render (lower field first for NTSC DV) and any of the
3:2 Pulldown options (I just use the first one). Make sure the
shutter is set to 180 and use 30fps as the frame rate. The dialog
in the frame rate box should read, "Frame Rate, sampling
@ 24.00 fps". Render.
PROS: Built into AfterEffects. Adjusting the shutter allows
you to alter the look.
CONS: Edit blending.
RENDER TIME: 27 mins., 20 secs. [AfterEffects - DV
NTSC 29.97 Best quality - no audio]
EDIT BLENDS: Yes
JAGGIES: 5 - No noticeable stepping as lines are softened.
COMMENTS: Nice - very fantastical-looking. Very slight
strobe that doesn't bother me. Images are a bit soft and blurry
along edges. Edit blends can be eliminated by rendering clips
individually, but that's a big hassle. Resolution chart exhibited
some loss of perceptible resolution. Fine edges rendered smoothly.
PERFS: 3.5
Deinterlace Blend
A variety of methods may be used
in deinterlacing a video image in order to resolve the temporal
differences between video fields and create a complete image.
This method requires duplicating a video clip in a non-linear
editor (I used Final Cut Pro) such that you have two of the same
clip on top of each other. Using a deinterlace filter, apply
the effect to the lower fields in one layer and to the upper
fields in the other layer. Reduce the opacity of the top layer
to 50%.
PROS: Simple technique. Deinterlace filter included with
Final Cut Pro (not sure about other NLE's, but it's a standard
effect).
CONS: You gotta render.
RENDER TIME: 26 mins., 42 secs. [Final Cut Pro 3]
EDIT BLENDS: No
JAGGIES: 5 - As smooth as 60i.
COMMENTS: A nice, smooth, simple effect. Similar to frame
mode and the DVFilm utility, but with slightly more motion blur
on the edges. Not quite as filmy looking as some of the other
techniques, but darn close. Experimentation may yield varying
results: For example, try deinterlacing the bottom clip while
leaving the top clip alone, but changing its opacity to 30%.
Resolution chart exhibited slight loss of perceptible resolution.
Fine edges rendered smoothly.
PERFS: 4.5
Joe's Filters: Field
Blender [$95 + shipping (includes
several additional filters)]
This filter essentially uses the same technique as the above
Deinterlace Blend trick. Options allow you to control the amount
of blending and whether the fields are interpolated or doubled.
Using a more efficient deinterlace routine, this filter renders
more quickly than Deinterlace Blend.
PROS: Essentially same technique as Deinterlace Blend,
but packaged as a nice, simple to use plug-in. Significantly
faster rendering.
CONS: Slightly more stepping than Deinterlace Blend, though
experimentation with the controls may improve results. You still
gotta render.
RENDER TIME: 10 mins., 50 secs. [Final Cut Pro 3]
EDIT BLENDS: No
JAGGIES: 2.5 - Moderate amount of stepping that noticeably
stretches/shrinks with change of line angles, though edges are
a bit softer.
COMMENTS: A nice, fairly smooth, simple effect, similar
to Deinterlace Blend. Resolution chart exhibited slight loss
of perceptible resolution. Fine edges rendered a bit jaggy.
PERFS: 4
DigiEffects
Cinemotion (plug-in) [$195
currently on sale + shipping]
From the makers of the popular Cinelook, DigiEffects offers Cinemotion,
a plug-in that primarily helps you add film motion qualities
to your video.
PROS: Render right off the bat with a number of included
presets, or create your own look with a multitude of options.
CONS: Edit blending.
RENDER TIME: 24 mins., 11 secs. [AfterEffects - DV
NTSC 29.97 Best quality - no audio]
EDIT BLENDS: Yes
JAGGIES: 3 - Moderate amount of stepping that noticeably
stretches/shrinks with change of line angles.
COMMENTS: Motion blur on edges is more steppy than blended.
Overall very good film look. Resolution chart exhibited some
loss of perceptible resolution. Fine edges rendered a bit blurry.
PERFS: 4
ReelSmart Deinterlacer and Motion Blur (plug-ins) [$89.95 each + shipping]
ReelSmart offers a number of plug-ins for affecting a film look
for your video that can be used individually or in conjunction
with each other depending on how much time and control you want
to invest. For this review, I used the deinterlacer (part of
the FieldsKit plug-in package) plug-in in conjunction with their
motion blur plug-in.
PROS: Multiple deep level plug-ins offer maximum control.
CONS: Can be complicated to understand. Longest render
time. Maximizing use may lead to significant time in post.
RENDER TIME: 2 hrs., 51 mins. [AfterEffects - DV NTSC
29.97 Best quality - no audio]
EDIT BLENDS: No
JAGGIES: 2.5 - Moderate amount of stepping that noticeably
stretches/shrinks with change of line angles.
COMMENTS: A very smooth, nice, natural look. Very filmy
looking - the best in this review. Resolution chart exhibited
no noticeable loss of perceptible resolution. Fine edges rendered
smoothly.
PERFS: 4.5
Each method has its strengths and weaknesses. For those who don't own post production software, a film look of particular variety can be obtained in-camera. For those who have the time and resources, each clip can be manipulated a multitude of ways in creating a specific film-like quality. Hopefully, this article helps answer some questions and steer you in the right direction in your quest to make your video look more like film.
It's important to note that the above techniques are not solely responsible for a film look. Lighting, aspect ratio, composition, lens filtration, and color correction are a few factors to consider as well, but that of course is a whole 'nother article.
copyright©2002dan coplan
Special thanks to Adam Wilt, Pete Litwinowicz, Marcus van Bavel, Kendall Anders, Joe Maller.
About Dan Coplan
Dan Coplan is a professional
videographer in San Francisco. Getting his MFA from Academy of
Art College in San Francisco, Dan focused his attention on visual
effects and making the most of an internship at ILM. Prone to
distraction and requiring far more instantaneous feedback, Dan
shifted his energies towards editing and became proficient with
Avid and Media100 systems. Spending countless hours in a chair
in front of the computer, however, drove Dan to the brink of
insanity. Getting behind the camera seemed the next logical step
and that's where Dan's has comfortably placed himself since.
http://www.race.com/dc/video