August 27, 2007
In iLife 08
By Ken Stone
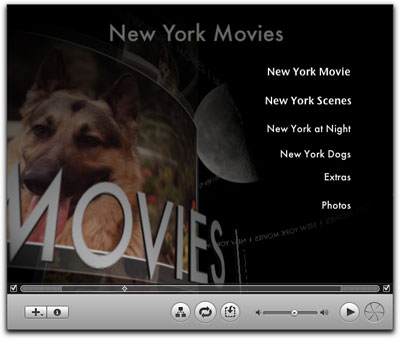
It has been 18 months since the last release of iLife 06, with upgrades to all of the included applications. iDVD 7, as it is called, has received a few new features but has had a major User Interface overhaul and its performance has been improved. You can now make changes to your menu, buttons and text while the canvas window plays in real time. New to iDVD 7 is 'The Inspector', a floating contextual palette that offers control over the different elements in iDVD depending on which element, (buttons, titles or menus) is selected in the Canvas window. Over the years the Inspector has been added to all of the Apple Pro apps, FCP, DVD SP, Compressor, SoundTrack Pro, Motion, etc. and now appears in iDVD 7. iDVD 7 includes 10 classy new themes, some of which are animated, which, when added to all of the previous themes, has now become a viable library of menus. The library of buttons has also been expanded, offering much better choices to help create a custom look to your DVD.
Tool Bar
There have been changes to the tool bar that runs under the Canvas window.

At the far left of the tool bar a new 'Inspector' button has been added, red arrow below. The three buttons in the center have been moved around or changed. The motion man icon has been replaced with two looping arrows, red box below. As before, with the motion man, the looping arrows button plays your motion menus and audio in the iDVD canvas window. A new 'Drop Zone Editor' has been added, blue box below. The Play button has been moved from the center of the tool bar to the right, green box below. Clicking on this will close the iDVD work space and open the iDVD Preview window with on-screen remote control to preview and test your DVD project.

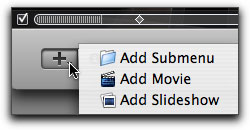
The 'Add' button at the far left remains unchanged as are the 'radioactive' Burn button, Map view and the Volume slider, which is for audio volume playback as you work and has no effect on the menu volume of your burnt DVD.
Media Pane
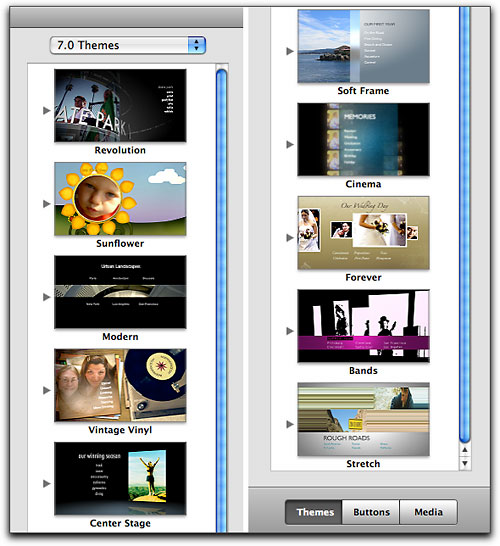
The 'Themes-Buttons-Media' pane on the right has been changed as well, the controls that used to be at the bottom of this pane have been moved to the Inspector. The Button section has been greatly expanded and now comprises seven sections of different types of art work to enhance the uniqueness of your menus. Wouldn't it be great if we could transport these elements over to DVD Studio Pro?
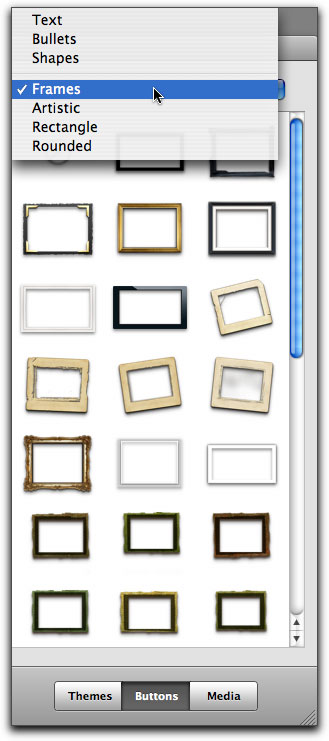
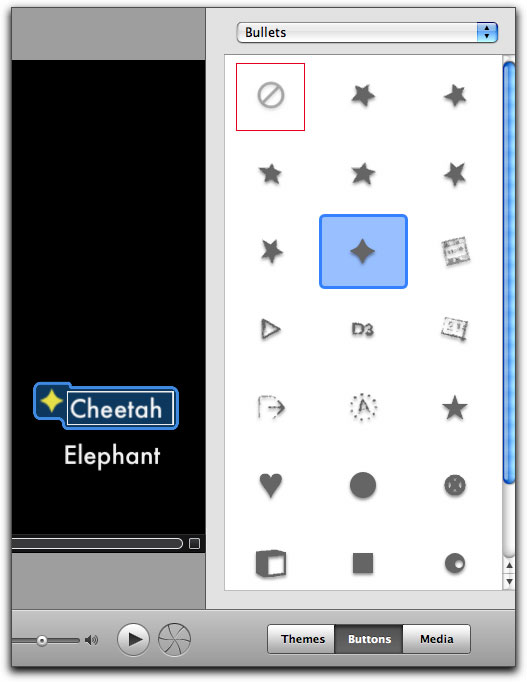
Not only has the number and type of buttons been greatly expanded but some new functionality has been added as well. For example, lets say that you have a text only button in your menu, moving your cursor over the button will color the button a Highlight color. However, if you want to use a bullet, text or shape to show as highlighted and not the button itself, select the button in the canvas, now select a bullet (text-shape) as shown in the blue shaded box below left. This will add the bullet to the button and now, when the cursor or remote control passes over the button, only the bullet will show as highlighted. To remove a bullet (or shape), select the button and then click on the 'forbidden' icon, red box below left. As shown below right, the Cheetah button has had a bullet applied so only the bullet highlights. The 'Elephant' button has no bullet applied so when selected, the button, text in this case, is highlighted. Each bullet or shape can be sized independently of the button. This new feature does make for a more professional looking menu.

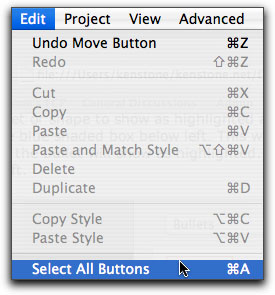
If you want to add this feature to all your buttons, it is not necessary to do it one button at a time. From the Edit menu > Select All Buttons.
Inspector
Without a doubt, the most important new feature in iDVD 7 is the Inspector, a floating contextual palette that offers control over the different elements in iDVD depending on which element is selected in the Canvas window. The Inspector can be used to modify Menus, Buttons and Text (titles).
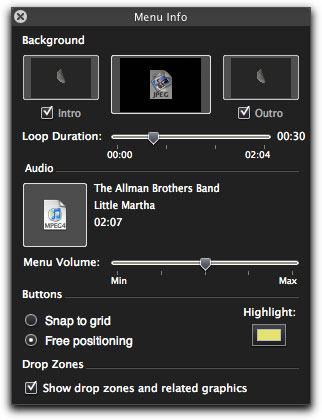
One of the controls found in the Inspector is called 'Intro-Outro' which can also be found in the canvas timeline. This feature controls the starting and ending points of your motion menu. Some of the supplied templates have motion menus that fade in at the start and fade out at the end, or have elements that come on screen at the start and exit the screen at the end. The first time you play a menu you would want the fade in or have the elements come on screen, but when the menu loops to play again, you would not want the menu to once again fade in. Using 'Intro-Outro' creates a seamless playing of your menu until the viewer makes a selection.
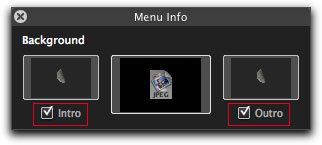
The shaded areas at the start and end of the timeline indicate the 'Intro-Outro' areas. You can scrub the diamond playhead in the timeline into the 'Intro-Outro' areas to see what they are doing. You can turn off 'Intro-Outro' by unchecking the boxes in the timeline or Inspector.

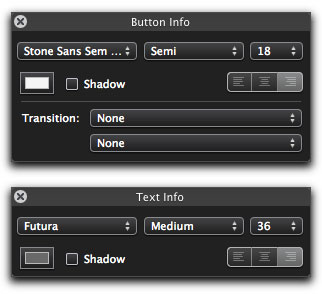
When the Inspector is closed you can modify text (titles) or buttons right in the canvas, by double clicking on the text to display the 'in place' editor. Font, style and size controls are available.
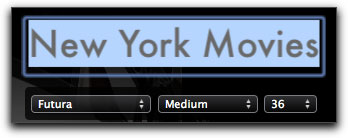
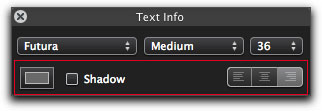
When the Inspector is open, click once on the text or button and the Inspector will change to reflect what you have selected. You will notice in the Inspector, shown below, that additional settings are available, text color, drop-shadow and alignment.
Drop-Zone Editor
In iDVD 6 there was a floating Dashboard window, the Drop Zone editor, shown below, now gone in iDVD 7.

In iDVD 7, a 'Edit Drop Zone' button has been added to the tool bar. Clicking on this button opens the Drop Zone editor in the bottom of the Canvas window.

When the editor opens, the entire menu is moved up towards the top of the screen, with the editor appearing at the bottom of the Canvas window. The advantage in this is that you can work in the drop zone editor, adding photos or movies, and see the results in the menu as you work. You can scrub through the menu to bring different drop zones on screen.
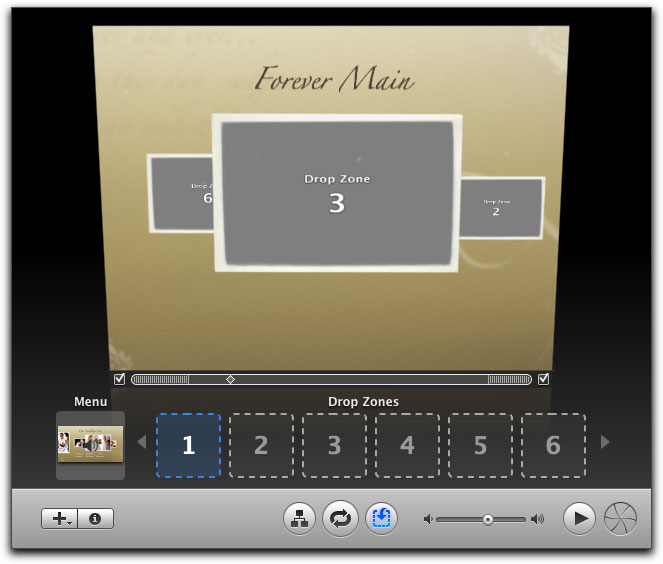
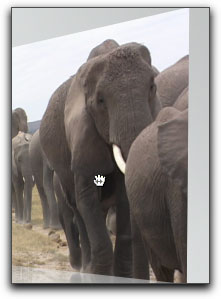
In earlier versions of iDVD there was a reposition feature for art placed in a drop zone, which offered a modicum of positioning of the photo within the drop zone. Placing the cursor over a picture in a drop zone turned the cursor into a grab hand icon, which you could drag to adjust the photo slightly. In iDVD 7, with a drop zone selected in the Canvas, you must now hold down the 'apple/command' key to access the grab hand icon.
Project Info Window
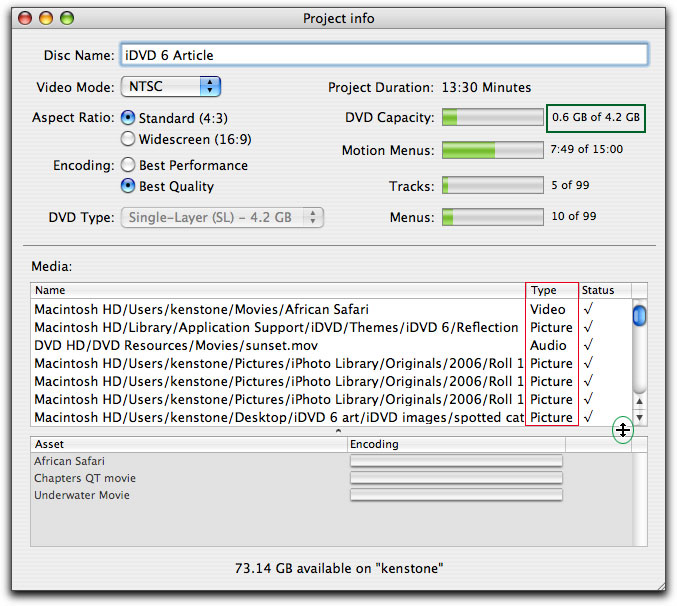
The Project Info window has received a much need update. While the old Project Info window did provide some information about our DVD project, the information was not presented in anything like a useable way. The old Project Info window from iDVD 6 is shown below.
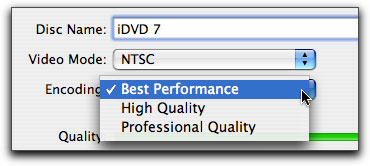
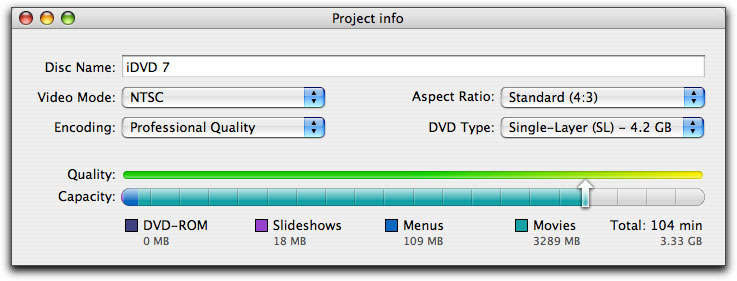
iDVD 6 had two encoding options, Best Performance which encoded quickly, but at the cost of quality and the duration of your video is limited, and Best Quality which did take longer to encode but at higher quality. The number of encoding options in iDVD 7 has been increased from two to three, with the addition of the 'Professional Quality' setting. Professional Quality encoding encodes at yet higher quality and allows longer playing DVDs to maintain quality. Encode times using Professional Quality will be double that of a High Quality encode. I suspect that Professional Quality is using dual pass while High Quality is single pass thus accounting for the longer encode times but higher quality.
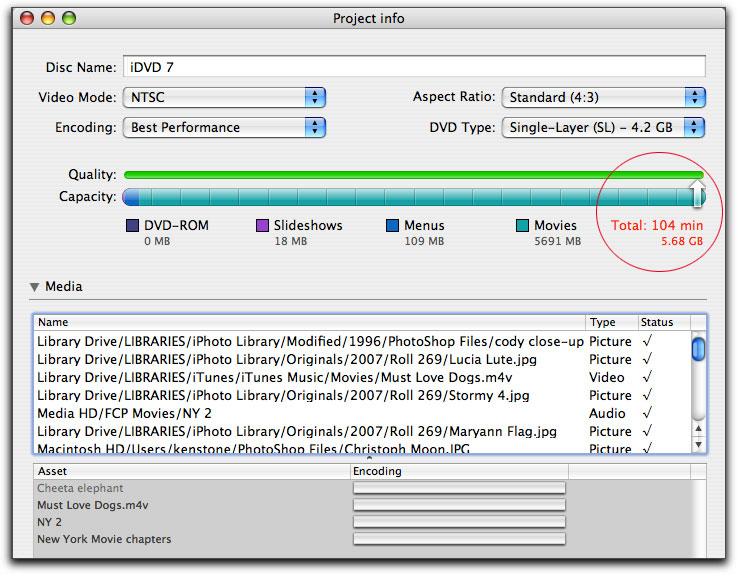
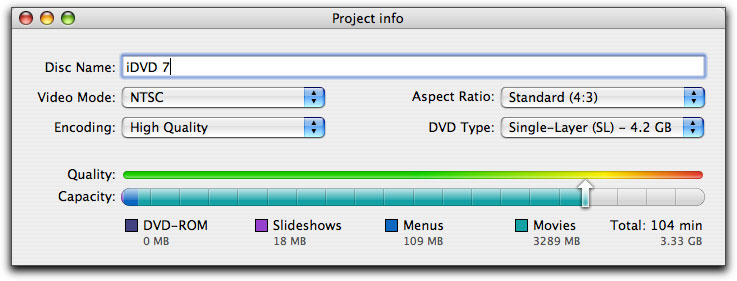
New to Project Info is the Quality and Capacity bar which gives us a graphical indication of the quality that we can expect, depending on the duration of the project, additional content, DVD-ROM, Slideshows and Menus and the choice of encode quality settings.

A white arrow points to the quality level. As long as the quality arrow is pointing to dark green you can expect good quality. As you add content to your project and its size goes up, the arrow moves to the right. Once the arrow moves out of the dark green, quality starts to go down, light green is almost as good. As the arrow moves to yellow then orange, quality really suffers. Red, no joy.


I have created an iDVD project that runs 104 minutes. The new Project Info window displays all of the information about my project in a meaningful way. You can choose NTSC or PAL formats right from this window as well as aspect ratio and DVD type, Single or Dual Layer disks. The Capacity bar, shows how much space on the DVD the different elements of your project take up and the total run time and space used in your project.
I am going to show my 104 minute project with each of the three different encode settings. The first setting is Best Performance (fastest encode times). While this setting encodes the fastest it is limited not only in quality but in the amount of video that can be encoded to DVD. I have circled the total run time and disk space usage, note that these figures are in red which is a warning that there is too much material to fit onto a DVD at this encode setting. In this scenario, disk usage is shown as 5.68 Gigs yet a DVD will hold only 4.2 gigs. Obviously attempting to burn this disk would result in a failure. I have no idea why the quality bar would show all green in this situation, as this is obviously not the case.
With exactly the same project, I am going to switch encode to High Quality. You can see that while the run time is still 104 minutes and nothing else has changed, the amount of space now required by my project is 3.33 gigs which will fit onto a 4.2 gig DVD. While this setting will now accommodate the length of my project, you will notice that the white arrow is pointing to lime -yellow, which indicates that the encode quality will be somewhat less than stellar.
Switching to Professional Quality yields improved encode quality, as shown below, as the white arrow has moved back into the greener area of the Quality bar. This setting will take the longest to encode.
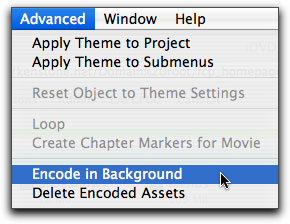
While it is recommended that you set your encode settings before you start your project, it is not always possible to know which setting you'll use when it comes time to encode. If this is the case, I suggest that after opening your new iDVD project, turn off 'Background Encode', before you start to build your project.
Notes
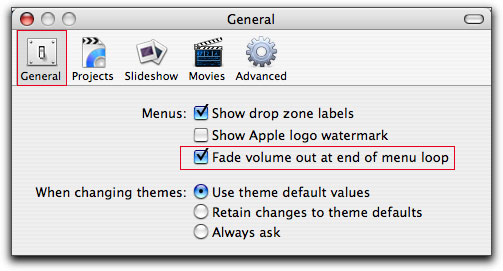
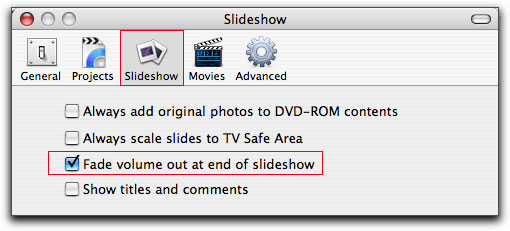
While not new to iDVD 7, there are two audio fade features that some people miss because they are found in the iDVD Prefs rather than in a menu. In the General tab, 'Fade volume out at end of menu loop' and in the Slideshow tab, 'Fade volume out at end of slideshow'. We would probably be better served if these two audio settings were moved out of Prefs and re located to the Inspector. A side note about audio. While you can use music from iTunes which is 44.1 kHz, iDVD will only accept video footage shot at 48 kHz 16 bit audio.
It has been 18 months since iLife 06. Surprisingly, there have been very few new features added to iDVD 7. New templates and additional art work have been added, but this update is all about changes to the user interface, which do improve the workflow in iDVD and are gladly accepted. The introduction of the Inspector Palette, brings iDVD in line with a number of pro apps and is an important addition to iDVD. The addition of a third encode option 'Professional Quality' is probably the single most important new feature in iDVD 7.
Despite the numerous changes made to the user interface of iDVD 7, the functionality and workflow remains primarily the same as previous versions of iDVD. Authoring in iDVD 6 will be of great help to anyone just learning how to use iDVD.
Enjoy,
--ken
copyright © www.kenstone.net 2007
are either registered trademarks or trademarks of Apple. Other company and product names may be trademarks of their respective owners.
All screen captures, images, and textual references are the property and trademark of their creators/owners/publishers.