
April 27, 2009
By Ken Stone


April 27, 2009iMovie 09
By Ken Stone
While I have written about both iDVD and iWeb, I never paid much attention to iMovie, after all, I work in FCP. Recently I went to the LAFCPUG meeting here in L.A., where Randy Ubillos, creator of Adobe Premiere, Apple Final Cut Pro and Apple Aperture, showed off his latest creation, iMovie 09. Now there has always been an iMovie in the Apple iLife package, but several years ago, Randy created a completely new version called iMovie 08, now iMovie 09. So why am I writing about iMovie 09 if I work in FCP? The answer is simple. At the demonstration I saw a number of features in iMovie 09, that I wished were in FCP and I wondered if there was a way to use iMovie 09 in conjunction with FCP, utilizing some of its features to supplement the FCP workflow, most importantly in the rough cut phase of editing, as '09' has an amazing skimming/edit tool. iMovie also sports a new and modern tool for exact clip trimming, the Precision Editor, and it's stunning. And, iMovie provides full Real Time playback, no rendering required, ever.
After doing some testing, I found that the workflow required to use '09' with FCP is probably not worth the advantages gained by using the two apps together. However, I did discover that '09' is truly an amazing application, much more able and sophisticated than it would first appear. Automated video import process, browser organization, clip skimming and editing, text and animated titles, transitions, video effects, backgrounds, sound effects, audio control, voiceover, green screen, background music, speed control and direction, photo manipulation (Ken Burns effect), markers and chapter markers, color correction, waveforms, themes, animated maps, video stabilization, picture-in-picture, L-cuts, Precision Editor, full screen playback, the list goes on. iMovie is a full fledged editor, I think that you are going to be surprised at what it can do and how intuitive it is.
iMovie Interface
In order to show the entire iMovie interface I have reduced its size for this article. At normal size, everything is much easier to see and to work with. We will get into the different elements of the interface later on in the article, but for now, I just want you to get the general feel of it. The iMovie interface is divided up into five windows. Top left is the 'Edit Project' and 'Project Library' window, two windows in one. You switch between these two windows by clicking on the 'Project Library' or 'Edit Project' button very top left in this window (red box). As shown below, the 'Edit Project' window is active. Top right is the Viewer. Beneath these windows is the iMovie Tool bar. Bottom left is the Event Library and to the right is the Event Browser.

iMovie offers two different ways to arrange the windows in the Interface. As shown above, the Project Library and Edit Project window are in the top left corner, at the bottom of the interface is the Event Library and the Event Browser. There is a 'Switch' button in the Tool bar, left hand side. When you click on it, the top left window and the bottom windows switch places.

The Project Library window is now the active window, shown below.

At the far right of the Tool bar are buttons that provide access to the iTunes and iPhoto libraries, Text, Transition, Map and Background windows which, when opened, share space with the Event Browser. Click on the 'X' to close the window and return the Event Browser to its full size, red arrow below, or click on the button a second time to close the window.

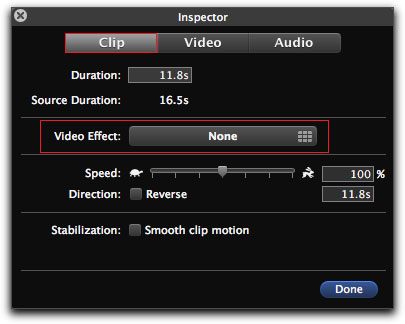
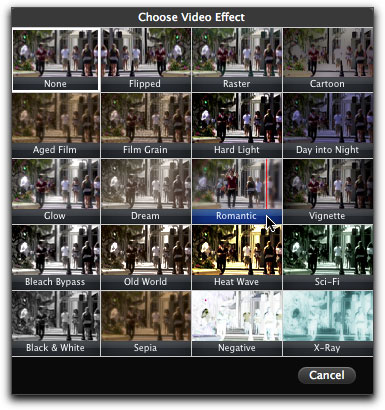
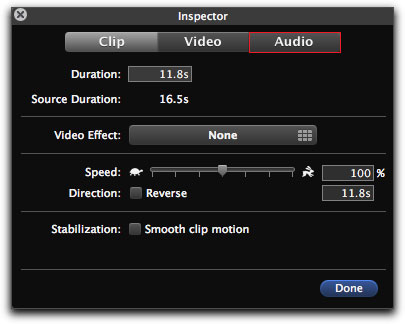
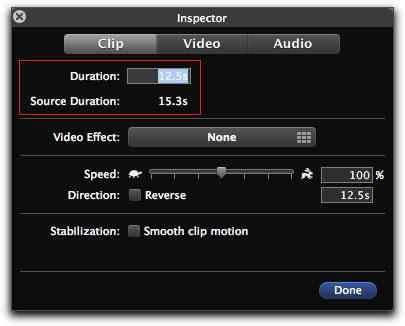
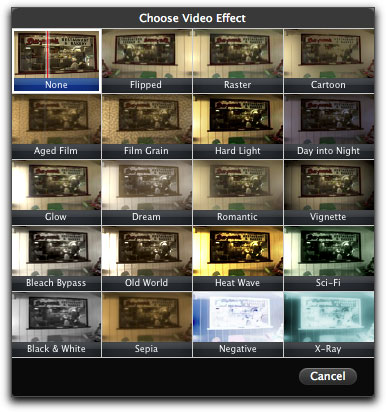
In iMovie, the 'Inspector' or HUD (Heads Up Display), is a floating window, which provides us with easy access to the various controls that we use to build our Project. Almost everything we do in iMovie can be controlled in the Inspector window. Double click on a clip, transition, effect, text, audio, etc. and the Inspector window will open and will display those settings that are relevant to what we are working on at the time. Double click on a clip in the Edit Project window and the Inspector will open, (below left). You can see the different settings and options available for adjustment. Clicking on the 'Video Effect' menu, will open the Effects palette, shown below right.
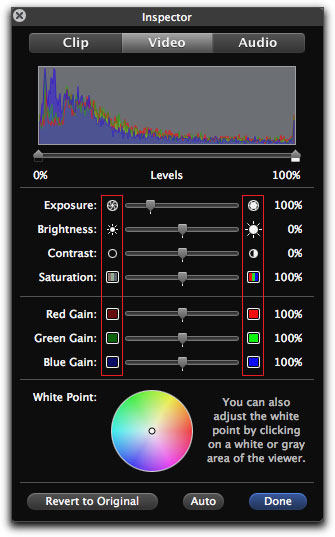
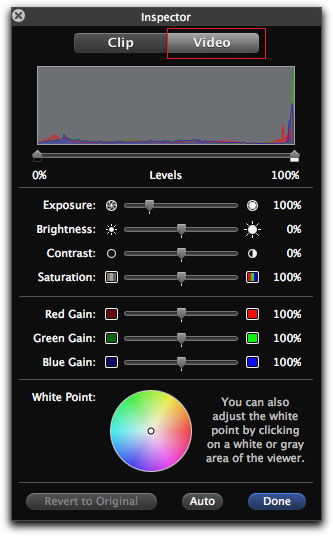
In the Inspector, Video tab, is the 'Video Adjustment Panel'.
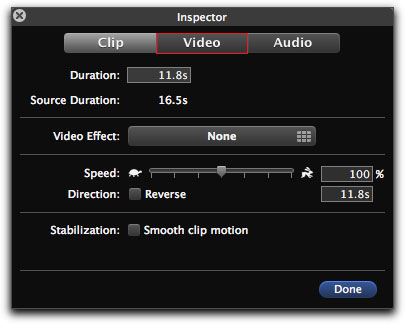
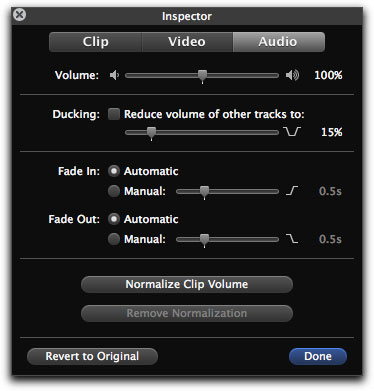
In the Inspector, Audio tab, is the 'Audio Adjustment Panel'.
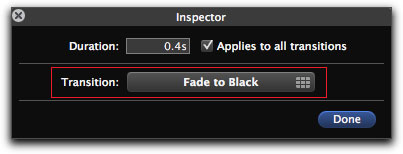
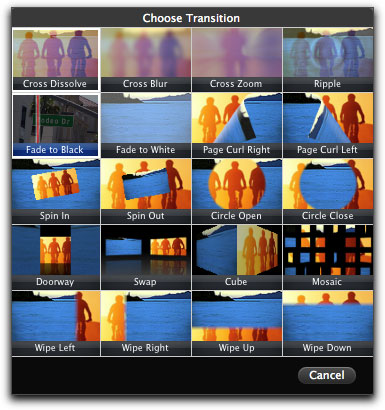
When a Transition has been applied, double clicking on it opens the Transition Inspector. The Transition menu opens to display the Transition palette, below right.
There are other windows in iMovie, such as the Precision Editor window shown below. We will cover all of the windows and how to use them later on in the article.
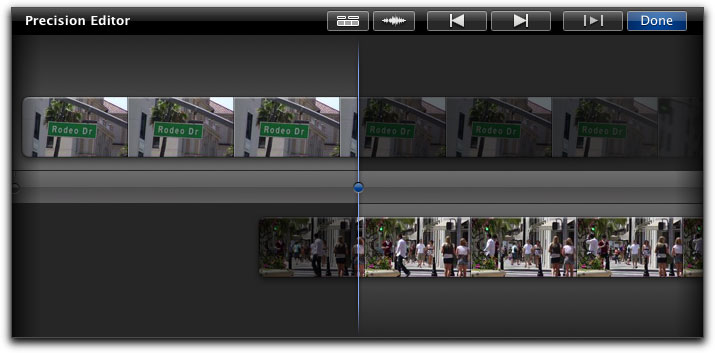
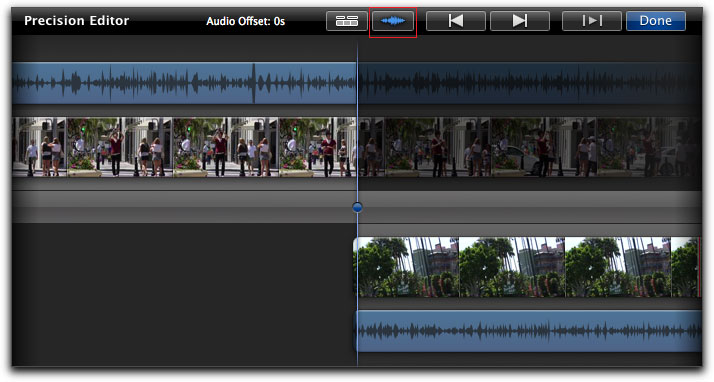
This is basically how the iMovie interface works, windows and palettes remain hidden until needed, providing iMovie with a clean and uncluttered interface. Even the 'Precision Editor' window (above), which is kept out of the way until needed, when opened, can display audio tracks and waveforms as well.
In the File menu there is a 'Print' command. If you have a Project selected in the Project Library, you will have 'Print Project'. If you have an Event selected in the Event Library, then you'll have 'Print Event'. What this Print command does, is print out the clip thumbnails that are in either your Project or Event. Just pictures of your clips, no metadata. The printed thumbnails are pretty small and even though there is a way in the interface to enlarge the onscreen thumbnails, they still print small. If you are running a second monitor you can place the Viewer window on to the second monitor, from the Window menu > 'Viewer on Secondary display'. Moving the Viewer window to a second monitor, opens up a lot of working space in the iMovie interface on the first monitor. The iMovie 'Command z' (Un-do) is unlimited, it undoes all the way back to when you last quit iMovie.
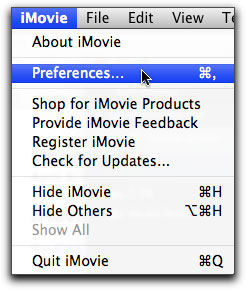
iMovie Preferences
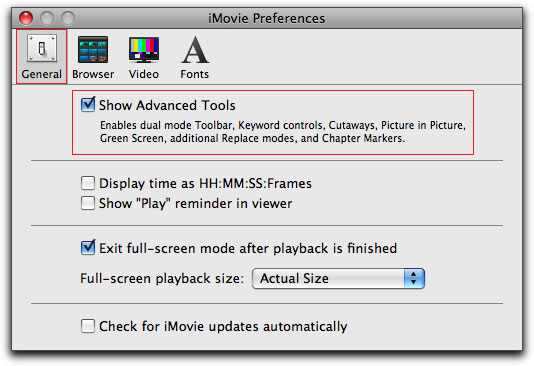
As with any new application, the first thing we want to do is to have a look at its Preferences, which I know can be a bit boring, but at least you'll know where the settings are, if you need to make changes later on. The General tab has one very important control, 'Show Advanced Tools'. This is the setting that enables many of the important iMovie features, you'll want to turn it on. I have Advanced tools turned on throughout this article.
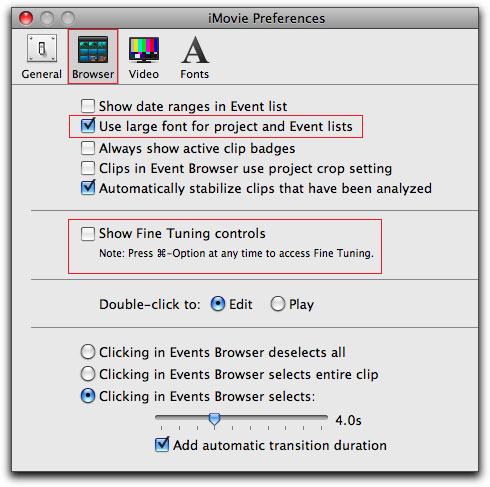
The Browser tab offers 'Use large font for Project and Events lists' which make things more readable and the 'Show Fine Tuning controls' which is used to lengthen or shorten a clip's duration, one frame at a time, when dragging the edge of a clip. 'Command Option' toggles this feature on and off. The Video tab offers a choice of video standards, NTSC and PAL, but as is pointed out in the window, changing this setting requires you to quit and then relaunch iMovie to affect the change.
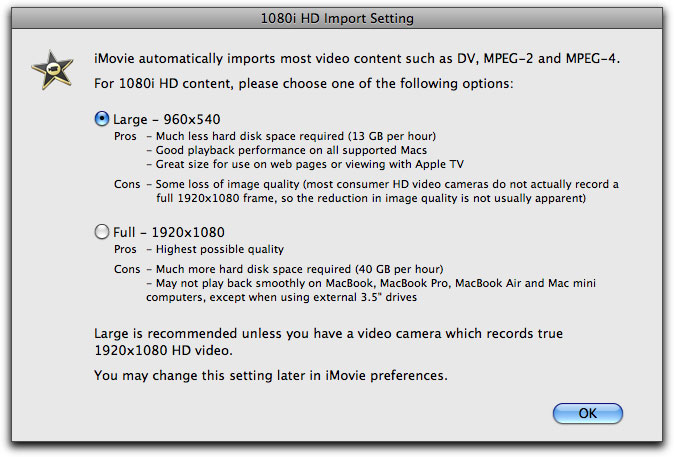
The other setting is for the importing of 1080i video, as it lets you select which frame size you want iMovie to work with. Depending on the finial output, like SD DVD, ATV or the web, the smaller 960 x 540 size will work very well. Choosing the larger 1920 x 1080 takes up much more hard drive space and could slow things down a bit. In most cases 960 x 540 will do the job. When importing 1080i video into iMovie, the video will be transcoded to AIC (Apple Intermediate Codec). AVCHD or HDV video is always transcoded to AIC regardless of frame size.

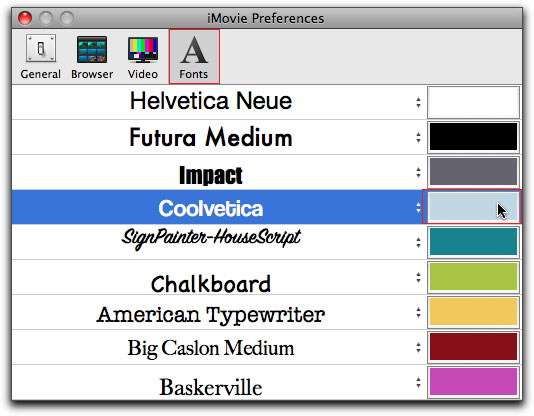
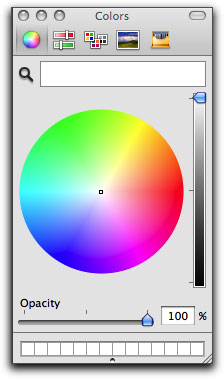
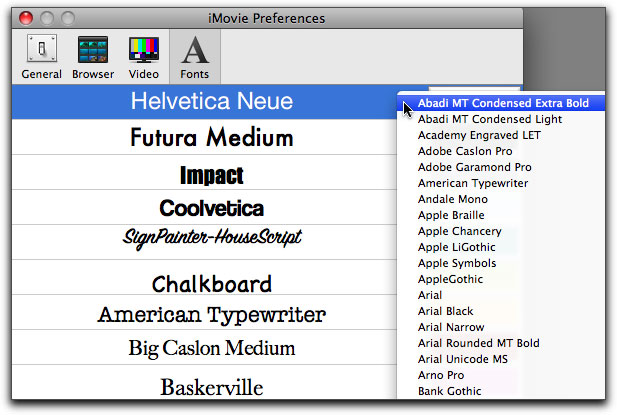
iMovie offers a number of opportunities for us to work with text, for titles and such. The Fonts palette is shown below, but we are not limited to the 9 different font colors. Click on any color swatch on the right and the Apple color wheel will open where we can change the existing color to any color we want.
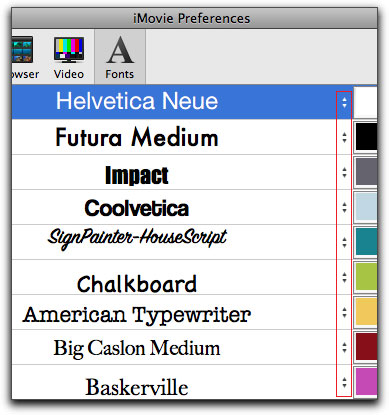
The same holds true for our choice of fonts. Click on any of the two sided arrows, to the left of the color swatches, to produce a font drop-down menu with all of the Apple system fonts available. You can customize all of the fonts and font colors in the iMovie Font palette to suit your own taste.
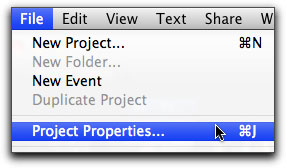
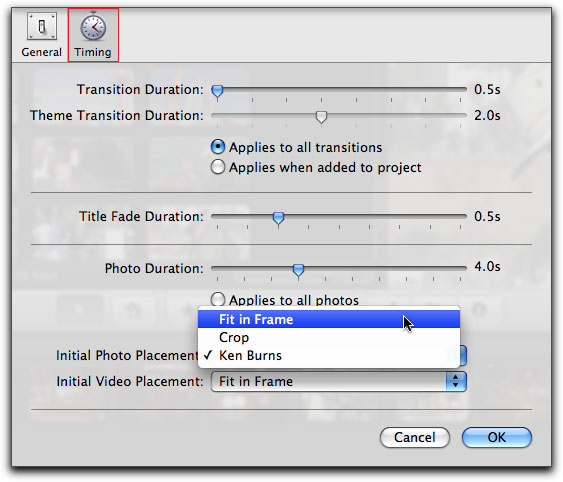
While the following dialog box, 'Timing', is not part of the iMovie Preferences, it's important, so I'm showing it here. From the File menu > Properties > Timing. You can set a number of iMovie parameters, but, for me, the most important one is the 'Initial Photo Placement' which defaults to Ken Burns. Every time you add a photo or Still Frame, the Ken Burns effect is applied. Now I like the Ken Burns effect just fine, but not on everything. Turning it off all the time gets to be a bore. In the Initial Photo Placement menu you can choose, Fit in Frame or Crop. I have selected 'Fit in Frame'. Easy enough to turn Ken Burns back on in the Viewer window if needed.
Acquiring Video
There are a number of ways to bring video into iMovie. The primary method would be to plug your camera into your Mac, iMovie can work with both USB2 and Firewire inputs. iMovie also seems to be format agnostic and I found that it will import and work with most of today's format flavors; HDV, AVC HD, DV, XDCAM, XDCAM HD and XDCAM EX. It works with NTSC and PAL and in 4:3 and 16:9, though Apple only officially supports; AVCHD, HDV, DV, MPEG-2, MPEG-4 MPEG-1 and H.264 and just about any .mov file.
iMovie can import from cameras that shoot to tape, memory card, hard drive and even DVD. For those cameras that shoot to memory card, the camera is not even required for import. You can use an ordinary card reader to mount the memory card on the desktop, iMovie will recognize the card and import properly, it will even recognize and work with a disk image. I imported some HVX 200, DVCPRO HD, 720p 24PN footage, iMovie did not care and handled it properly. A note about AVCHD video. The best way to capture AVCHD is to use a two step process. First use the Archive feature (discussed shortly) when you connect the AVCHD camcorder to your Mac. Then import the 'Archive' into iMovie using the Import > Camera Archive process, not the standard Import from Finder menu item. iMovie can import MPEG-4 video from disks or hard drives.
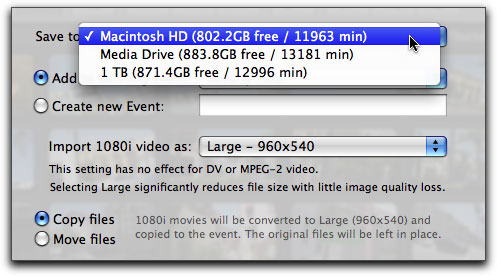
There is one very important issue to remember. We are working with video files which take up a lot of storage space on our hard drives. Additionally, as time goes by, we can add many video sessions (Events) to iMovie. It would be easy to fill up a hard drive with iMovie videos. For this reason, whenever bringing video in from a camera or by using any of the import processes, there will always be the opportunity to select which hard drive you want to store your video on. If you plan on using iMovie to any extent, you might want to consider getting an additional hard drive, either USB2 or Firewire, to store your iMovie video.
From a camera
With iMovie up and running, plug your camera into the Mac via USB 2 or Firewire, turn the camera on and set to 'VTR' or 'Computer'. Additionally you can insert the camera's memory card into a card reader and the memory card will mount on the desktop, ready for iMovie. iMovie will detect the camera or card and open the iMovie Import window. If the Import window does not open, click on the camera icon. The following example is from a Sony CDR CX-12 memory card based camera. I don't have a tape based camera to demo here, but the Import window will have playback controls and provide the ability to set In and Out points for your capture.
As shown below, the four clips that are on the memory card show up in the lower pane, the duration of each clip is denoted in white. Select a clip, yellow border, and click the Play button or hit the space bard to preview the clip before import. Lower left of the Import window is an 'Automatic/Manual' button. If you choose to import all of the clips, leave this set to Automatic and click on the Import All button.
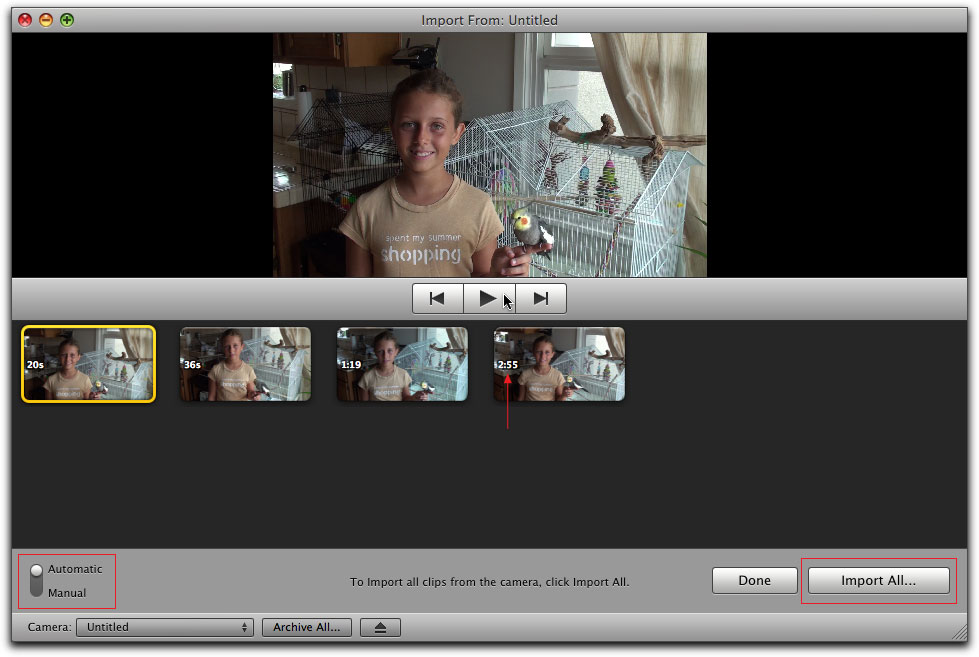
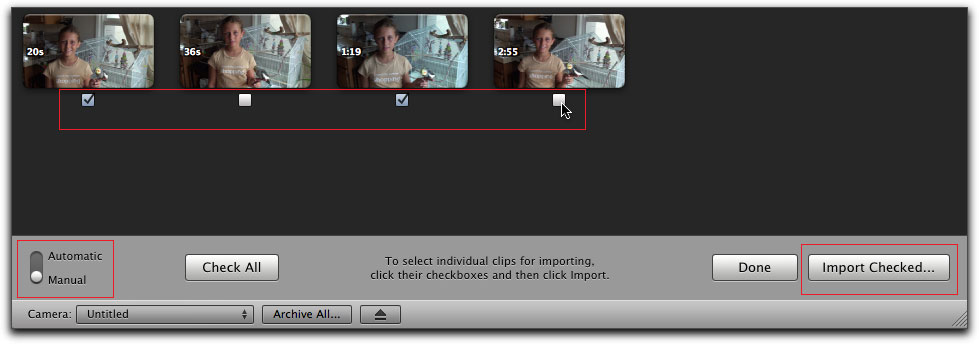
If you wish to import only some of the clips, set the 'Automatic/Manual' button to Manual. Each clip will now display a check box beneath, simply uncheck any clips that you wish to exclude from the import. Then click on the 'Import Checked' button to start the import process.
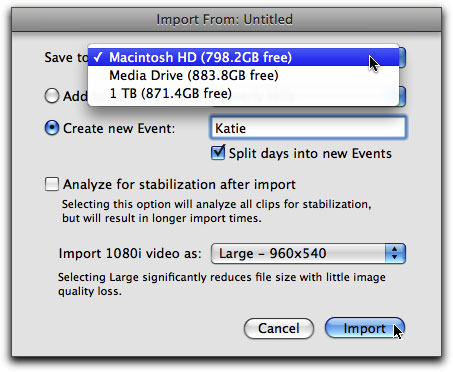
The Import process starts by opening an Import dialog box that allows you to select the hard drive that you want to store the video on, the option of adding the video to an existing Event or creating a new Event and naming it as I have done here. You will also have the option of choosing the frame size of your video if you are importing 1080i footage. When importing 1080i video, iMovie will transcode the video to the Apple Intermediate Codec (AIC). You can import at the full 1080 size, which does take up a lot of space on your hard drive, or you can import as 'Large 960x540', which will use less hard drive space and would be perfectly adequate for computer playback, Apple TV, final delivery to iDVD or the the Web (YouTube). Use the full 1080 import to maintain maximum video quality for delivery to Final Curt Pro via the Share menu > Export Final Cut XML or for broadcast. There is an additional setting 'Analyze for stabilization after import', we will cover stabilization later on.
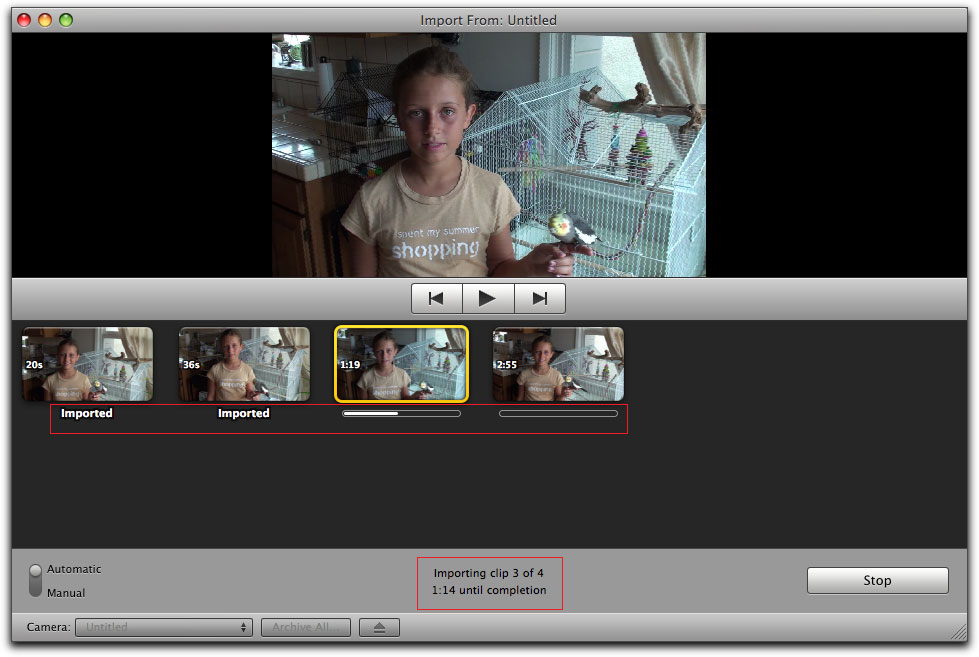
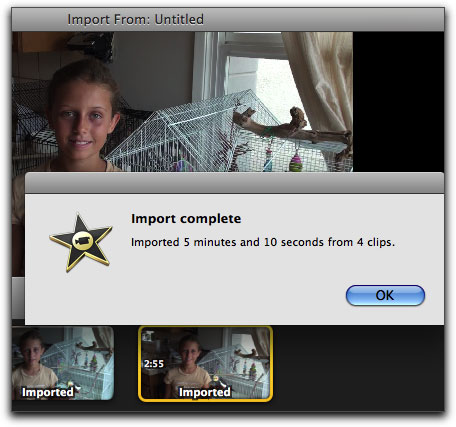
During Import, a progress bar and text will appear beneath each clip. Additional import information is presented at the bottom of the window.
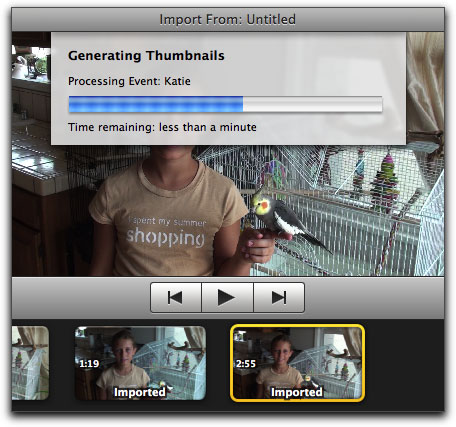
The last step of the Import process is the creation of Thumbnails.
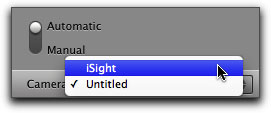
If you have a iSight or other Firewire camera attached to your Mac you can do a live capture right from the Import window. The Camera button, lower left, will allow you to select the iSight camera and this will open an 'Import from iSight camera' window in which you can record live video that will be imported into iMovie. You can do this 'Live Import' at any time, you don't have to be in the Import window. In the iMovie interface, below right, there is a camera button, click on it to active the iSight camera.

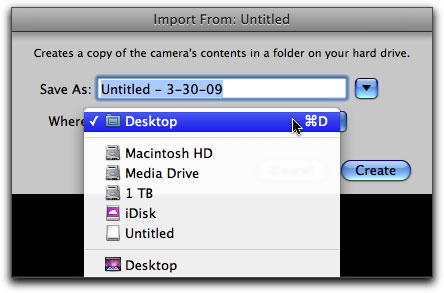
There could be a situation where you don't have the time to go through the Import process, but you need to bring the video in from the camera/memory card and store it in your Mac, so that you can erase the camera/memory card and get back to shooting. iMovie has 'Archive All' button that will allow you to transfer the video clips to a hard drive directly. You will now be able to go back at a later time, open the Archive and perorm the Import process. When you Archive your video, you will be given a chance to name the archive and to select a hard drive to store the video for later import and use. Do not save an Archive to an iMovie Events or Project folder, as this can slow down iMovie's performance.

Other Import Processes
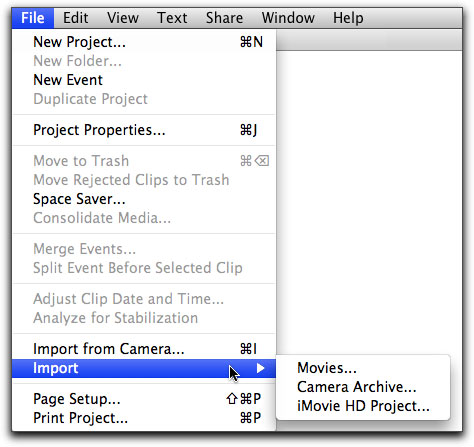
There are three Import options; Movies, Camera Archive and iMovie Project.
At the top, navigate to the hard drive and folder that you want to import from. You can select a folder or clips inside a folder for import.
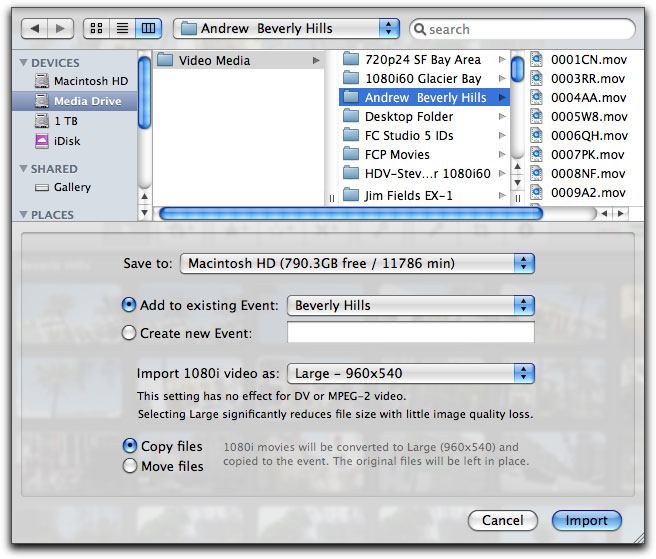
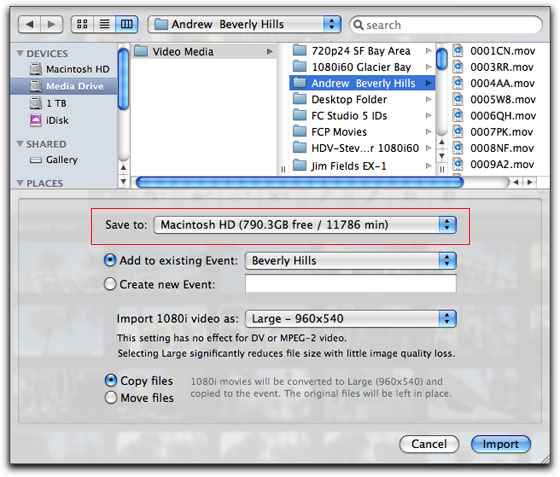
The 'Save to' settings allows you to pick which hard drive you want to save the imported video to.

Projects and Events
iMovie's organization is very simple and straight forward. There are two elements to iMovie; Projects and Events. Projects are where you build your movie and Events are where all your video clips are stored. So a Project file does not contain any media, rather it contains all the information about your movie, it is like a blueprint for a building. The Project keeps track of all the video clips that are brought into it, it points to the clips in the Event file. In addition, the Project file contains all the information about your movie; themes, titles, markers, color correction, clip trimming, background audio, transitions, effects, etc. Every time you use a tool in iMovie, modify a clip in the Project, or make any changes, that information is recorded into the Project. You can have any number of Projects that you want, but you can only have one Project open at a time. iMovie is a 'non-destructive' video editor, so this means that the source video is never touched. When iMovie is played, the information contained in the Project file is applied, in Real Time, to the video. You can create a new Project or Event at any time from the iMovie File menu.

When you create a new Event or Project from the File menu, the default settings will place the new files on your boot drive: User > Movies > iMovie Events - iMovie Projects. iMovie will automatically create any required support files, like iMovie Cache and Thumbnail files for you. The path for iMovie Events is shown below.

While the Project file is normally not too large, several megs or so, the Event file contains all of your video and can get to be very large indeed. When creating a new Event, whether from a camera, card or from the File menu > Import, you will always be given the chance to select a hard drive to place the files on. Shown below left, is the Import box, that opens when a camera/memory card is attached to the Mac. Below right is the Import box that opens when Import is selected from the File Menu.

Project Library
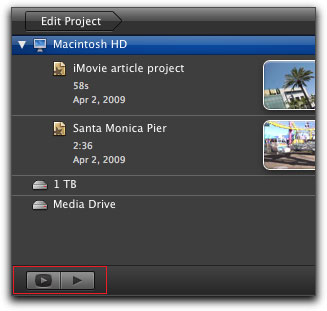
Top left of the iMovie interface is the 'Edit Project'/'Project Library' window. The Project Library window is active (below) which shows all of your iMovie Projects and which drive they reside on. I have two Projects on my Mac HD but no Projects on my '1TB' or 'Media Drive'.

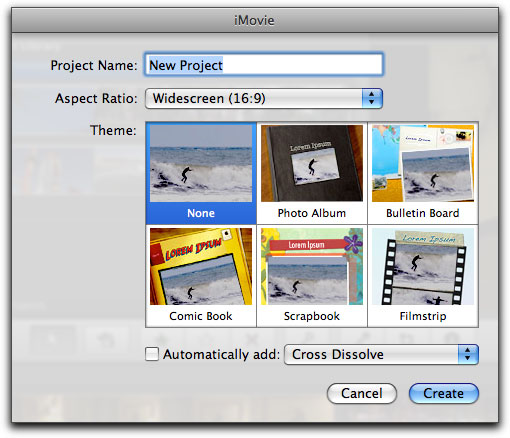
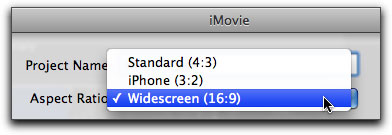
You can create new Projects right inside the Project Library. First, select which drive you want to use to store the new Project on, then click on the '+' button lower right in the window (as shown above). This will open a 'New Project' window, where you can name the Project, select the format, Standard, iPhone or Widescreen. You can also choose a Theme for your new Project if you so desire.
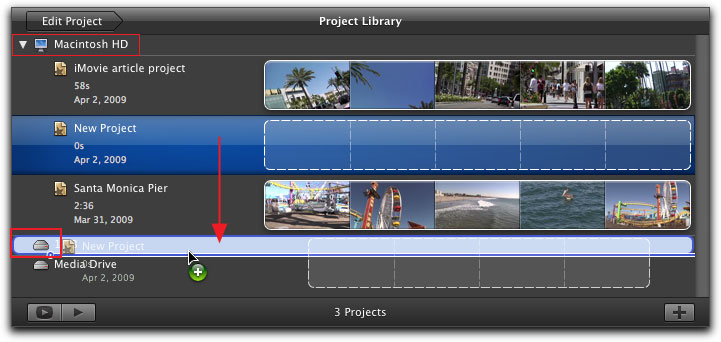
If you create a new Project from the File menu, you will not be given the option of picking a drive, the new Project will be placed on your boot drive automatically. The drive that a Project file is stored on is not as critical as an Event, because Project files are relativity small. However, to keep things organized, you can move a Project from one drive to another. In the Project Library, select the Project and then drag it to the desired drive, in this case from the 'Mac HD' to the 'Media Drive', as shown below.

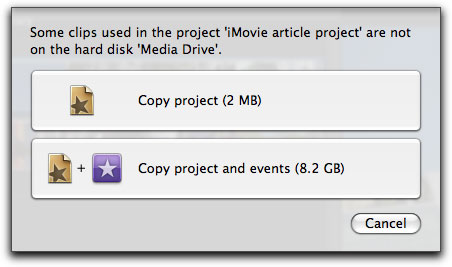
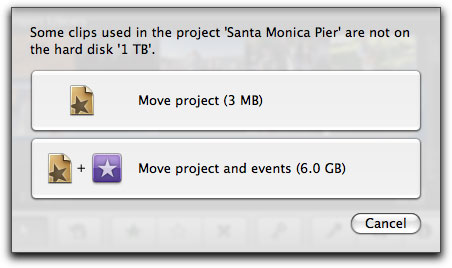
If your Project has content, clips have already been added to the Project, then after you drop the Project onto the new drive a dialog box will open offering the option to Copy the Project or Copy the Project and the Events (media). This action will copy to the new location but will leave the original Project and Events where they are, below left. If you want to 'Move' the Project and not copy, hold down the Command key while you drag, the Project or Event will be written to the new location and deleted from the old location, below right.
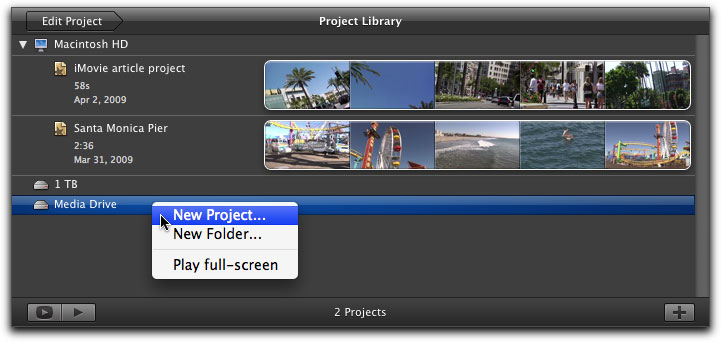
A simpler way to create a new Project and place it on the correct drive in the first place, is to open the Project Library and then Control click on the drive that you want to use, from the drop-down menu, choose New Project. Or, you can select the drive you want to place the Project on and then click on the '+' button lower right of the window.
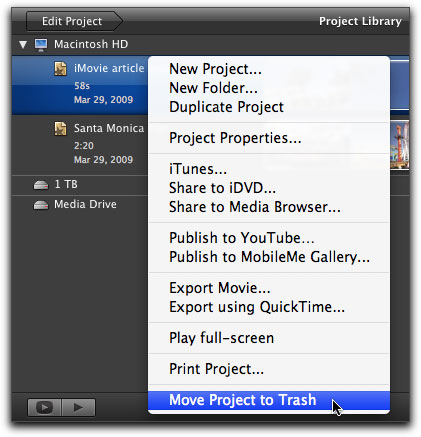
Control clicking on a Project in the Project Library, offers a variety of options including 'Move Project to Trash' which removes the Project from both iMovie and from your hard drive.
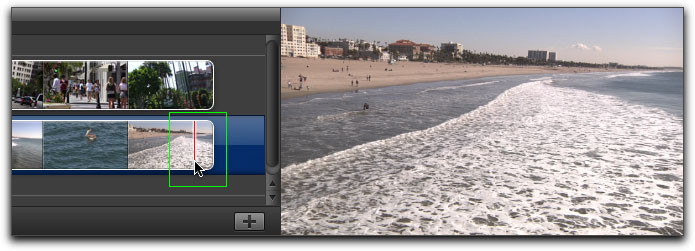
You can playback your movie in the Viewer window from any Project in the Project Library. Place your cursor anywhere over a film strip and as you drag or skim, the video will play in the Viewer window. When you place the cursor over a film strip, a thin vertical red line called a 'Pointer', is displayed that behaves much like a playhead showing the current position of playback (green box below). You can also select a Project and hit the space bar to play in the Viewer window. At the bottom left of the Project Library window are two buttons: 'Play Project full screen' and 'Play Project from beginning'.
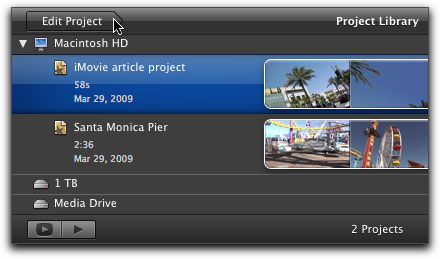
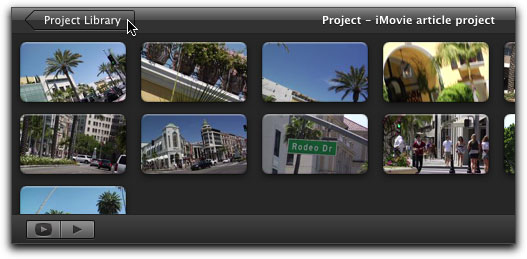
When you have finished in the Project Library, select the Project that you want to work with, then click on the 'Edit Project' button, upper left of the Library window. This will open the Edit window. You can toggle back and forth between the two windows by clicking the button upper left.
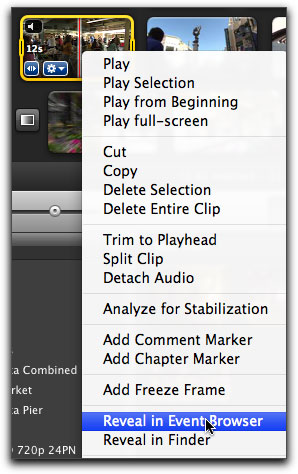
If you Control click on a clip in the Edit Project window and select 'Reveal in Event Browser. The Event containing the source clip in the Event Library will become highlighted and the corresponding clip in the Event Browser will be highlighted (selected) as well.
Event Library
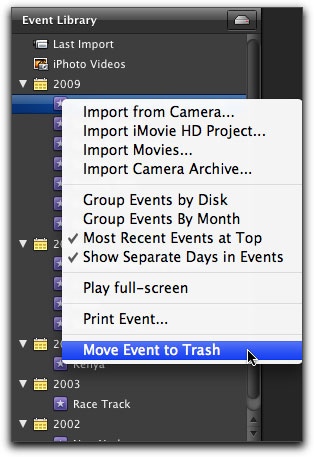
Every time you bring video into iMovie, either from a camera, a card reader or any of the import processes, an Event is created and it is named with the current date and the new Event is placed into the Event Library. The Event Library is a powerful organization tool, as we shall see. You can select the Event name and change it to something more appropriate. If you control click on the Event a number of options are presented. If you select 'Move to Trash', iMovie will remove the Event from the Event Library and from your hard drive as well.
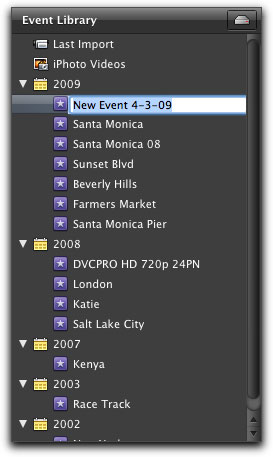
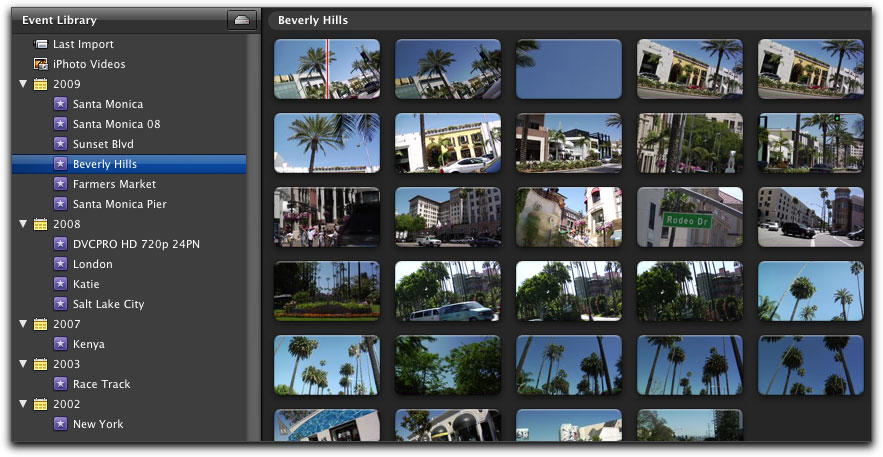
Shown below, I have named all of the Events in my Library and iMovie has sorted the Events chronically by year. iMovie looks at the date stamp in the metadata of the incoming video and places the Event into the year that the video was shot. To the right of the Event Library is the Event Browser, when an Event is selected in the Event Library, the clips contained in that Event are displayed in the Browser.
If you shot video over a three day period, iMovie would create a different Event for each of the 3 days. You can easily merge different Events, regardless of when they were shot. In the Event Library, select and drag an Event onto the Event that you want it to merge with.
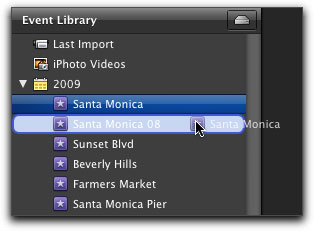
When you release the Event on top of the other Event, a naming dialog box will open allowing you to name the new, merged Event.

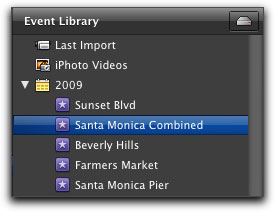
The newly named Event now shows up in the Library, note that the two Events that were merged, Santa Monica and Santa Monica 08, are now gone from the list.
Not only can we merge Events but we can split Events apart as well. Select the Event that you want to split, in the Event Browser, select the clip that is to become the first new clip in the new (second) Event.

From the File menu select 'Split Event Before Selected Clip'.
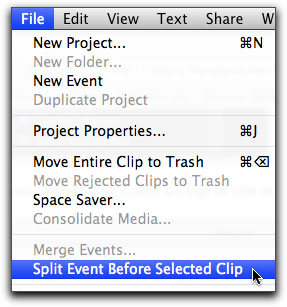
The Event will now be split, the new Event will retain the original Event name but will amended with the number 1.

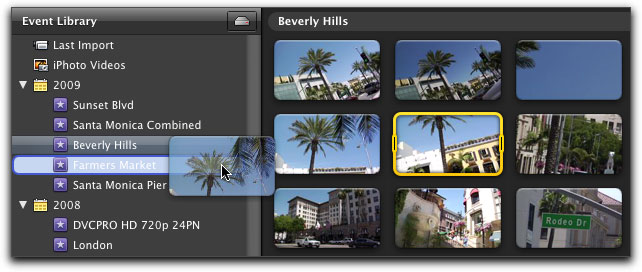
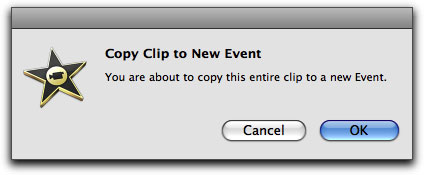
You can copy a clip from one Event to another. Select the Event that you want to copy the clip from, then, click on the clip and drag it out of the Event Browser into the Event Library and drop it on the Event that you want to copy the clip to. As show below, the Beverly Hills Event is active and I am dragging the clip to the Farmers Market Event. The 'Copy Clip to New Event' message will appear.
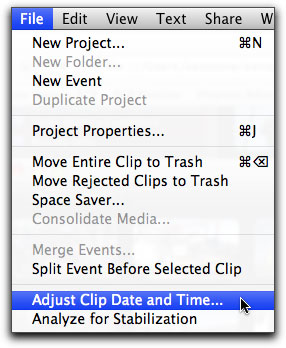
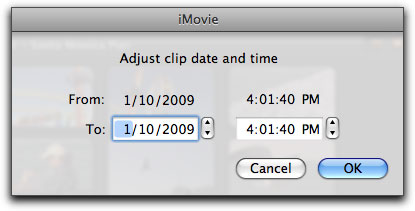
You can change the clip(s) Date or Time to change their chronological order in the Event Library. Select a clip or multiple clips in the Event Browser, and then choose File > Adjust Clip Date and Time.
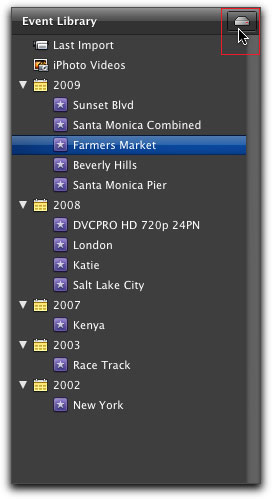
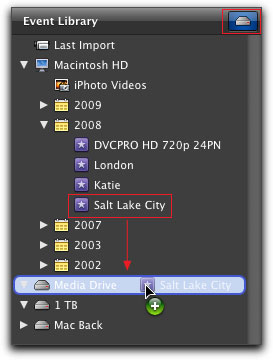
The default order of the Events in the Event Library is chronological, in either ascending or descending order, however, you might need to view your Events based on which hard drive they are stored on. You can toggle between the two display modes by clicking on the hard drive icon, upper right in the Event Library. You can also do this from the View menu > Group Events By Disk.
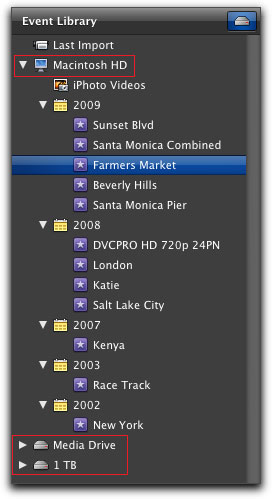
You can copy an Event(s) to another hard drive. With the Event Library set to 'Group Events By Disk', click on the Event to want to copy and drag it onto the hard drive you want to copy the Event(s) to. As shown below left, I have dragged the Salt Lake City Event to my Media drive. This will make a copy of the Event. If you want to move the Event, hold down the Command key while you drag, the Event will be deleted from its original location.
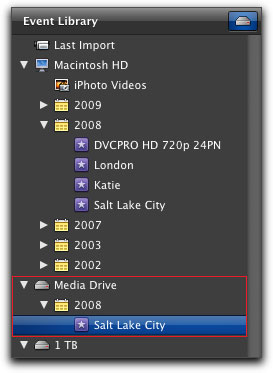
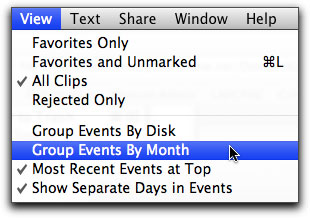
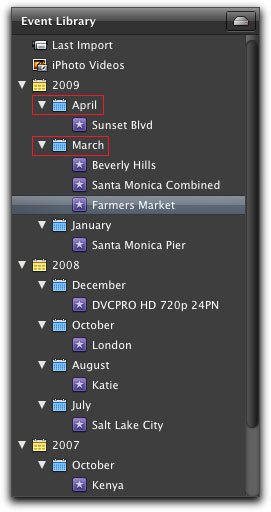
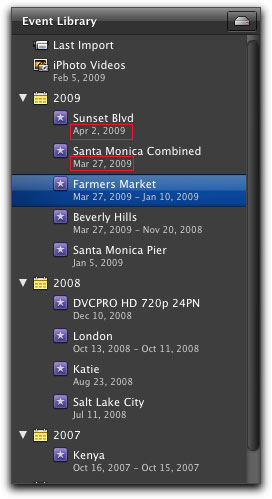
From the View menu you can also arrange the Events by Month, Most Recent Events at Top and Show Separate Days in Events. Events by Month is shown below center. You can also have iMovie display the date that the event was recorded, but this setting is found in the iMovie Preferences > Browser tab > 'Show date ranges in Events list.' Event Library with shooting dates shown below right.
Event Browser
When you select an Event in the Event Library, all of the clips contained in that Event show up to the right in the Event Browser. It is in the Event Browser that we audition our clips, playing them in the Viewer window and making our selections. Lower right in the Event Browser is a slider that sets the number of frames of video that is displayed per thumbnail. As shown below, I have the slider set at 2 seconds, so each thumbnail in the Browser represents 2 seconds of video. This setting can be adjusted from 1/2 second of video to 30 seconds of video. It also has an 'All' setting that will show each clip as a single thumbnail. When you place the pointer, (thin red vertical line), over the thumbnails, the start of each clip is denoted by the clip duration in seconds and a 'Gear' icon.
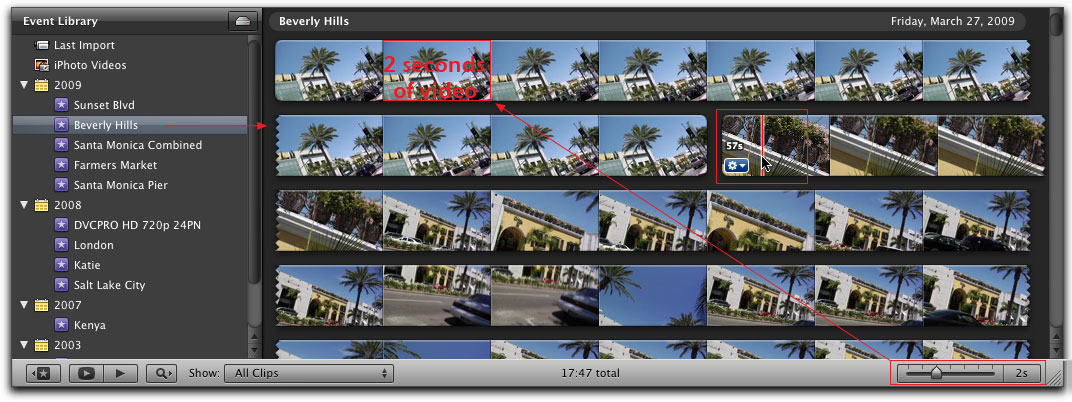
When this slider is set to 'All' each thumbnail in the Browser represents an entire clip, regardless of the length of the video clip. Throughout this article, I am in the 'All' mode, so that you can see the different clips, but when you are working, you will take advantage of displaying your clips stretched out, by adjusting this slider.

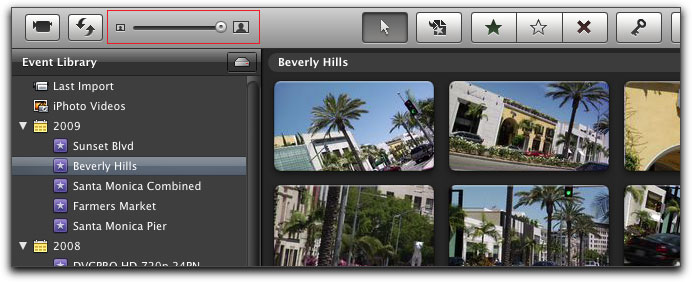
We can control the size of the thumbnails of the clips in both the Event Browser and in the Edit Project window. Shown below at the smallest size.
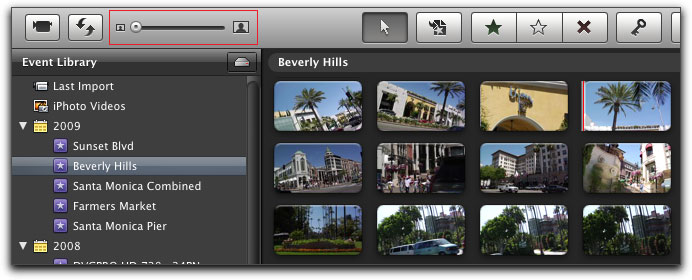
Thumbnails shown below at the largest size.
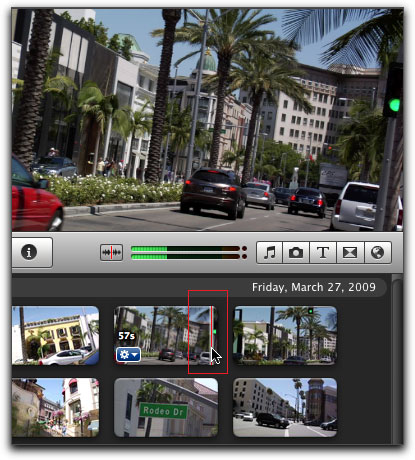
As you skim a clip in the Event browser, the video plays in the Viewer window. When you place the pointer over a clip in the browser and hit the space bar, the clip will play in the Viewer and will continue to play until all the clips in the Browser have been played or you hit the space bar to stop playback.
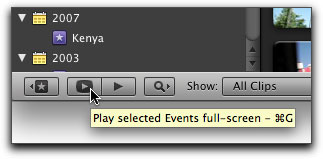
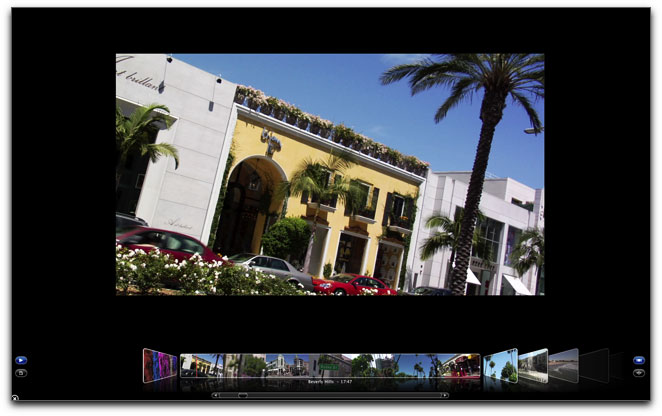
There is also a 'play full screen' option, shown below with 'Cover Flow'.
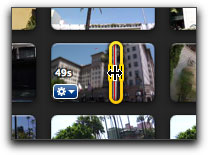
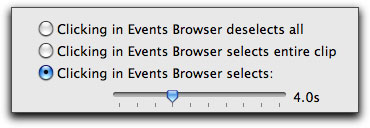
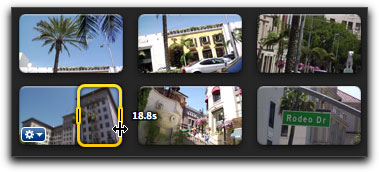
Working in the Event browser, we can select clips or portions of clips for use in our Project. Place the Pointer over any thumbnail in the Event browser and click once. This will set a default selection of 4 seconds. The duration of the selection is set in the iMovie Preferences > Browser tab. After the default section has been set, the cursor turns into a double sided arrow, click and drag to extend or shorten the selection to the desired length. As you drag, the frames of the clip will be displayed in the Viewer. If you hold down the Option key, before you click into a thumbnail, the entire clip will be selected. Once you have made your selection, you can drag the clip into the Edit Project window or hit the E key and the clip will added to the Project for you.
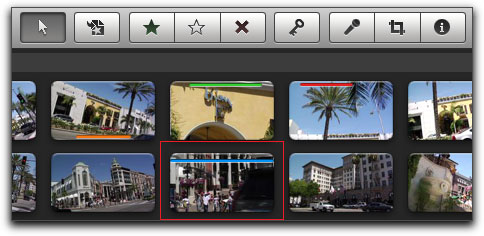
During editing we make selections of the video that we want to use in our Project. But, as we review our clips in the Event browser, we can select and 'mark' them for future reference, add keywords and hide or even remove clips from the Library. We can mark clips as Favorites (green bar), mark clips as Rejected (red bar), add Keywords to clips (blue bar). Clips that have been added to the Project in the Edit Project window, are marked with an orange bar in the Event browser, to show us that they have been used. In the iMovie Preferences > General tab, I have 'Show Advanced Tools' selected, you'll want to turn this feature on.
I have selected a portion of clip that I will want to work with in the future and want to mark it for future reference by clicking on the 'Favorite' button in the Tool bar. After making it a 'Favorite', the clip now sports a green bar, the length of the green bar and its position in the clip represents the selection that was made.


I have found a section of video that is simply no good and I don't want to be bothered with it, so I want to mark it as 'Rejected'. With the bad portion of video selected, I click on the 'Reject Selection' button, which places a red bar on the thumbnail. Marking the video as 'Rejected' does not remove or Trash the video, you would do that manually.


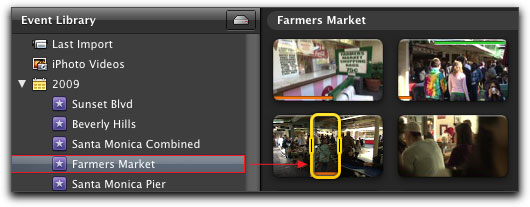
When a portion of video has been selected and placed into the Edit Project window for use in the Project, that section of video, in the Event browser, is marked with an orange bar to denote that it has been used (great feature). This process is done automatically for us by iMovie. With Favorites or Rejected, the colored bar is placed at the top of the clip thumbnail, the orange bar representing 'used' is place at the bottom of the thumbnail.


We can also add Keywords to clips in the Event browser. Select a clip or section of video and click on the Keyword button in the Tool bar. This will open up the Keyword window, where I checked the keyword 'Outdoor'.
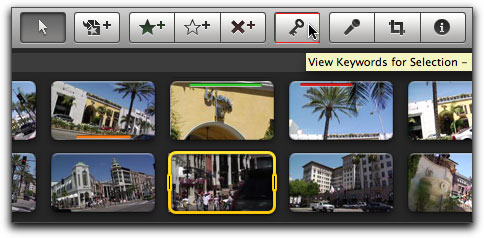
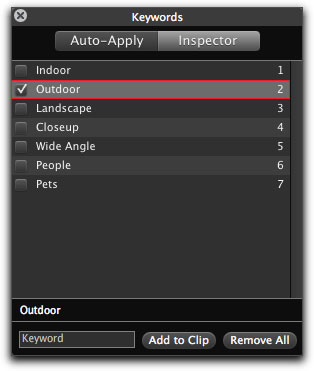
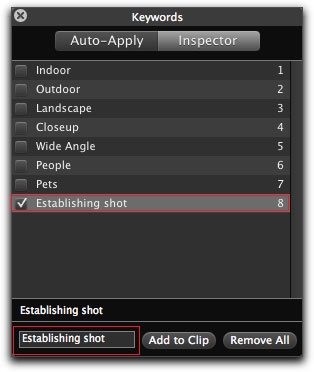
iMovie automatically records the keyword and places a blue colored bar at the top of the clip. You can add any keyword of your own choosing, by typing in the Keyword box lower left of the window. After you type in the keyword, click on 'Add to Clip', which it will and it will be added to the list of keywords as well.
Click on the Spyglass to open the Keyword window.
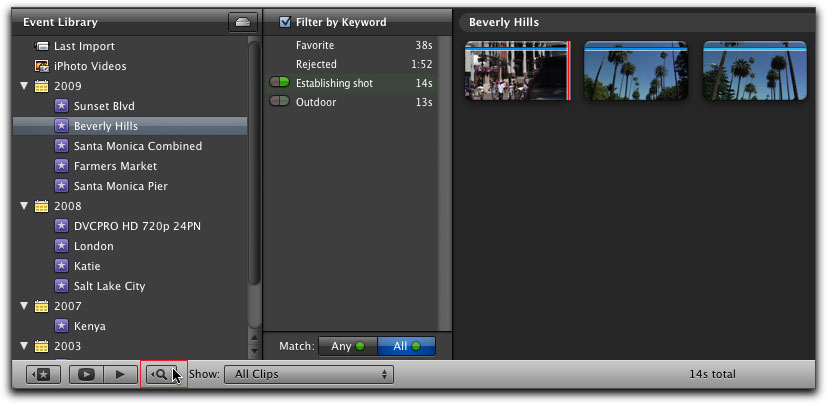
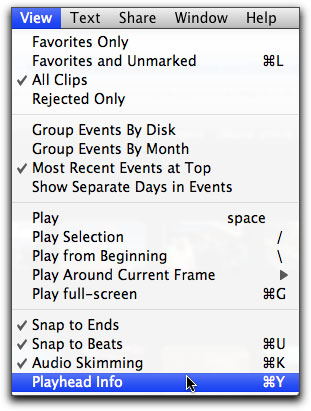
There is a way to filter the clips that you have marked, hiding the video that you don't need at the time. At the bottom of the iMovie window is a 'Show' drop-down menu, which gives you the option of filtering the clips in the Event browser based on Favorites Only, Favorites and Unmarked, All Clips and Rejected Only. As shown below, 'All Clips' has been selected.

All four types of markers are displayed.

As shown below, Favorites and Unmarked are displayed. Note that blue bar, 'Keywords' and orange bar, 'Used' are also displayed. When you launch iMovie the 'Show' menu defaults to 'Favorites and Unmarked'. Rejected clips, red bar, are hidden from view.
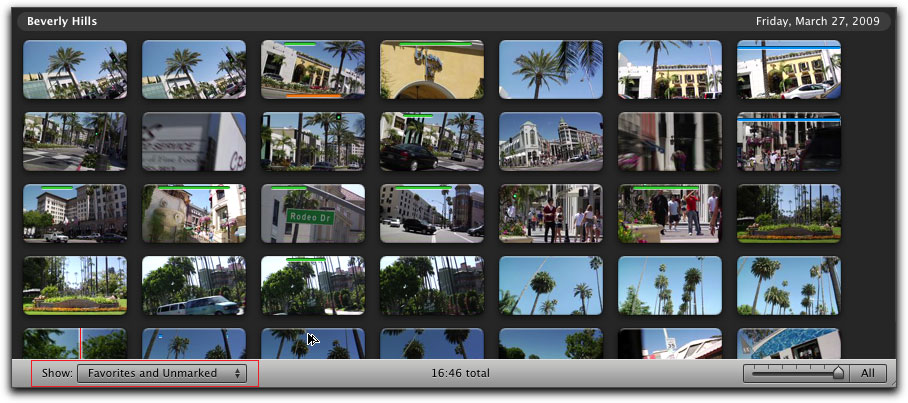
Being able to sort the Event browser is a great organizational tool, an efficient workflow. iMovie even allows you to delete those clips that you have 'Rejected'. Set the Show menu to 'Rejected Only'.
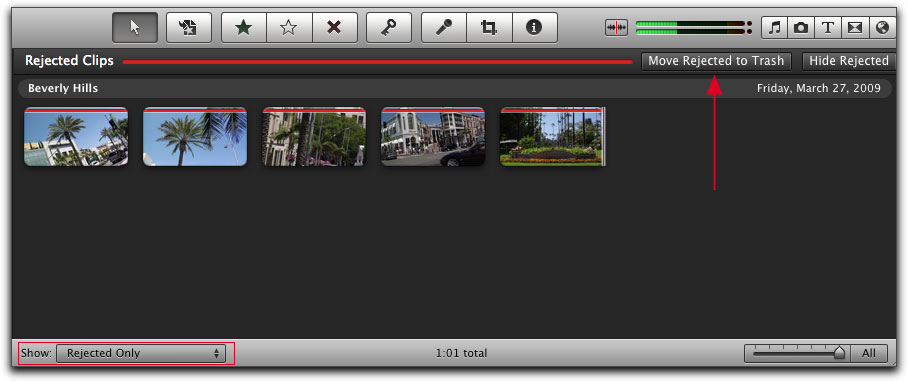
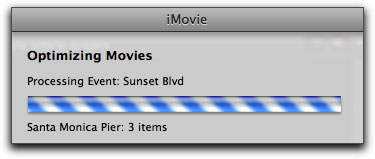
Click on the 'Move Rejected to Trash' button. Most often, when you 'Trash' something, it happens instantaneously, but in iMovie it can take a little time, you actually get a progress bar.
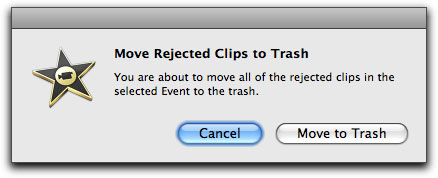

The Trash is shown below.

If after sending the Rejected clips to the Trash, you realize that you have made a mistake and need to restore the clips to the Events browser, simply 'Un-do', Command z from the keyboard. iMovie will rewrite the clips from the trash back to the Event browser, you'll even get a dialog box showing that the clips are being returned (rewritten). After the clips have been restored to the Rejected window, if you open the Trash you'll see that the clips are still in the Trash. This is okay, as the clips have been rewritten back into iMovie and the clips in the Trash are now dupes. It's okay to empty the Trash.
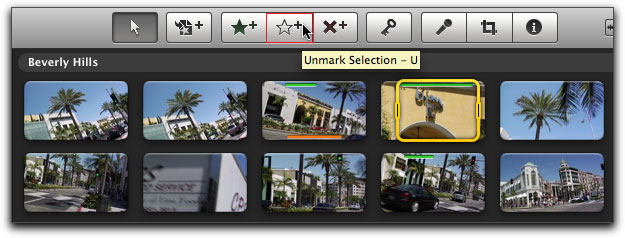
You can Unmark any clip(s) at any time. Select the clip(s) that you want to Unmark, click on the 'Unmark tool in the Tool bar. There is an exception, the orange 'Used' bar will remain on the clip even if Unmark is used. If you delete the clip from the Edit Project window, the orange bar will disappear from the clip in the Event browser (as it will no longer be in use).
After you have assigned a keyword to a clip, it is not necessary to open the 'Spyglass' panel to see the actual keyword. From the View menu, we can turn on Playhead Info (command Y). Place your cursor exactly on the blue keyword bar and the keyword will be displayed along with other information. This works in both the Edit Project window and in the Event Browser.

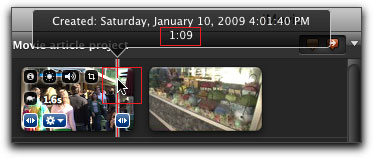
If you skim the clips in the Edit Project window with Playhead Info turned on, the duration of your movie up to the position of the Pointer will be displayed. As shown below, I am 1 minute and 9 seconds into my movie.
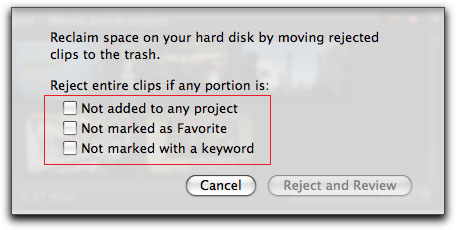
There is a way to Media Manage your hard drive space. In the File menu > Space Saver. In this box you can choose to send clips that you have not used in a Project, clips not marked as Favorite or clips not marked with a keyword to the Trash. You need to be careful as to which boxes you check, I think that 'Not added to any Project', might be a good way to manage hard drive space at the end of a Project. Even after you click 'Reject and Review' you will have another chance to remove items from the Rejected list before trashing, by selecting the item and then clicking on the 'Unmark' button in the Tool bar. This will move the Rejected clip out of the Rejected list and back into the Event browser.
Clip Selection
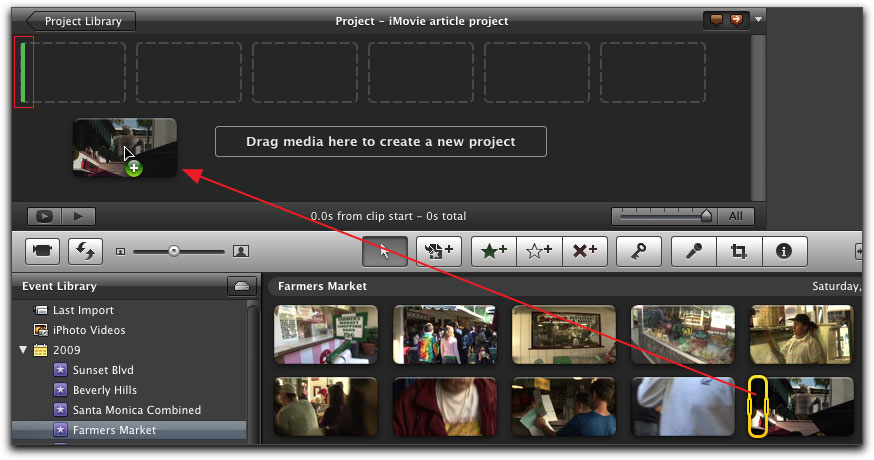
I'm starting off with a new empty Project and am going to be working with footage shot here in L.A., at the Farmers Market. In the Event browser, skimming and playing the clips in the Viewer window, I have selected my establishing shot and dragged it into the Edit Project window. The green vertical bar shows the placement of the clip when dropped into the Project. As this is the first clip, the green bar is at the very start. A clip can be automatically added to the Project from the Event browser by selecting the clip and then hitting the E key on the keyboard, no need to drag.
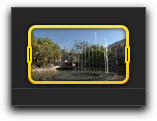
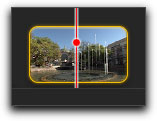
When you select a clip (one click) in the Edit Project window (below left), it gets a thick yellow boarder around it. When you double click on a clip in the Edit Project window, it opens up the Inspector. You can always tell when the Inspector is open because the yellow border around the clip, in the Edit Project window, becomes a 'thin' yellow border (below right). If you have forgotten to close the Inspector and try to do something else, you get a warning 'bonk' sound from iMovie.
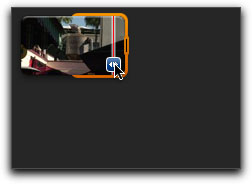
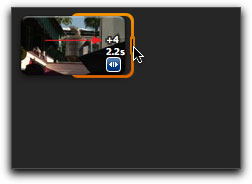
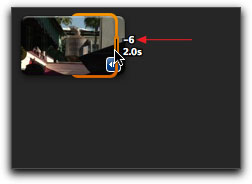
In the Edit Project window, (shown below), placing the cursor into the first clip displays a pointer (thin red vertical line - playhead), a grab hand for moving the clip around and several blue icons. The two blue left-right arrow icons, found at each edge of the thumbnail, are for fine tuning the trim of the clip. Click on either one of the icons and a partial orange border will appear, you will then be able drag the edge of the clip in one frame increments. In this case I am lengthening the clip so a + sign with the number of frames added appear, dragging inward will shorten the clip and a - sign with the number of frames removed will appear.
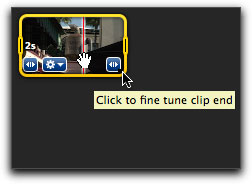
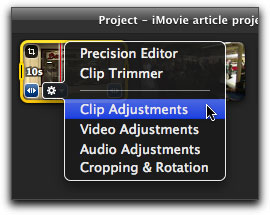
Clicking on the Gear icon drop-down offerers access to a number of iMovie's features which we will get into soon. The top two items, the Precision Editor and Clip Trimmer, are only available from the Edit Project window. Selecting 'Clip Trimmer' from the menu opens the Clip Trimmer window where we can change the start or end point of the clip by dragging on the handles left or right. Place the cursor over a handle, hold down the Option key and use the right and left arrows to adjust the handle one frame at a time. If you move the cursor into the clip it turns into a grab hand, click and hold down the mouse button and you can slide the clip selection left or right, choosing different video to be displayed without changing the duration of the clip. While trimming, you can preview the changes in the Viewer window. When you have finished, click the Done button, the Clip Trimmer window will close. Note that if you selected the entire clip in the Event browser and loaded it into the Edit Project window, then, in the Clip Trimmer window, you will not be able to extend the start point or end point of the clip, as there is no additional video to work with. You will be able to shorten the clip by moving the start and/or end points inwards.
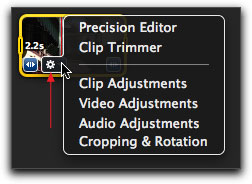

iMovie provides three different ways that you can precisely trim a clip; the Fine tuning controls, the Clip Trimmer and the Precision Editor which is covered later.
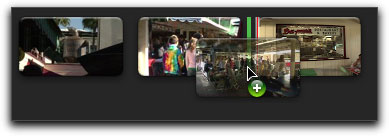
I have continued to select and add clips to the Edit Project window. Below left, I have decided that the clip that I am bringing in belongs between clips two and three, so that is where I have positioned the clip. The green vertical bar shows the insertion point for the clip. You can move clips around at any time by clicking on them and moving to a new location, below right.

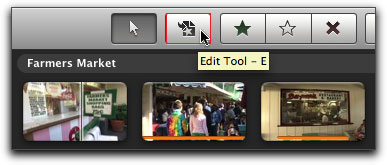
iMovie has a very powerful Edit tool, selectable from the Tool bar (below left). When the Edit tool is selected and the cursor is placed into a thumbnail in the Event browser, its icon turns to a small tan piece of paper with a folded corner (below center). As you click and drag with the Edit tool, the area that you select turns yellow and the duration of the selection is displayed (below right). When you release the mouse button, the clip is automatically added to the Project, no dragging required. If you are unhappy with your selection, use Un-do, Command z from the keyboard or you can select the clip in the Edit Project window and hit the delete key.


Crop & Rotate
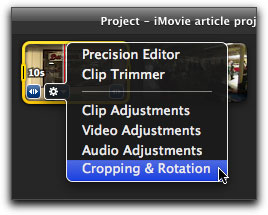
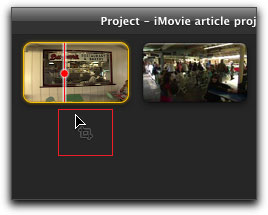
The Viewer window is the 'workbench' for a Project. It is in this window that all of the effects and abilities that iMovie has to offer are made available and are applied. We will start with the options made available in the Gear (Action) drop-down menu. When we select 'Cropping & Rotation', the first thing that happens is that when the cursor is placed in the Edit Project window, a cropping icon is added to the cursor to remind us that we are in cropping mode. The video will now show up in the Viewer window with special cropping icons.
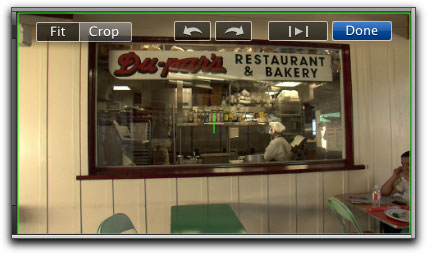
In the Viewer window, click on the 'Crop' button, this will add green brackets at the four corners of the green bounding box. The cursor will turn into a 'position' marker when placed over one of the corners or into a left-right facing arrow if placed on one of the green borders. Clicking and dragging in will reduce the size of the selected area inside the bounding box, but the video will retain its proper aspect ratio. After the video has been cropped to the correct size, placing the grabber hand icon on the green + in the center allows you to drag and reposition the cropping borders.
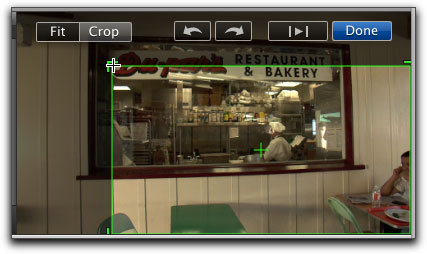
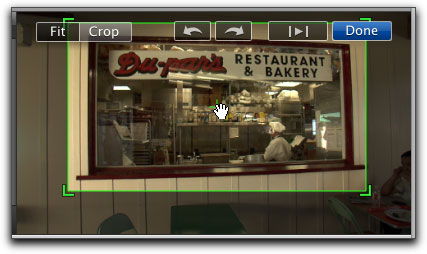
When you have sized and positioned the cropping border as you want, click the Done button, iMovie will perform the crop and the cropped image will fill the frame. Cropping is an excellent tool when you have some image at the edge of your video that you would like to remove, but there is a caveat. The more that you enlarge the video, the softer the image will look.
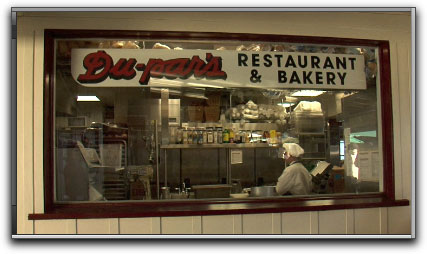
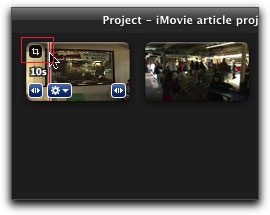
After you have completed the crop, if you look at the clip in the Edit Project window you will see that a Crop icon has been added to the upper left of the clip. This icon denotes that you have either cropped, rotated or applied the Ken Burns effect to the clip. Double click on the crop icon to open the clip back up in the Viewer window so that you can edit or make changes. Clicking on the 'Fit' button will return the video to its original size.
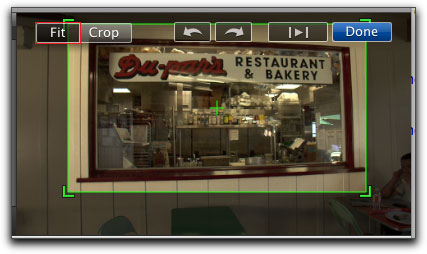
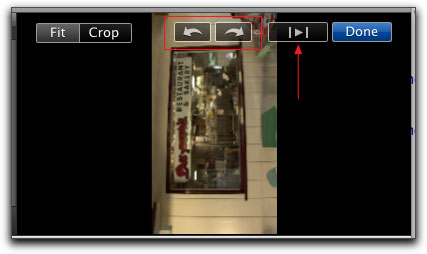
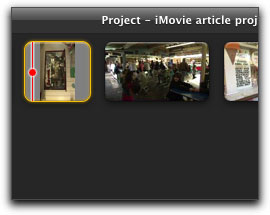
Center top of the window are two 'Rotation' arrows to rotate the video 90° clockwise or counter-clockwise. The icon just to the right of the Rotation icons is the 'Play' button. Notice that if you have rotated the video, back in the Edit Project widow, the thumbnail of that video has been rotated too.
Clip Adjustments
Selecting 'Clip Adjustments' from the Gear (Action) menu in the Edit Project window opens the iMovie Inspector. You will notice that while Clip, Video and Audio Adjustments are available from the Action menu, they are also available as tabs in the Inspector window. The Clip tab in the Inspector provides us with both information and settings to affect the selected clip. Near the top is the Duration and Source Duration. You can click into the Duration field and change the duration of the clip. Click on the Video Effect button and the Effects Palette will open. We can also change both the speed and direction of the clip and add image 'Stabilization' to the clip. When you have made your adjustments click 'Done' and the change will be applied. Additionally you can invoke the Inspector palette at any time by selecting the clip and clicking on the Inspector button in the Tool bar.

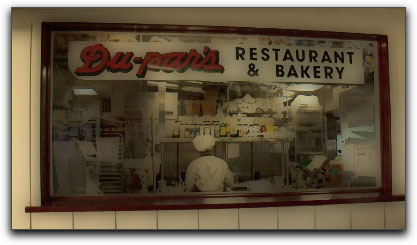
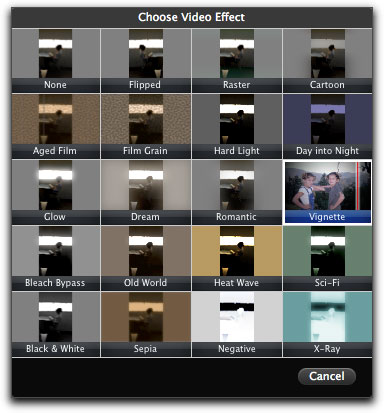
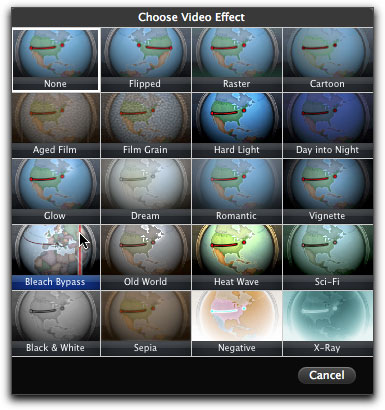
Click on Video Effect button to open the Effects Palette, which offers 19 different Effects that can be applied to the selected clip. Now here is one really amazing feature of iMovie's Real Time abilities. In the Effects palette, each Effect thumbnail is actually a miniaturized version of the selected clip. As you movie your cursor over the different effects in the palette, tiny versions of the clip play out right in the palette window and the Viewer window shows you the results of that effect full size and in Real Time and all you are doing is moving your cursor around the palette. The Cartoon effect is shown below right. If you want no effect or to remove an effect, click 'None' upper left of the palette. There is also a 'Flipped' effect which can come in handy.
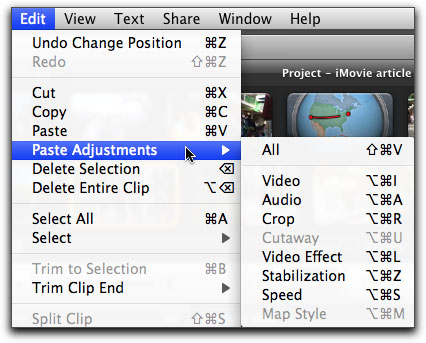
After having made adjustments to a clip, you can Copy the adjustments and Paste them to other clips. Select the clip and Copy, then, select the clip (s) you want to add the adjustments to and from the File menu > Paste Adjustments. There will be a list of the different adjustments that you can paste.
 Sometimes the video we are working with is shaky due to camera movement during the recording process. Running while shooting or shooting from a moving vehicle can cause this.
During the initial Import process we are given a chance to 'Analyze for stabilization'. This process does not stabilize the incoming video but rather analyzes it so that we can 'Stabilize' the video at a later time. This process can take awhile, so you may want to see which clips, if any, need stabilization and then perform the process just on those clips that need the help when the time comes, this can be done later from the Inspector for the clip in question. Stabilization is a two step process. First the video needs to be analyzed, then later, stabilized if requested.

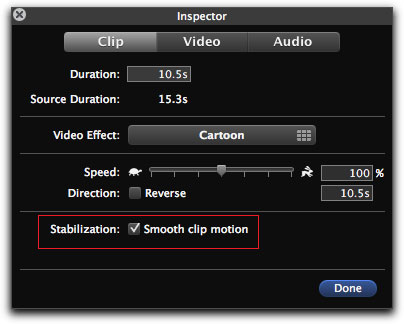
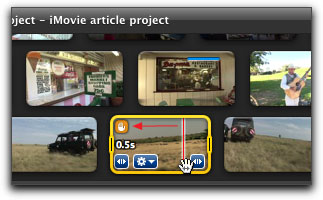
When you have turned Stabilization on, you will get a process bar. When the analysis has completed, the stabilization will be applied. In the Edit Project window, look at the clip that has been stabilized and you will see that a 'hand' icon has been added (red arrow).

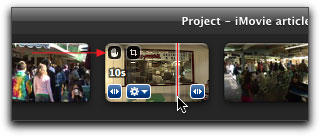
Double click on the hand icon to return to the Inspector, where you can make adjustments or turn stabilization off. The stabilization process involves moving the video image in the opposite direction to the movement of the camera and it becomes necessary to enlarge the video, to be able to crop out the uneven edges of the video. The greater the enlargement, the greater the amount of cropping required. You can control the degree of zoom, using the Zoom slider in the Inspector, to find a balance between the amount of smoothing and the amount of cropped video. If you open the Inspector > Clip tab and there is no Zoom slider at the bottom of the window, this means that the clip has not yet ben analyzed.
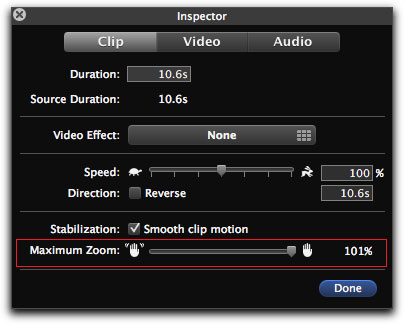
iMovie will inform us, in the Edit Project window, the level of zoom or enlargement applied to the clip. If the 'Hand' icon has a black background (below left) there is little zooming required to stabilize the video. An orange colored background requires more zooming (below center) and a red background requires a large amount of zoom, much of your video may be cropped out (not shown). If there is too much shake and iMovie can not successfully smooth the video, you will see a warning, a squiggly red line through the bottom of the clip (below right). A general rule of thumb, zoom in for greater stabilization, zoom out to show more of the picture. It often is a compromise. If you decide to turn stabilization off and then change your mind, you can turn it back on in the Inspector without the need to reanalyze the video.

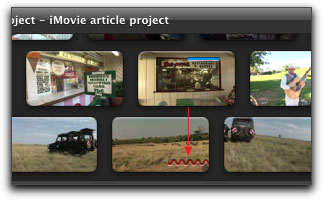
If you have clips that have too much shake and you get a squiggly red line through the bottom of the clips, noting that the clips are really not usable, you can hide those clips from view by clicking on the 'squiggly red line' button found at the bottom of the iMovie window. If you need to bring the problem clips back into view, click on the button again.

Video Adjustments
Selecting Video Adjustments from the menu opens the Inspector - Video tab, this window is called the 'Video Adjustment Panel'. When the Video Adjustment Panel opens, a color wheel icon becomes attached to your cursor and the video will loop as it is being played in the Viewer.
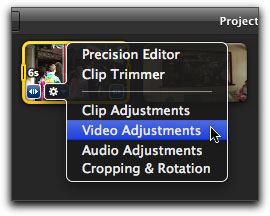
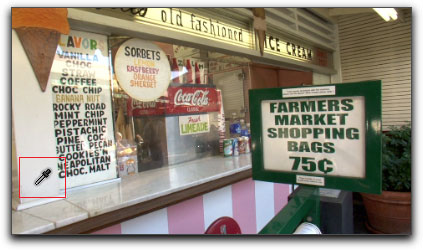
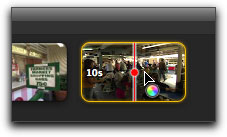 The tools offered in this window are pretty straight forward, easy to use, and work well. What is exciting here, is the fact, that as you play your video in the Viewer and make adjustments in the Inspector, the changes show in Real Time as the video plays back. A really good way to see the effect of your color corrections applied to the entire clip as it plays. Using the slider is good for getting you in the ball park, but on either side of the slider controls (red boxes) are small icons, that, if clicked, change the setting in one unit increments for fine tuning. There is also an 'Auto' button for automatic white balance, that when selected, turns the cursor into an eye dropper when placed into the Viewer window. Click the eyedropper on some part of the image that is supposed to be white, iMovie will set the white point for you. If you are unhappy with the automatic white balance, click on the 'Revert to Original' to remove the effect. When you have finished and clicked 'Done' and returned to the Project widow, you'll see that iMovie has placed yet another icon (color wheel) in the clip thumbnail. You can't say that iMovie doesn't tell you what it's doing.

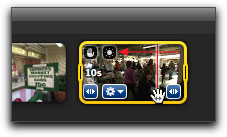
After having made adjustments to your video, you can Copy the adjustments and Paste them to other clips. Select the clip and Copy, then, from the File menu > Paste Adjustments. There will be a list of the different adjustments that you can paste.
Audio Adjustments
Selecting Audio Adjustments from the menu opens the Inspector - Audio tab.
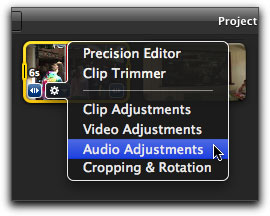
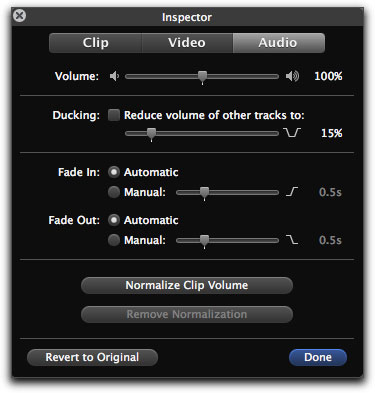
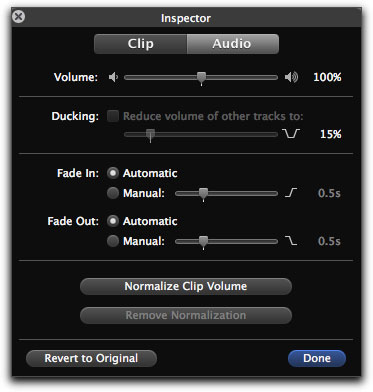
At the top of the Inspector window is the Volume slider for adjusting the volume of the selected clip. There will be situations where you'll be adding background music, sound effects, audio from other clips or voice overs. The 'Ducking' control allows you to reduce the volume of any added audio, giving priority to the audio that belongs to the clip. There are Fade In - Fade Out controls that when set to 'Manual' allow you to adjust the duration of the Fade from 0.0 to 2.0 seconds. Because we can use video clips that come from many different video shoots, it could be that the audio volume from the different clips is very different. We can use the 'Normalize function to adjust the audio volume across multiple clips, giving them equal volume levels. If you do not like the way your Normalized audio sounds, you can turn this feature off and remove the Normalization effect.
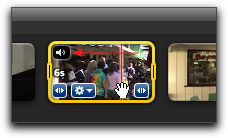
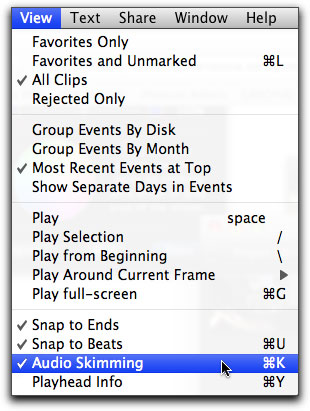
When you have finished adjusting your audio and have clicked on Done and returned to the Edit Project window, you see that the clip now sports an audio icon in the clip thumbnail. Double click on the audio icon to return to the Inspector. When skimming a clip in either the Event browser or in the Edit Project window, the audio will skim too. If the skimmed audio starts to become annoying, you can turn off 'Audio Skimming' from the View menu, you can also toggle the audio skimming on or off by clicking on the small audio skimming button in the Tool bar, below right. Even if audio skimming is turned off, the audio will still play normally when you playback your video in the Viewer window. You can 'mute' the audio of a clip, in the Edit Project window, select the clip and from the Edit menu > 'Mute Clip'. To turn the audio back on > 'Unmute Clip'.

After having made adjustments to the audio of a clip, you can Copy the adjustments and Paste them to other clips. Select the clip and Copy, then, from the File menu > Paste Adjustments. There will be a list of the different adjustments that you can paste.
Precision Editor
In iMovie we can trim (shorten or lengthen) a clip, photo, title, cutaway, audio track or transition by selecting the item in the Edit Project window and dragging on the handles on the left or right of the item. We can also click on the Gear icon of the clip and choose 'Clip Trimmer'. These techniques work well, but iMovie has a more powerful and accurate tool for us to use when working on the Edit point between two clips or two clips with a transition. Part of the skill of story telling is knowing exactly which frame to start or end a clip on. The tool is the 'Precision Editor', and it's a visual editing tool. When using the Precision Editor, a special window opens that shows both clips and if there is a transition between the two clips, that will show up too. It's a graphical tool that allows us to see the frames of video for both clips at the same time, displaying both used and unused frames. As we skim through the two clips in the Precision Editor window, the video is displayed in the Viewer window. As I said, a very powerful tool.
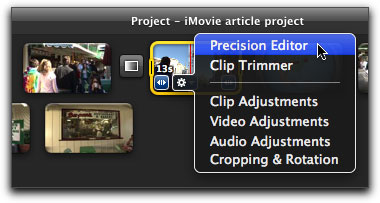
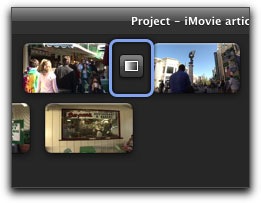
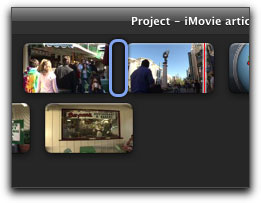
When we want to work on the edit point between two clips, click on the Gear icon of the second of the two clips and from the menu, select Precision Editor, shown below left. A blue box will be displayed between the two clips in the Edit Project window, showing that we are in Precision Editor mode. If there is a transition, the blue box will encompass the transition, below center. Below right, Precision Editor has been applied to two clips with no transition. If there is no transition, you can double click between the two clips to open the Precision Editor.
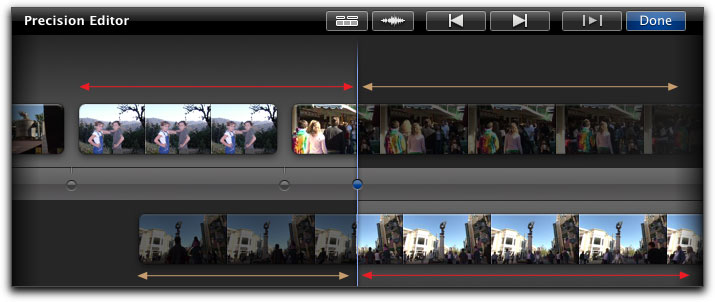
The Precision Editor window is shown below. The vertical blue line shows the edit point between the two clips. The top film strip is the first clip, the bottom film strip is the second or following clip. In the top or first clip, the video frames to the left of the edit point (blue line) are highlighted, the highlighted frames are the frames that will be used (red arrows below), the frames that come after the edit point are grayed out and will not be used (brown arrows below). With the bottom film strip or second clip, the frames to the right of the edit point are highlighted and are the frames that will be used, to the left of the edit point, the frames are grayed out, these frames are not in use.
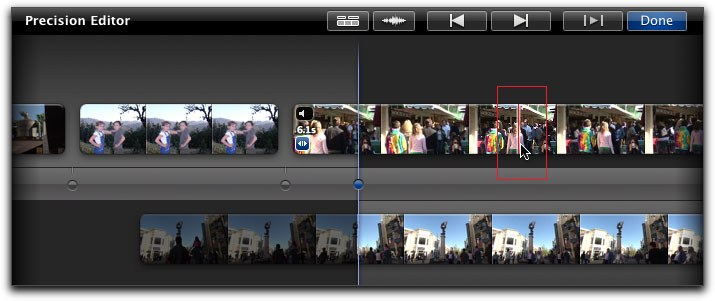
Using the Precision Editor is very easy. In the example below, I want to extend the length of the first clip. As I skim into the area of the first clip that is to the right of the edit point, the clips highlight and as I skim, I can see the video, frame by frame, in the Viewer window. Below, my pointer is on the exact frame that I now want to be the last frame in the first clip, red box below.
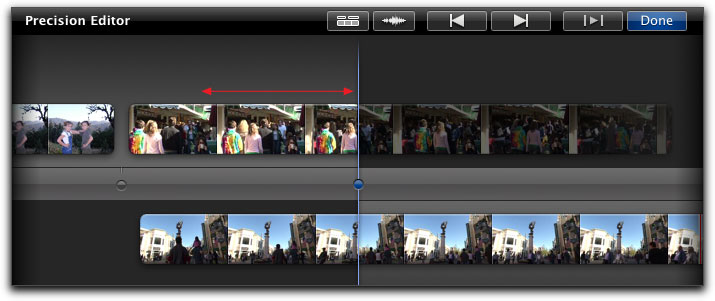
When you have the pointer on the frame that you now want to be your edit point, just click. The Precision Editor will move the frames between the edit point and the pointer to the left, into the highlighted area of used clips. Look below and you can see that the film strip has shifted to the left adding those additional frames to the end of the first clip.
The same process works for the lower or second clip. I want to add some additional crowd footage to the start of the incoming clip. Below I have skimmed to the left, in the unused section of the clip. As I skim, I can preview the frames in the Viewer.
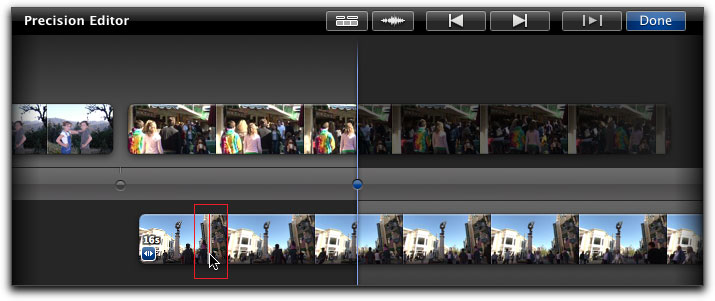
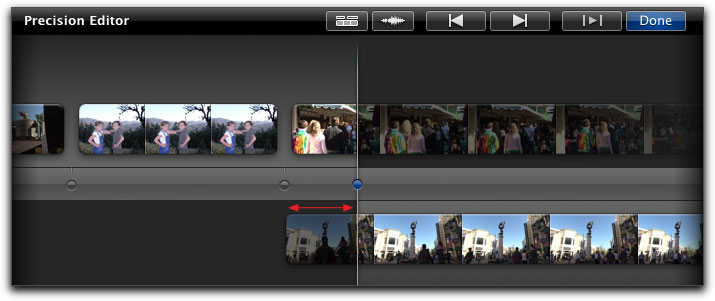
When I have found my new starting frame with the pointer, I click. The frames that were to the left of the edit point and were not used, have been moved to the right of the edit point and will now be added to the start of the second clip for playback. In both of my examples I have added frames but of course you can move the pointer in the opposite direction and remove frames from either of the two clips. Just skim in the used area till you find your new start or end frame and click, very simple.
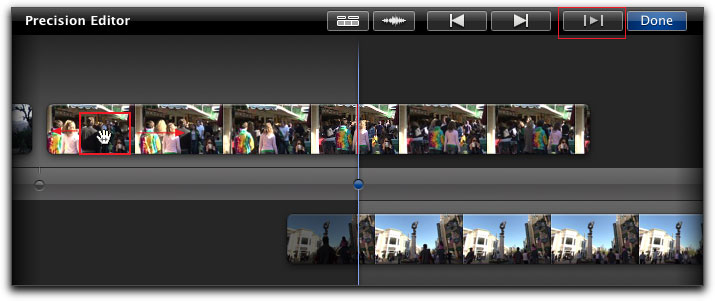
Another way to use the Precision Editor is to place the pointer over a clip, it turns into a grab hand, red box below left. You can click with the hand and drag the film strip left or right, viewing the frames in the Viewer window as you go. When you find the correct frame and release the mouse button, the trim will be made. We can play and audition our current edit by clicking on the 'Play current edit' button, red box below right. Just to the left of the 'Play current edit' button are 'Show Previous edit' and Show next edit' buttons, so you can navigate from one edit point to the next right in the Precision Edit window.
There is an often used editing technique called a 'L-cut' or 'Split Edit', in which the audio from one clip extends into an adjoining clip. We use the Precision Editor to create this type of audio cut and use the same technique as when trimming video. In order to work with the audio we will need to turn on the audio track, audio wave forms, in the Precision Editor, click the Waveform button in the Tool bar.

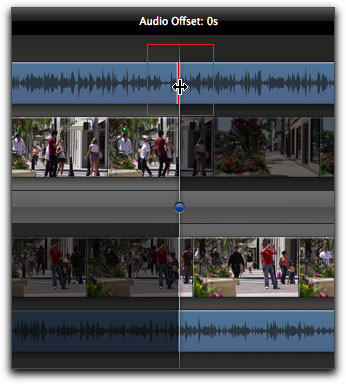
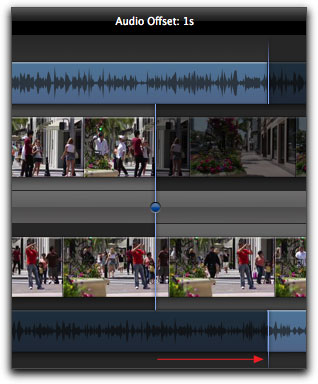
The Precision Edit window is shown below with the audio tracks turned on. There is a blue vertical edit line that cuts through both the first (top) clip and the second (bottom) clip. It is where the blue edit line intersects the audio track, that we do our trimming. In this case, the audio at the start of the second clip is not very good, but the audio of the first clip, even after the edit point is fine. What I want to do is to extend the audio of the first clip into the second clip, to replace the bad audio at the start the second clip.
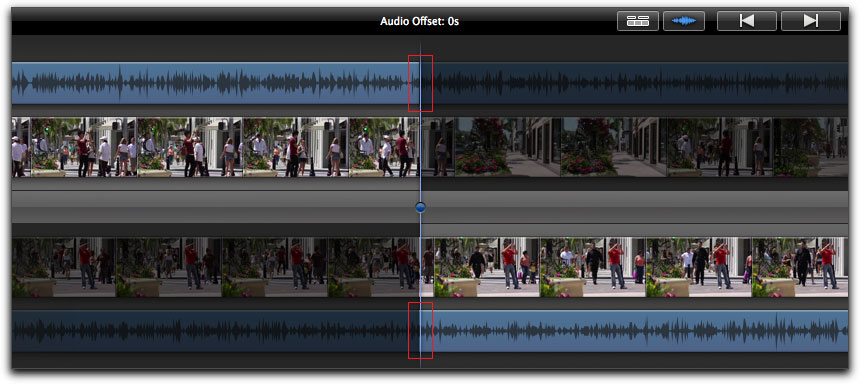
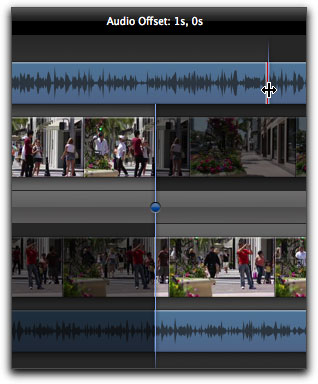
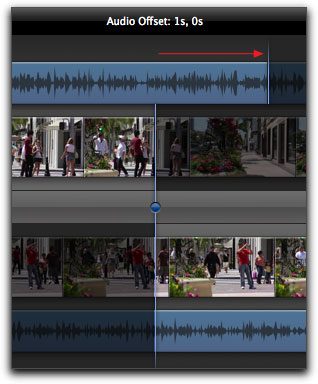
Placing the cursor over the blue edit line, turns it into a left-right arrow, red box below left. I have clicked on the blue edit line that runs through the top audio track and dragged the edit line to the right, extending the audio of the first, or out going clip, into the second, incoming clip, below middle. Below right shows the new position of the blue edit line in the audio track. As you can see, the audio that is between the original edit point and the new edit point is no longer grayed out, it is now highlighted and will play.
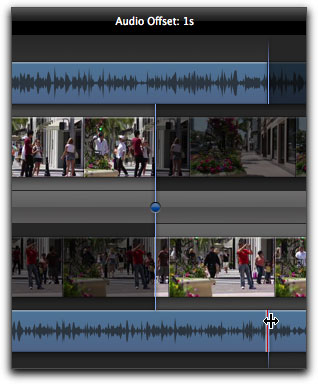
Great, I now have better audio playing into the start of the second clip, but the bad audio of the second clip is still playing. I need to shift the edit point of the bottom (second) clip to the right, excluding the bad audio. As shown below right, the blue edit line in the bottom clip has been moved to the right and falls exactly under the edit line of the top audio track. In the bottom track, the audio that is between the original edit point and the new one is now grayed out, it will no longer play.
We can also use the Precision Editor on other elements of our Project, such as photos and picture in picture, green screen, markers and titles. This also includes all audio and sound effects. Basically any element that has a duration can be trimmed in the Precision Editor. The ability to see each frame of video in the Viewer window as you skim in the Precision Editor is extraordinary.
One tool I would like to see incorporated into the Precision Edit window is the yellow guide lines that we have in the Picture in Picture function in the Viewer window. This would facilitate lining up edit points of the video and audio tracks.
Transitions
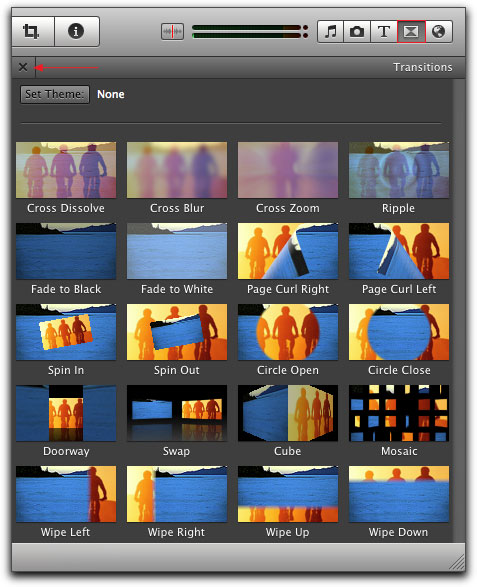
iMovie offers 20 transitions to use in our Projects. You open the Transition palette by clicking on the Transition button in the Tool bar (Command 4 from the keyboard). The Transition palette will open into the Event browser space. To close the Transition palette, click on the 'X', top left of the palette window. You can audition the different transitions right in the palette by placing your cursor over each one, the transition thumbnail will play for you.
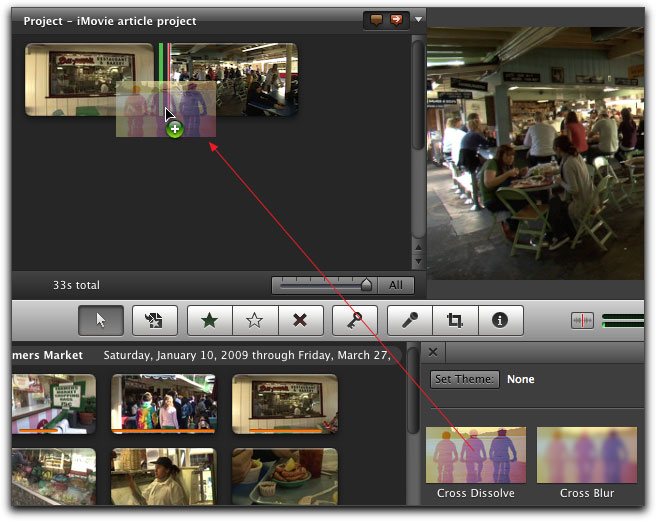
To add a transition, click and drag the transition from the palette into the Edit Project window and place the transition between the two clips of your choice. As you do this, you will see a green vertical placement bar, showing where the transition will be added.
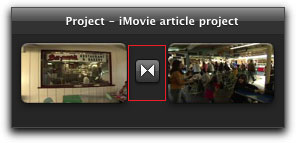
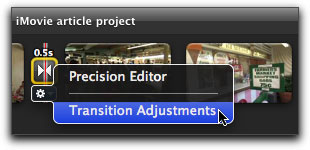
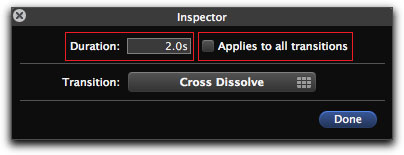
The transition icon is added between the two clips. To change the duration of the transition you can click on the transition icon to open the transition Inspector, or place your cursor on the transition and click on the Gear icon, you will get a drop-down menu, choose 'Transition Adjustment'. You can change the duration of the transition by clicking into the Duration box and make the change. If you want the new duration to apply to all transitions, put a check in the 'Applies to all transitions' box, this will change the duration of both existing and future transitions. You can also change your choice of transition.
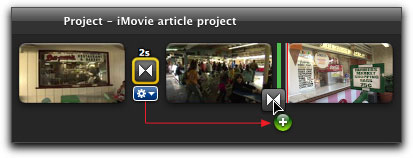
You can move the transition from one place to another by clicking and dragging to the new location, the green bar will light up to show your placement. If you hold down the Option key when dragging, you will make a copy of the transition. To remove a transition, simply select it and hit the Delete key. If you want to fade up at the start of your movie and fade down at the end, place the 'Fade to Black' transition at the very start and end of your movie and adjust the duration.
Titles
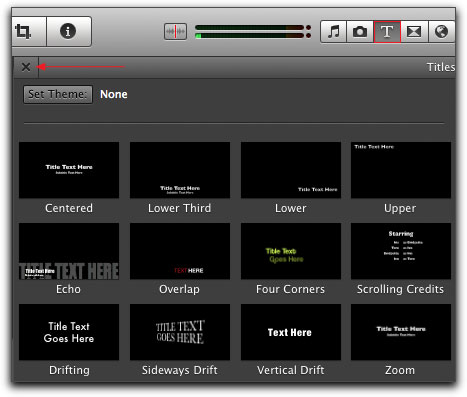
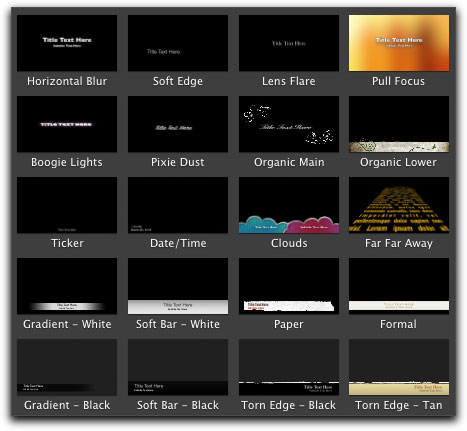
iMovie 09 comes with 32 Titles, a little more than half of which are animated, including Scrolling and Far Far Away credits and the ever popular Lower Third. Click on the Title icon in the Tool bar (Command 3) to open the Title palette, to close, click on the 'X', top left of the palette window. You can audition the different Titles by placing your cursor over each one, those that are, will animate for you.
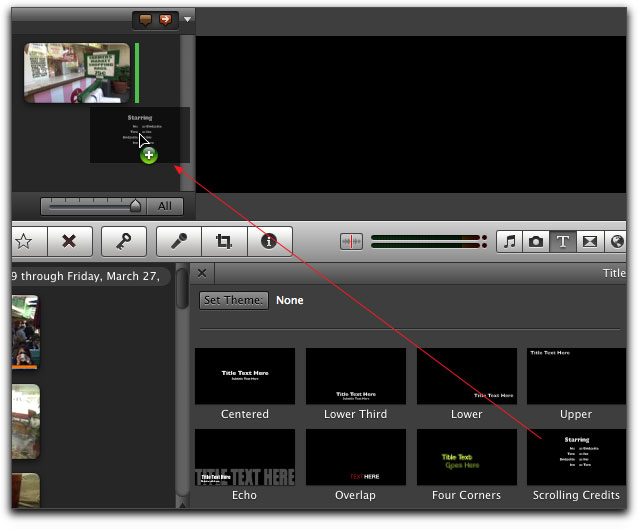
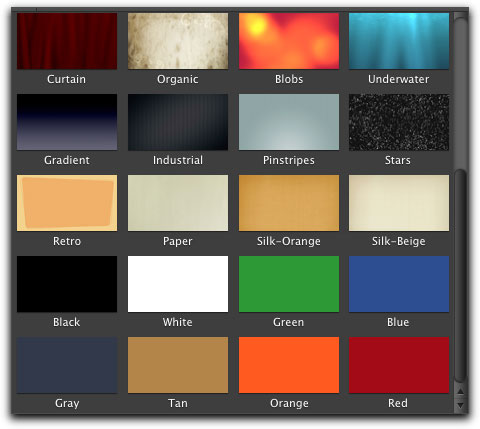
We can apply titles in two different ways. One way is to place the title on top of a clip. The other way is to place the title at the very start or end of the movie, or even in between clips, but doing it this way, we are placing the titles over empty spaces, so a background for the titles will be required. I have dragged the Scrolling Credits title into the Edit Project window and dropped it at the very end of my movie. As soon as I release the title, the 'Choose Background' palette opens. As you move your cursor over the different backgrounds in the palette, they will show in the Viewer window. Some of the backgrounds are animated, place your cursor over a background and hit the space bar, the animated background will play and loop in the Viewer. You really get to see what what the backgrounds look like.
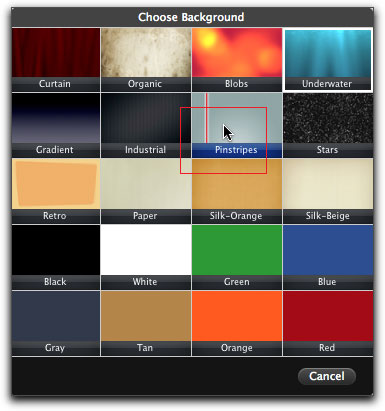
Be careful here, if you 'click' on a background in the Background palette, the Background palette closes and the background is set in the Viewer. Well, there is always Un-do. It is important to note that we are dealing with two different elements. We have the background and we have the title, they are separate entities. If you want to change the background, you must double click on its icon in the Edit Project window. If you want to change the title, double click on its icon.
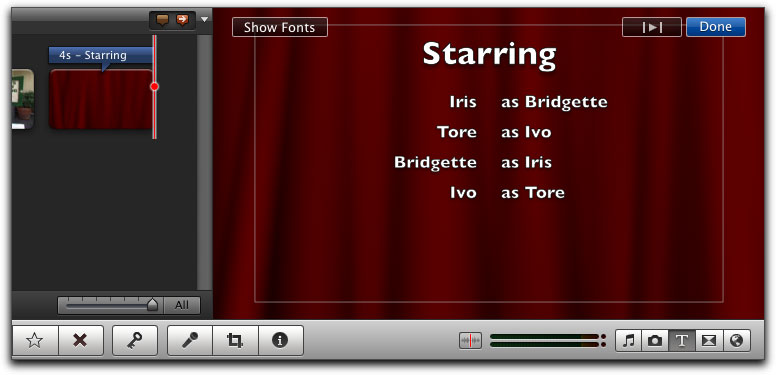
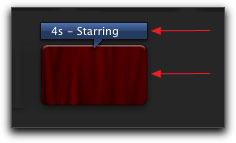
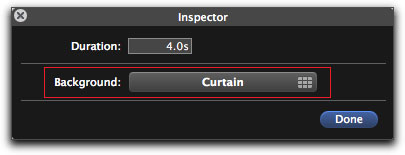
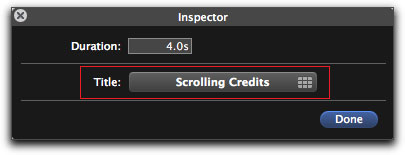
Double clicking on an icon will open the Inspector, Click on 'Background' or 'Title' to open up the palettes and make your changes. Also, here in the Inspector, is where you set the duration for the background and the title.
Here is something interesting, look below left, the blue title icon bar looks like it's pinned to the clip. Well it is. Click on the clip and drag it to a new location in the Edit Project window and the title goes right along with it.
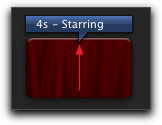
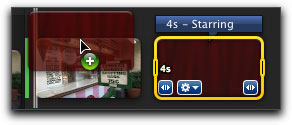
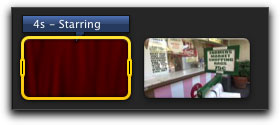
But, if you click on the blue title icon bar and drag, you can change its position relative to the clip. If you drag too far, iMovie gives you several cryptic warning icons.


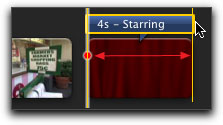
Click on the title icon in the Edit Project window to edit the title in the Viewer. Click on the 'Show Fonts' button.
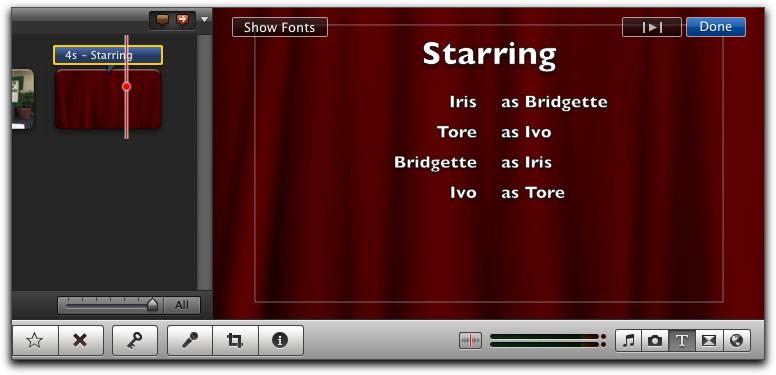
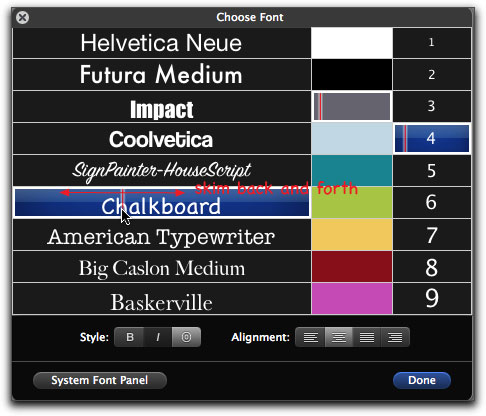
When the Font palette first opens the title may disappear from the Viewer. Place you cursor over one of the Fonts in the palette and skim back and forth, you'll see the title reappear in the Viewer. As this is a scrolling title, as I skim the title will scroll in the Viewer. Move from font to font until you find the font you want. Click on the font name to select it. A white bounding box will now appear around the font name. Do the same for the font color and font size. You can see the white bounding box around 'Chalkboard', font color gray and font size 4. There are several additional settings available. Click Done when finished.
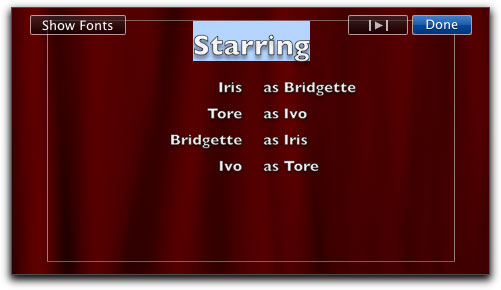
Changing the text in a Title is done in the same manner as working with text in any text application, click and drag through the text, to select it, then type in your new text.
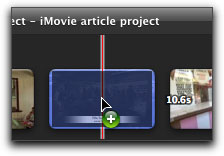
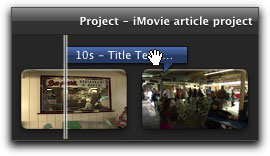
To add a title over video, simple drag the title from the palette onto a video clip in the Edit Project window. You can reposition the starting point of the title by dragging the blue title icon bar in either direction. As you drag, the pointer (thin red vertical line) moves showing the starting location for the title.
You will adjust your font settings in the same manner as before, select the title icon in the Edit Project window and click in the Viewer.
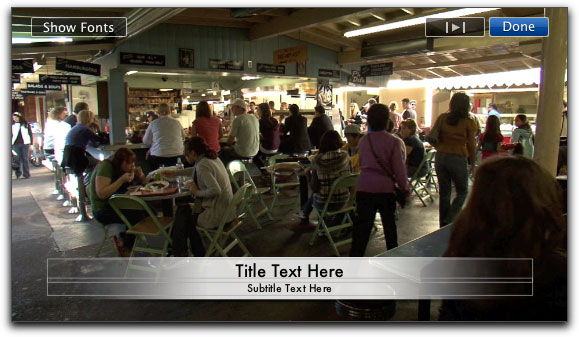
The iMovie Font's palette offers 9 different fonts and 9 different font colors for you to pick from. But, as described in the iMovie Preference section of this article, you can set your own fonts, picking from the Apple system font list. You can also set font colors to colors of your choosing. Changes that you make to the Font palette in iMovie Preferences will show up throughout iMovie.
Photos
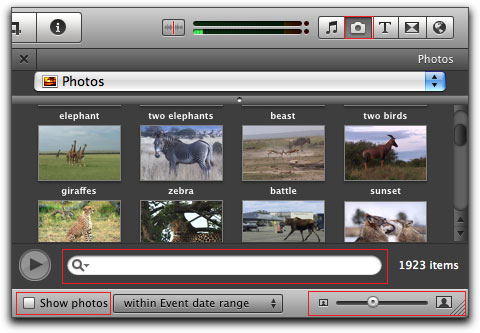
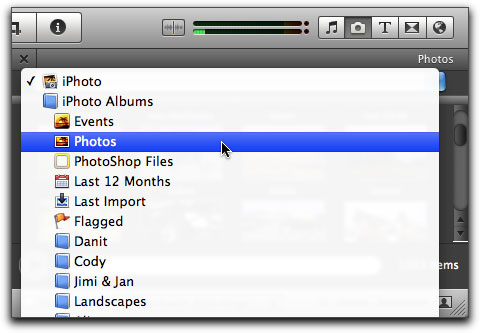
There are a number of different ways to work with photos in iMovie. The first and most obvious is iMovies' connection to iPhoto or Aperture. Click on the 'Photo Browser' button in the Tool bar (Command 2). The Photo browser offers several ways to search for photos. There is the standard Search box, lower left of the window is a search by date range, shown unchecked here. Lower right, you can vary the size of the thumbnails in the photo browser. Clicking on the 'Photos' drop-down menu provides access to your iPhoto Albums.
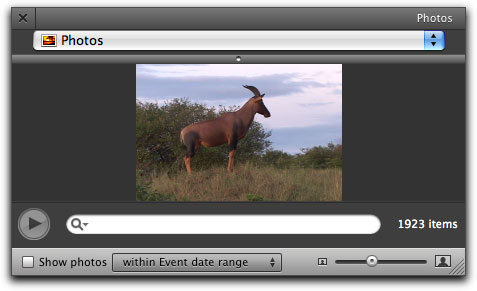
Double clicking on a photo thumbnail will open that photo up in a larger size in the photo browser. Please remember that I have set my iMovie interface to its smallest size for this article, with the interface at normal size you get a much bigger picture. Click once on the enlarged image to return to the photo browser. When you have found the photo that you want to use, drag it into the Edit Project window and drop at the desire position.
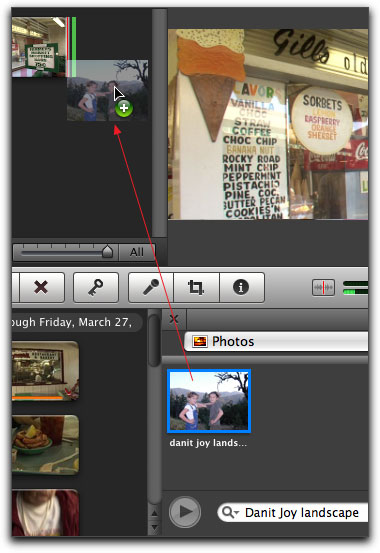
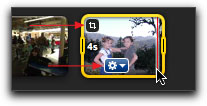
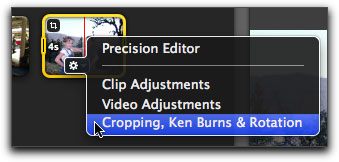
With the photo in place there are two ways to access the iMovie photo controls. All photos in iMovie will have a small crop icon upper left in the thumbnail which you can double click on to open the photo in the Viewer window. There is also a 'Gear' icon that you can click on and select 'Cropping, Ken Burns & Rotation'. Either way works the same.
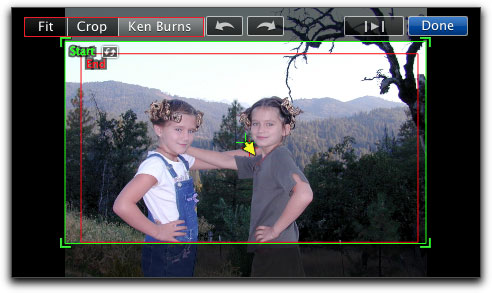
If you place the photo into the project and do nothing else, it will play with the Ken Burns effect (turned on by default) and last for four seconds. Click on Fit or Crop to turn off the Ken Burns effect. Double click on the photo thumbnail in the Edit Project window to launch the Inspector, where you can set the duration of your still photo. The Inspector also offers access to both the Clip Video Effects palette and the Video Color Correction window. The 'Choose Video Effect' palette is open below, as you move your cursor over the different effects, they play in Real Time in the Viewer window.
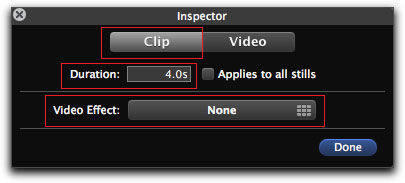
Clicking on the Video tab opens the Video Adjustment Panel. Just as when working with video clips, you can preview the Video Effects or Color Correction to the photo in Real Time in the Viewer window. The photo loaded into the Viewer shown below right at default.

When iMovie works with a photo, it will do its best to fit the image to the screen but it will alway protect the aspect ratio of the photograph, that is to say that no matter what you do with the photo, there will be no distortion or squeeze applied. In the example shown below left, I have clicked on the 'Fit' button. iMovie fills the window top to bottom but because of the shape (aspect ratio) of this particular photo, it is not wide enough to fill from side to side. Below right, I have selected the 'Crop' button. iMovie produces a single green cropping box over the image. When I created this project I chose Widescreen (16:9), so the green cropping box is in the Letterbox format.
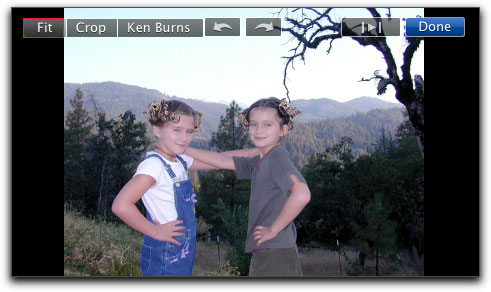
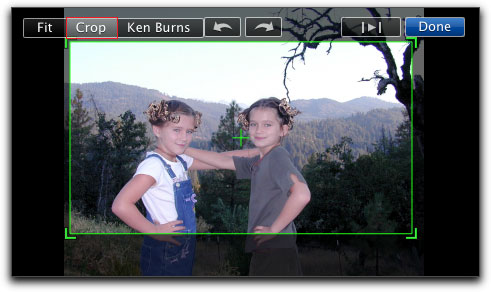
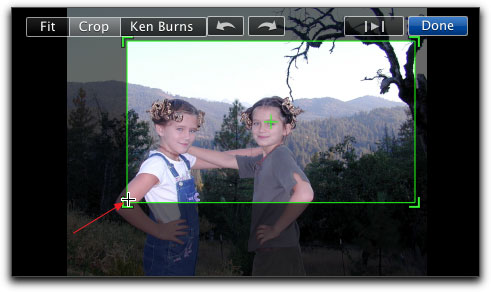
I have reduced the size of the cropping box by dragging in one one of the corners. Below right, I have clicked on the center + and dragged to position the cropping box. When finished, click the Done button.
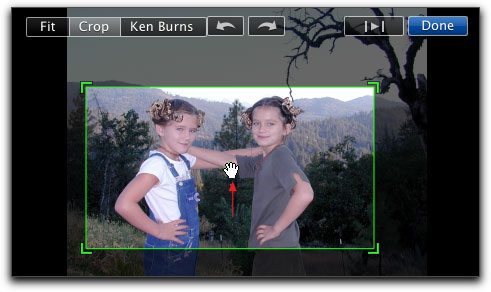
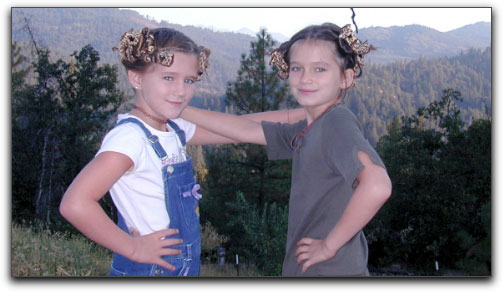
The finished photo is in the Viewer window. You can always go back and change both the size of the cropping box and its placement on the photo.
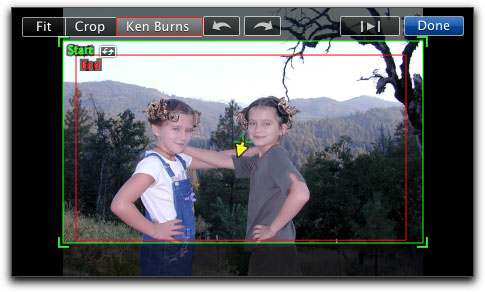
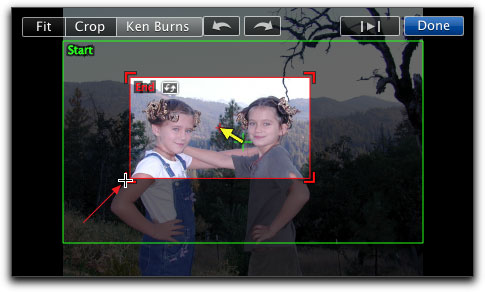
The next option is the Ken Burns effect. The photo in the Viewer has two boxes superimposed over the photo. The green box is the starting size and placement, the red box is the finished size and placement. You can tell that you are in the Ken Burns mode because of the yellow arrow head in the center of the photo. Click on the green word 'Start' to work the green border or click the red word 'End' to make the red boarder active. As shown below I have left the green Start border as is, I clicked on the red word 'End' and then dragged in from a corner to reduce the size and then clicked in the middle of the image and dragged to reposition. The small yellow arrow represents the movement and direction that will occur during the Ken Burns effect. Before you leave this window, you can play the effect in Real Time in the Viewer window. If you click the 'play' button upper right, the effect will play once and stop. If you play by hitting the space bar, the effect will play and loop until you stop playback.
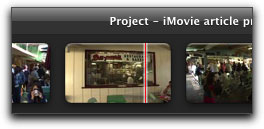
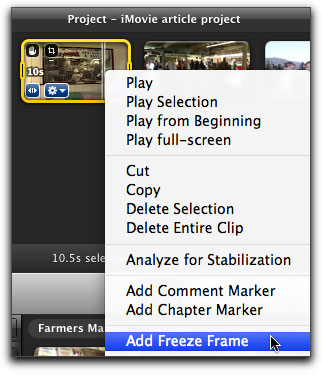
In iMovie we can make either a 'Freeze' frame or a 'Still' frame. To make a Freeze frame, in the Edit Project window, move the pointer over the frame that you want as your Freeze frame. Hold down the Control key and click, this will open a drop-down menu, select 'Add Freeze Frame'. This will add the Freeze Frame at the location of the pointer, with a duration of four seconds. Adding a Freeze frame is a little like stopping time. The video plays, stops, shows the freeze frame (for four seconds) and then finishes up. The original clip is below left. Below right you can see how iMovie works. It splits the clip, adds the chosen frame as a clip in the middle and then creates another clip with the remaining video. You can always change the duration of the Freeze frame and apply Video effects and Color correction. BTW, when iMovie plays through the Freeze frame, there is no audio. You can add audio back to the Freeze frame. More on this later.

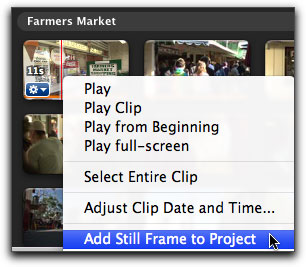
Adding a Still frame, we work in the Event browser, not in the Edit Project window as we did with the Freeze frame. In the Event browser, position the pointer over the frame that you want. Hold down the Control key and select 'Add Still Frame to Project'. A Still frame, with a four second duration, will be added to the end of your project in the Edit Project window, as shown below right. Again, as with any photo you can change the duration, apply Video effects and do Color correction. Just like a Freeze frame, a Still frame has no audio either. While iMovie places the Still frame at the end of your project, you can move it anywhere. A good use of Still frames is for backgrounds for movie titles and credits. You can 'tweak' the image using Video Effects and the Video Adjustment Panel.
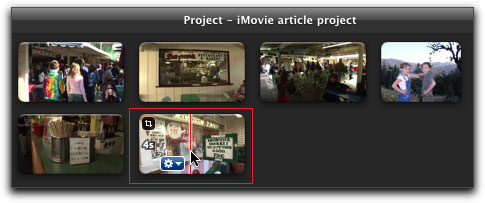
You can return to work on any photo, still or freeze frame in the Project by selecting it and clicking on the 'Crop' tool in the Tool bar.

Cutaway & Picture in Picture
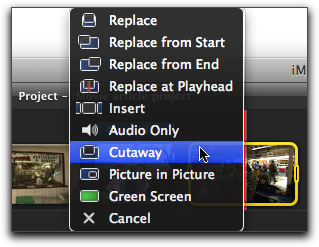
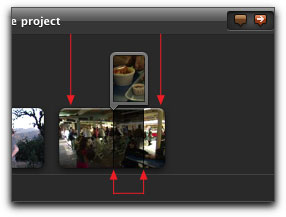
iMovie offers us the ability to add a 'Cutaway', or 'B-roll' to our movies, a standard editing technique. A video clip is playing, then cuts away momentarily to another shot and then back to the first clip. In the Event browser choose a clip, select that portion of the video that you want to use as the cutaway and drag it up into the Edit Project window and place over the clip that you want to have the cutaway. In this case I am using a close up of a bowl of shrimp as my cutaway to an outdoor shot of people eating. When you release the cutaway shot onto the clip in the Edit Project window, a menu appears, select Cutaway.
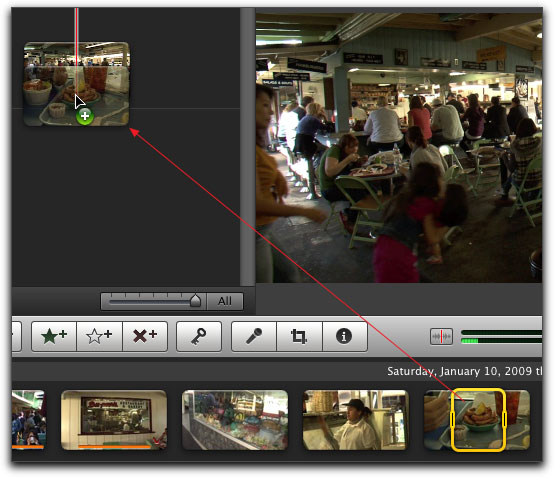
In the Edit Project window, after selecting cutaway, the entire line of video clips drops down and the cutaway clip is added, with a gray border, above the clip that it is attached to. Directly beneath the cutaway clip, in the main clip, is a gray shaded area that represents the cover of the cutaway in the main shot. You can click on the cutaway and drag it to a new position over the clip. Just as with any other clip in iMovie, all of the adjustments are available to a cutaway, crop, trim, video effects, video adjustments, audio, etc.
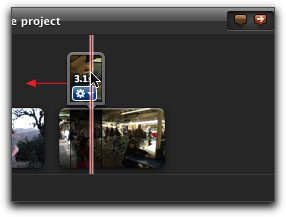
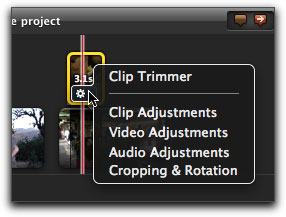
Double click on the cutaway to open the Inspector. You can fade the cutaway In and Out using the 'Cutaway Fade' slider and you can also reduce the opacity of the cutaway so that the underlying video shows through as shown below right. This gives a kind of 'cross-dissolve type of look.
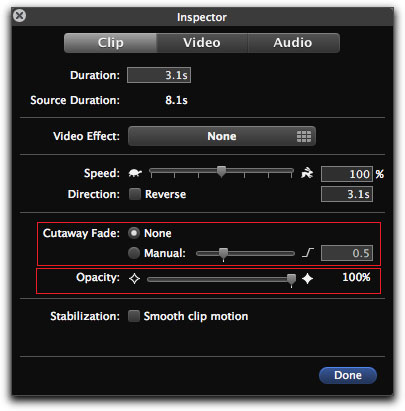
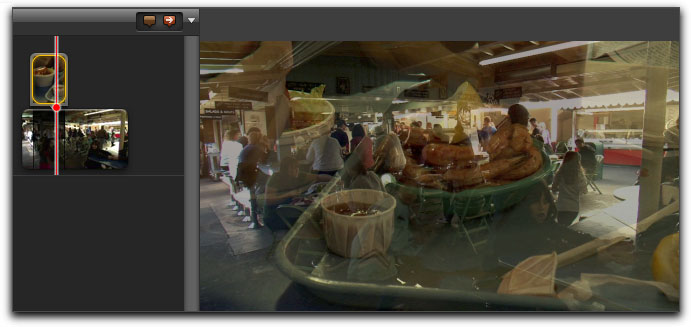
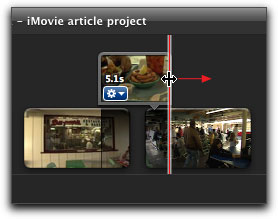
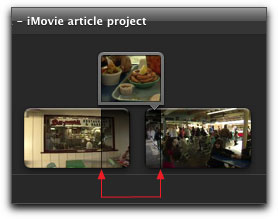
You can drag to reposition the cutaway, drag on the edges to change the duration of the cutaway and even position the cutaway over two clips. If there is a transition between the two clips that the cutaway covers, the transition will not play. When you add a cutaway over a clip, the audio from both the clip and the cutaway will play at the same time. You can adjust the audio from either the clip or the cutaway to achieve the sound you want.
A fairly familiar video technique used in Broadcast is the 'Picture in Picture', often called PIP. To achieve this effect in iMovie, in the Event browser, select and trim the video you want to play inside another clip. Drag it from the Event browser into the Edit Project window and place on top of the targeted clip. When you release the mouse button a menu appears, select Picture in Picture.
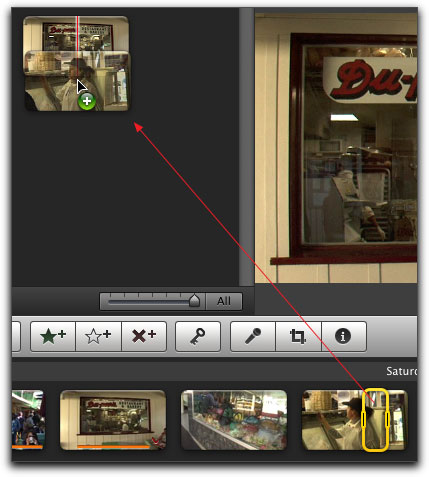
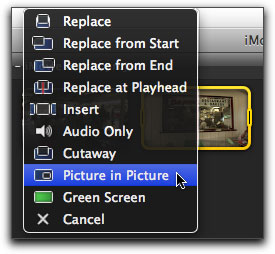
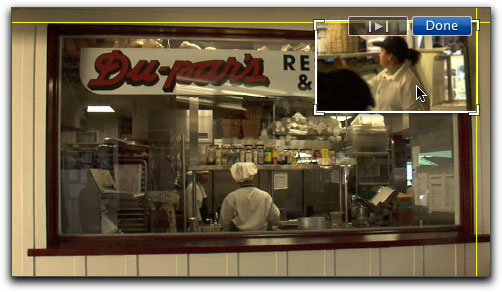
Just as with a Cutaway shot, with Picture in Picture, the line of clips in the Edit Project window drops down and the PIP is added above the clip. The Picture in Picture effect is denoted by a blue border around the icon. The area of the clip that the PIP covers is shaded gray just like a Cutaway shot. You can change the duration of the PIP by dragging on either end of the PIP. You can also click and drag to move it to a new position, even over two clips.
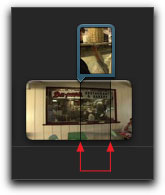
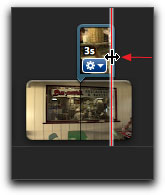
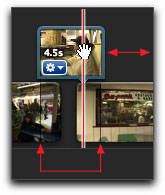
Click once on the PIP to select, in the Viewer window the PIP has been added. Four white corners have been added around the PIP.
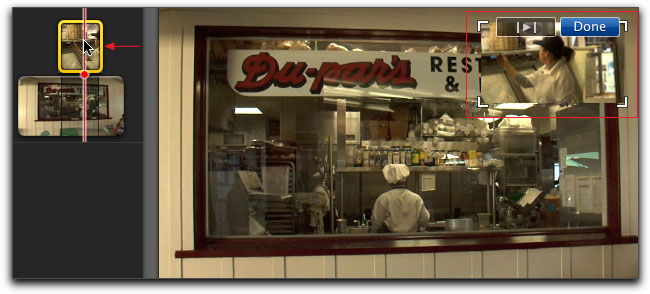
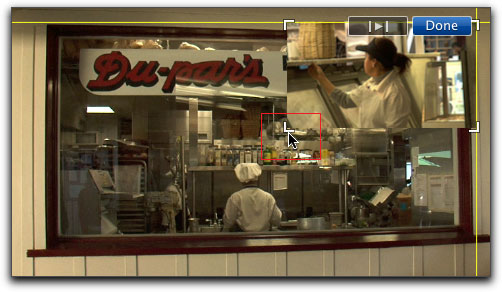
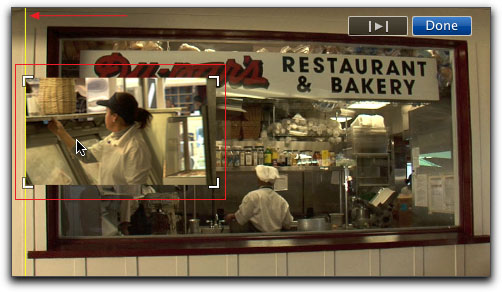
Click on a corner of the PIP and drag to resize the PIP. Click in the PIP and drag to reposition. As you reposition your PIP, yellow rules will appear to help with alignment.
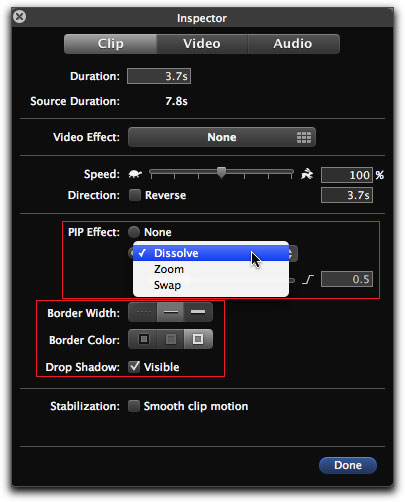
We can dress up the PIP, double click on the PIP icon in the Edit Project window to open the Inspector. There are three different border widths to select from. The border can be colored white, gray or black and a Drop Shadow can be added. There is the 'PIP Effect', if set it to None the PIP will just sit there. But there are three animated options. Dissolve, which fades the PIP in and then out, Zoom which starts the PIP out very small and zooms up to full size and then zooms back to small again. And there is Swap, the original clip shrinks down in size and moves into the PIP box, as the original clip gets smaller, it reveals the PIP clip, which is underneath and full size. With all three of these effects, you can adjust the duration of the effect in the Inspector.
Maps & Backgrounds
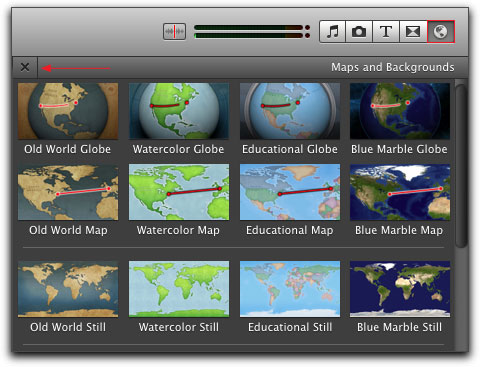
Ever since the first 'Indiana Jones' movie, animated Maps with traveling lines, have been a constant request. iMovie comes with 12 such maps. Click on the Map icon in the Tool bar (Command 5) to open the Maps and Backgrounds palette, to close, click on the 'X', top left of the palette window. The maps are shown below, the top two rows of maps are animated, the bottom row are still images of maps. These stills will work with the Ken Burns effect or can be used with Titles.
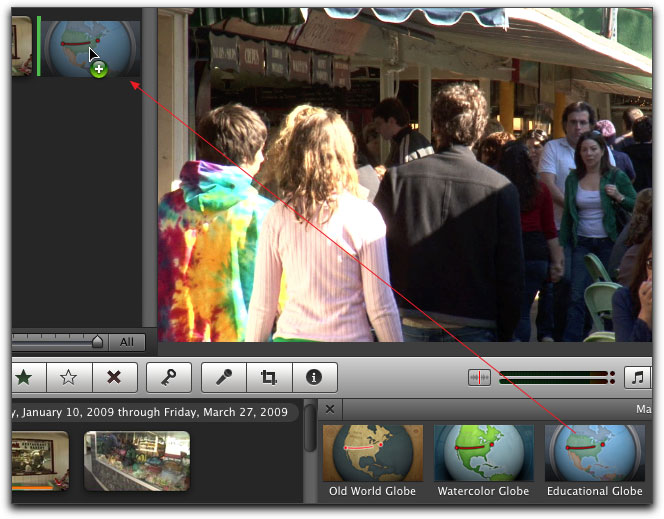
Select the map you want to work with and drag it up into the Edit Project window.
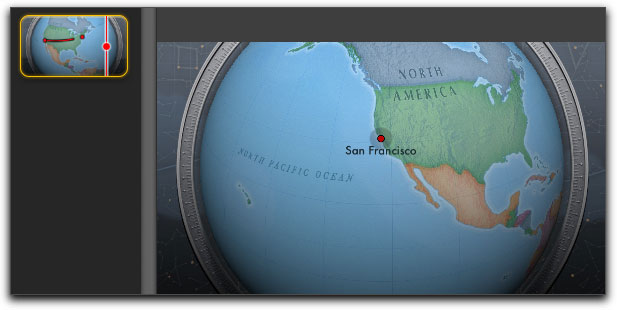
When you drop the map into place, the map loads into the Viewer and the Inspector opens, shown below right at default.
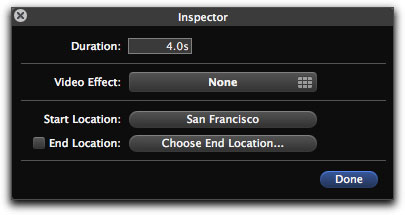
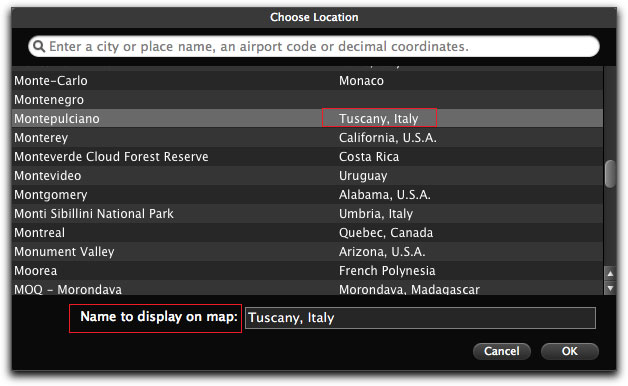
Click on either Start or End location. The 'Choose Location' window opens. You can enter information into the Search field at the top, or scroll through the large number of provided locations in the list. Once you have set the location (in this case Montepulciano), you can enter a name into the 'Name to display on map'. Click on OK and you'll return to the Inspector where you can change the duration of the map or add a Video effect. Interestingly, there is a 'Route distance' calculator.
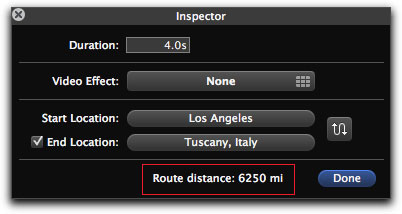
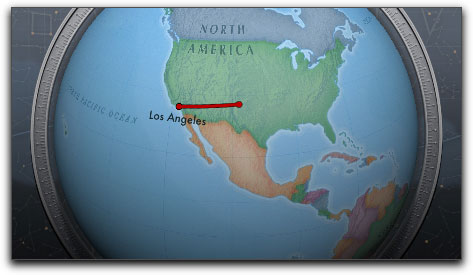
The animated globe will now spin and the route will be drawn onto the map. If you set you Start and End location and then decide to change the map you are working with, just drag a different map into the Edit Project window and drop it onto the map you want to replace. The maps will change out, but the locations will be carried over. If you want to continue the journey to a third location, add a second map to the Edit Project window, iMovie will use the End location of the first map as the Start location of the second map.
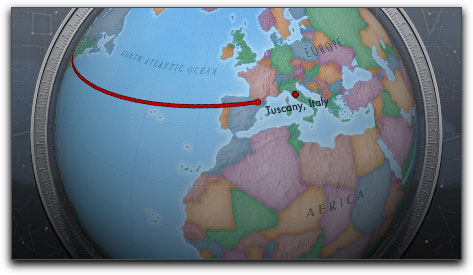
After you have set up your map, open the Video Effects palette from the Inspector. As you skim your cursor over the Effects thumbnails, they will play in Real Time in the Viewer. You can really change the look, the feel of the map to more properly reflect the mood of your movie.
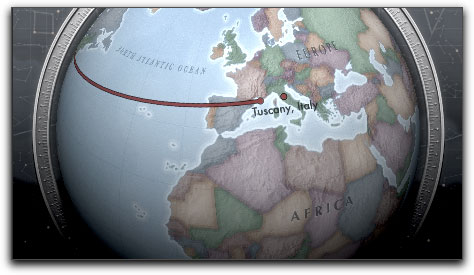
You can create maps in iMovie, and from the Share menu, export the finished animated map, as either Final Cut XML or as a QuickTime movie for use elsewhere. Excellent!
Backgrounds. When adding Titles at the very start or end of the movie, or even in between clips, you can not place a title over an empty space, a background for the title is required, so the 'Choose Background' palette opens automatically when you go to add a title. The Maps and Backgrounds button on the Tool bar, is just another way to get to the Background palette. You might want to use one of these backgrounds in conjunction with a 'green screen' video clip.
Music & Sound Effects
iMovie has access to all of your music in iTunes, click on the Music Note icon in the Tool bar to open the library(Command 1). In addition to the iTunes music, iMovie and iLife Sound Effects are available from the library as well. There are a number of different ways that we can work with music and audio in iMovie, let's start by adding Background music to our movie. Scroll through your music or albums or use the Search box at the bottom of the window to find what you are looking for. Select a song and click on the play button to audition. I admit to listening to my music from the library while working on this article.
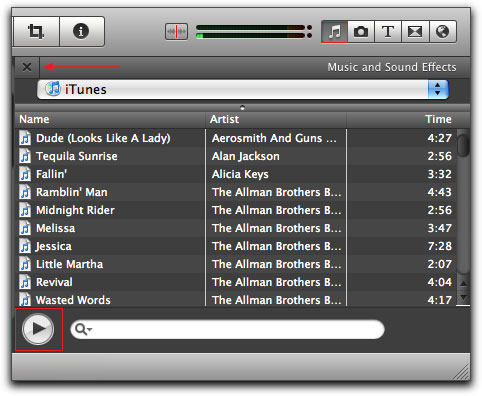
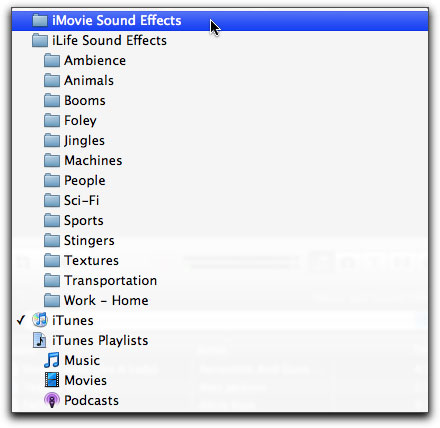
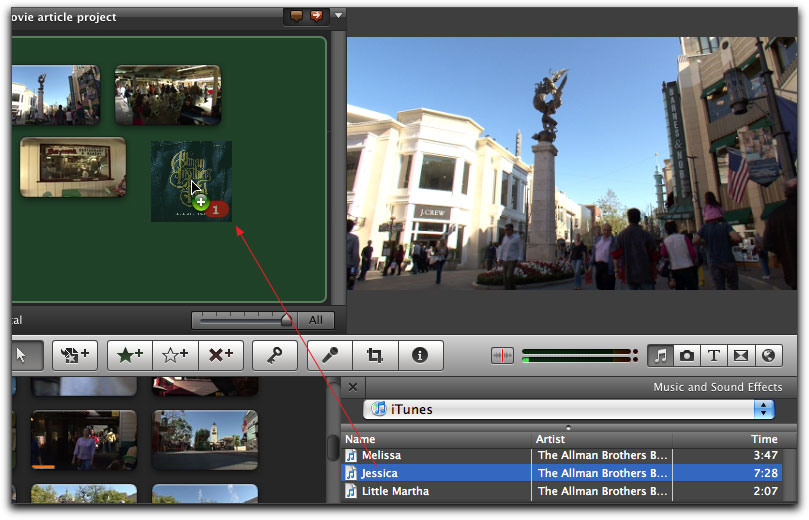
When you have located the music for your background, click and drag the music track up and into the Edit Project window. When you drag the music track into the Edit Project window, the background color of the Edit Project window will turn green. Be careful to drop the music after the last clip, at the end of the movie.
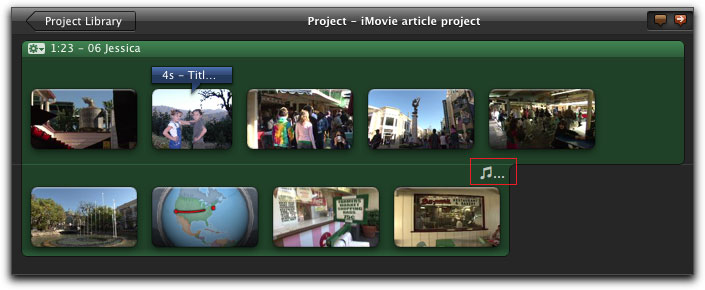
The length of the background music will adjust to the length of your movie. The music will start to play at the very beginning of the movie and play through to the end of the last clip. iMovie displays a musical note icon at the end of the Project to tell you that the music is longer than the video, shown below, red box. As you add clips, the music will extend out to cover the additional video, until you run out of music. You can add additional music tracks to lengthen the background music to cover your video. When you do this, iMovie will place a one second cross-fade between the music tracks. You can remove the background music by selecting it and hitting the delete key.
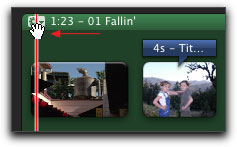
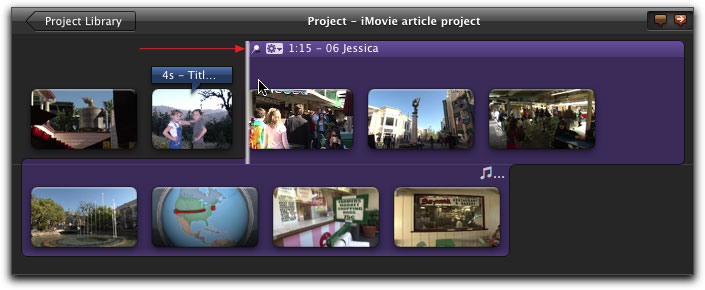
After you have added background music to your movie, you can change the starting point of the background music. Position your cursor in the upper left corner of the green background, your cursor turns into a grab hand, click and drag to the right. The color of the background will change from green to purple and a small 'pin' will be added to the purple background. Drag the pin to the desired start location for your background music. Because the background music is 'pinned' to your video clip, if you move the video clip to a new location, the background music will move along with the video.
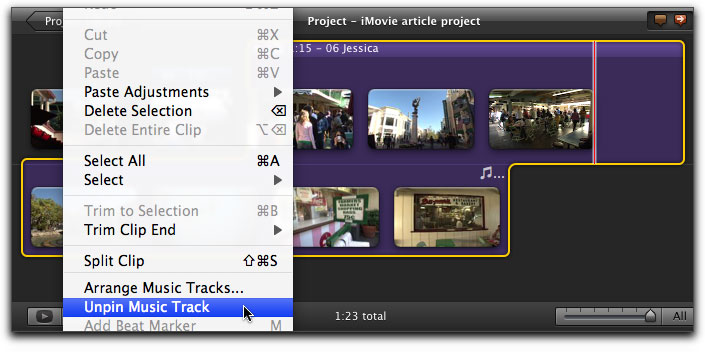
You can unpin your background music, select the background music and from the Edit menu > Unpin Music Track. The background music will return to its original state (the color will change back to green).
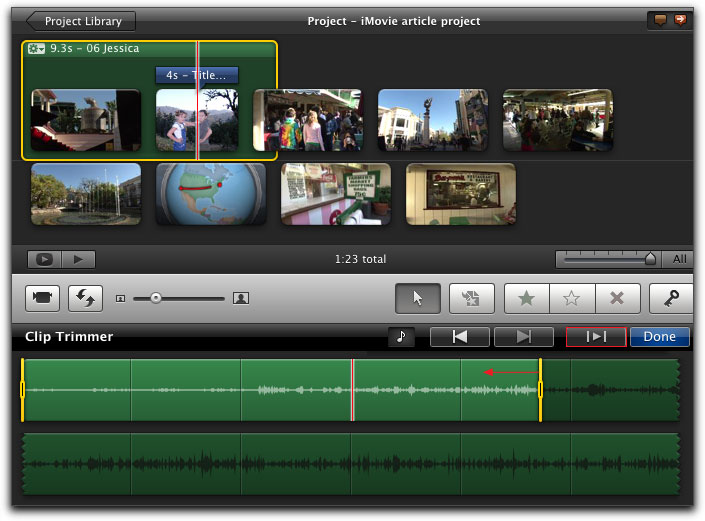
Another way to change the start or end of your musical background is by using the Clip Trimmer, available through the Gear icon, upper left of the background color.
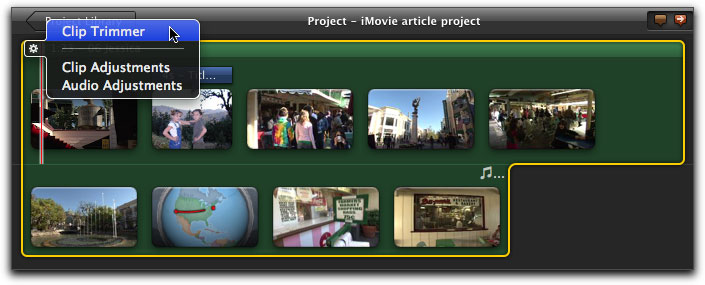
This will open the Clip Trimmer window. Click and drag the end handles, either start or end, to change the length of the music. I have dragged the end handle to near the start of my movie, it now covers just the first few video clips. This trimming process can be applied to all music, sound effects, audio tracks and voiceovers. You can check out your trim by clicking on the Play button in the Clip Trimmer window, the video will play in the Viewer as you listen to your music. When you have finished trimming, click the 'Done' button. The Clip Trimmer window will close and the trim will be applied to the music. iMovie will add a one second fade out to the end of the music clip. In the Edit Project window, double click on the green background to open the Inspector, where you can adjust your music.
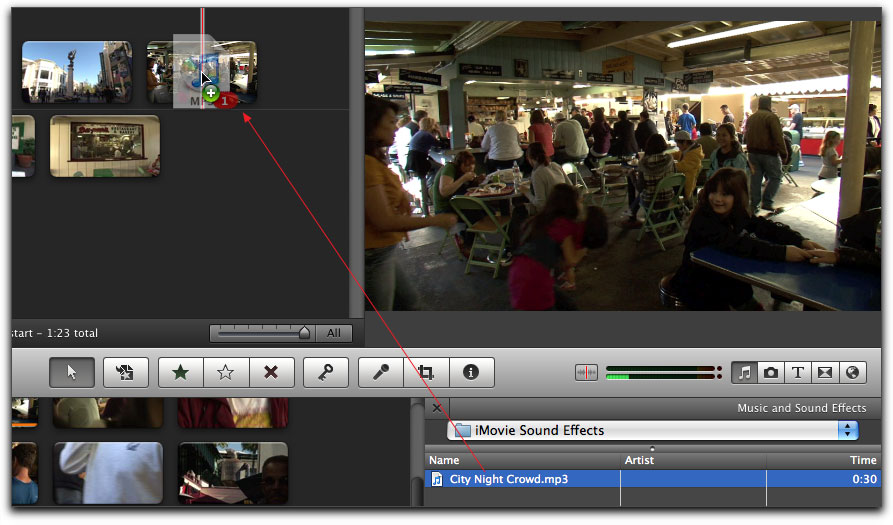
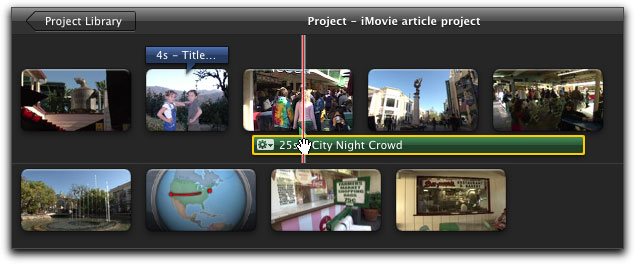
iMovie has two Sound Effects libraries, iMovie and iLife Sound Effects. I have selected 'City Night Crowd' as my sound effect and dragged it over the video clip that I want it attached to.
After the sound effect has been added, select and trim the start or end point of the effect by dragging on the handles. Double click on the sound effect to open the Inspector.
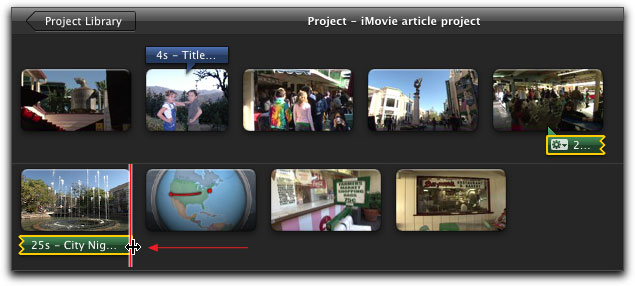

Click on the sound effect and drag it to a new location. The sound effect is pinned to your video clip, so if you move the video clip, the sound effect will come along for the ride.
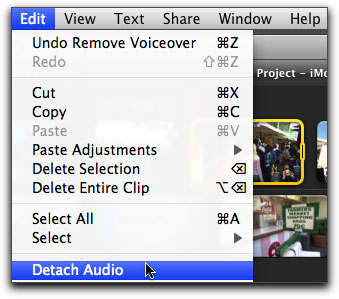
In iMovie, we can add to - or delete audio from a video clip. In the Edit Project window, select the clip and then, from the Edit menu > Detach Audio. When we have detached the audio from the clip, the audio becomes a purple audio track, separate from the video clip. You can select it and delete it.

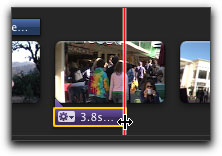
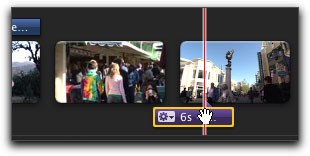
Below left, the audio has been shortened, below right, the audio has been moved to another video clip.
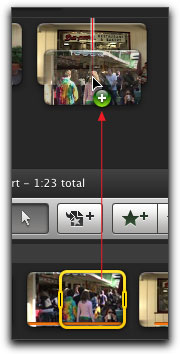
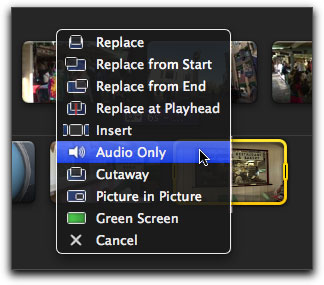
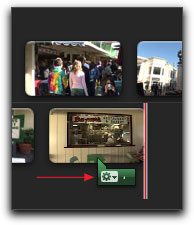
You can use the audio from a clip that is in your Event browser and add it directly to a clip in the Edit Project window. Select the clip whose audio you want and drag the clip up into the Edit Project window and drop on the clip that you want to add the audio to. When you drop the clip a menu opens up. Select 'Audio Only'. After the audio has been applied to the clip, you'll see it has a green audio track, pinned to the clip. Just like any other audio, you can open this in the Inspector, change the duration or position of the audio in the Project.
Voiceovers
Just as we can bring 'live' video into iMovie with an iSight or other camera, we can do Voiceover work as well. Click on the Voiceover icon in the Tool bar. This will open up the Voiceover window where you choose your input device. Most Mac portables have built in mics and cameras. When in Voiceover mode the Event Library and Event browser are grayed out.

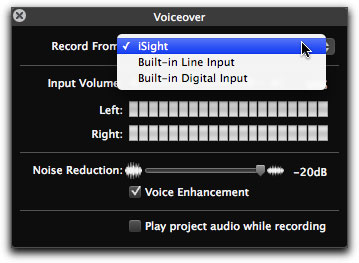
You can test your audio level and adjust the volume with the slider. You can also apply 'Noise Reduction' to lower background noise. iMovie can play back the project audio while you do your voiceover, but you are probably going to have to wear headphone if you use this feature. There is also Voice Enhancement, seems to be on by default. The Viewer displays the 'start recording' message. Place the cursor over a clip in the Edit Project window and it turns into the Voiceover icon (a microphone).
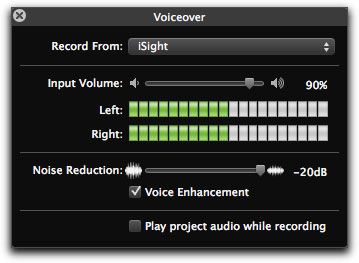
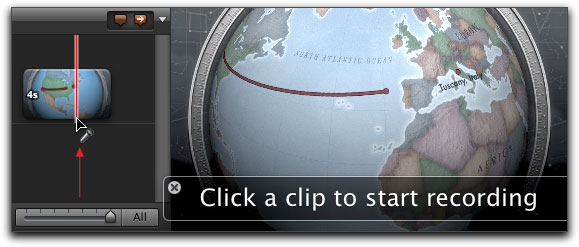
To start the recording process, in the Edit Project window, click with the Voiceover icon on the frame that you want your recording to start at. You will get audio alerts and a onscreen count down, 3- 2 -1.
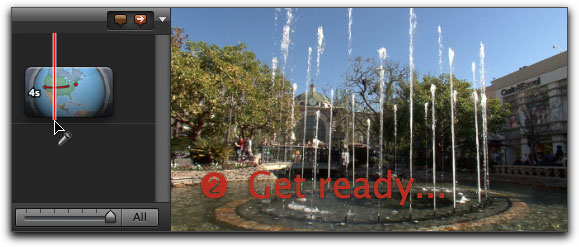
After the count down, you'll get a blinking 'recording' message in the Viewer window. As you record, the clip in the Edit Project window gets 'painted' red to show the progress of the recording.
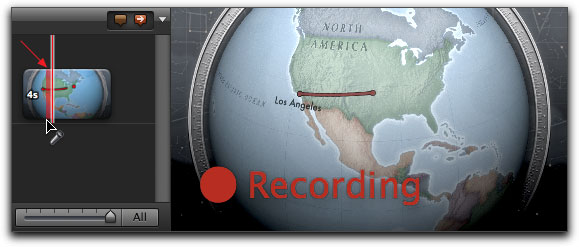
Click anywhere in the Edit Project window to stop the recording. The recording will stop but your cursor will remain a Voiceover icon. If you are finished, click again in the Edit Project window (just not on a clip), or click on the 'X' in the Viewer window, to exit the Voiceover mode. The Event library and browser will become available again. If you have not finished, you can click on any clip in the Edit Project window to do another recording. When you have finished your recording, a purple Voiceover icon will be pinned to your video clip. You can actually add several Voiceovers to one clip.
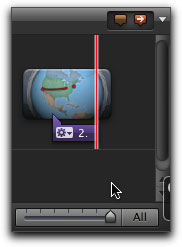
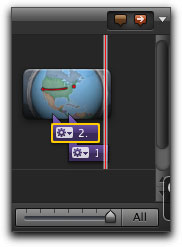
Markers
Markers are an important tool. When used with DVDs, Chapter markers enable us to jump from one part of the movie to another, Chapter markers also work in the QuickTime player, ATV, iPhone and iPods. Comment markers enable us to place notes into our project and quickly return to the marker at any time. There is also the Beat marker, used to cut video to the audio beat. You need 'Show Advanced Tools' selected in the iMovie Preferences to work with markers. Comment markers are brown in color, Chapter markers are orange with an arrow.
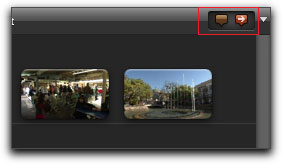
To add Comment markers, click on the Comment marker icon upper right of the Edit Project window and drag to the clip that you want to mark. You can place the marker at the exact frame you want. Markers are numbered by default, click on the number to select and then type in your own text.
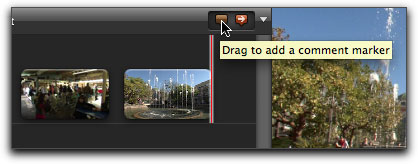
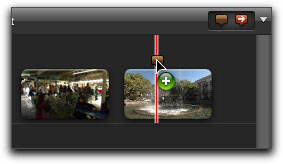
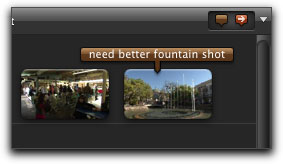
As shown below, I have added several Comment markers. With a large project and with Comment markers spread throughout, you can quickly navigate to any Comment marker by clicking on the small triangle just to the right of the Comment and Chapter marker icons, upper right in the Edit Project window.

From the marker drop-down menu, select the marker you want, iMovie will jump you to the marker and select it for you.

Chapter markers work in exactly the same way. After you have placed the Chapter marker, you can rename it. You can also select any marker and drag to a new location, or when selected, hit the delete key to remove. Select a marker and using the left/right arrows on the keyboard, move the marker one frame at a time.
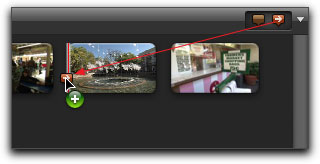
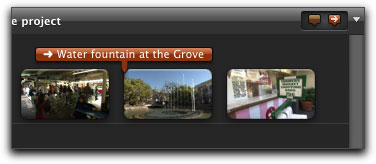
The Edit Project window now has both Comment and Chapter markers. Notice how iMovie will expand the clip track vertically to make room for the additional markers.

Using the Marker disclosure triangle, we now have immediate access to any Comment or Chapter markers. You can add as many Comment and Chapter markers as you need, no limit. You don't add a chapter marker to the start of your movie, this is done for you automatically.

The last type of marker offered by iMovie is the 'Beat' marker, as in 'Cutting to the Beat'. Also good for marking important sections on a music track, for cutting in photos in rhythm to the music. Beat markers can be applied to any audio, including sound clips, background music, sound effects, voiceovers, and detached audio. To engage Beat markers, click on the Gear icon upper left of any audio track.
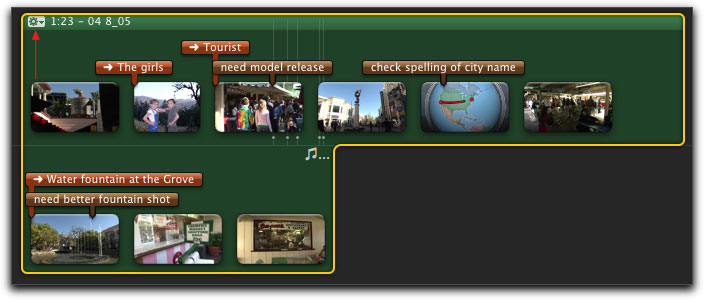
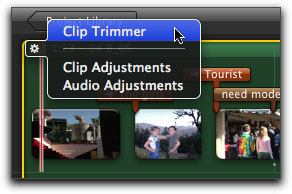
This will open the Clip Trimmer with an enlarged view of the clip audio and waveforms. You can add Beat markers by clicking on the musical note icon and dragging on to the waveform track. After you have placed a Beat marker, you can reposition it, or even drag it out of the window, it will disappear in a puff of smoke. You can also play the music in the Clip Trimmer window and add Beat markers by hitting the 'm' key in rhythm to the music.
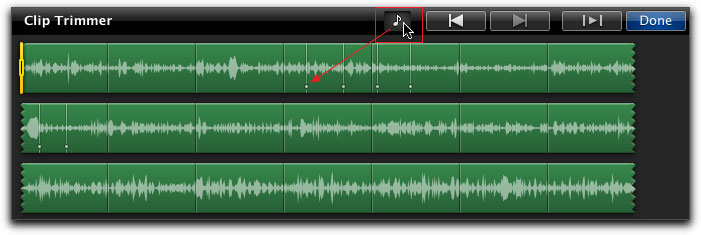
When you have finished and clicked on the 'Done' button, the Beat markers will show up in the Project as thin white vertical lines with a dot at the bottom of the line. Turn on 'Snap to Beat' from the View menu. As you work in the Project, when you move the pointer close to a Beat marker, the pointer will snap to the marker. Very important for accurate positioning.
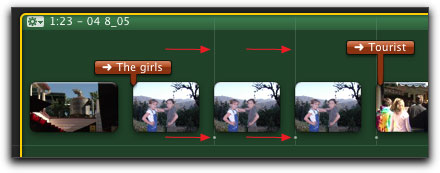
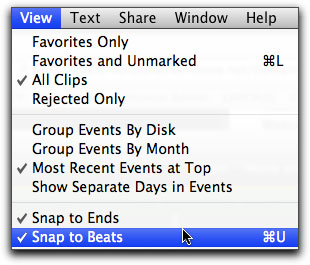
Green Screen
Green screen is a technique that allows us to combine two different shots together, making it look as though both were shot at the same time and place, as one video clip. The first clip, the green screen clip, is of someone or something in front of a green screen. This green screen clip will be added to another clip, one that contains the background for our new composite clip. iMovie will remove the green background from the green screen shot, leaving the subject of the shot floating in empty space (we don't really see this). This clip is superimposed over another clip so that the subject of the green screen shot is composited into the second clip.
To achieve a green screen effect, drag the video of the subject with the green background and drop it onto the clip that you want the subject added to. When you drop the green screen clip onto to another video clip you get a menu, choose 'Green Screen'.
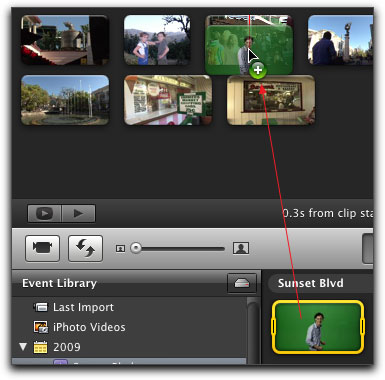
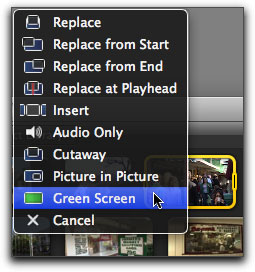
After green screen has been applied, the green screen clip will be placed above the other video clip in the Edit Project window. The clip that the green screen clip is superimposed upon will have a shaded gray area representing that part of the clip that has the green screen applied. You change the duration of the green screen clip by dragging on either end or by selecting the green screen clip and opening it in the Clip Trimmer. Drag to reposition. The green screen shot we are working with is almost perfect, notice that 'Full' is selected in the Viewer window.

But suppose that the green screen in the shot does not fill the frame or the lighting on the green background is not even, leaving different shades of green. An uneven green background can be difficult to work with. The shot below is perfectly lit, but the green background does not fill the entire frame.
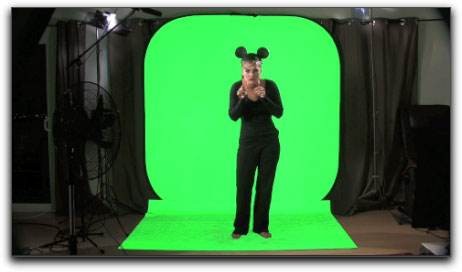
The green screen shot has been applied to a clip in the Edit Project window. As shown below, the part of the image that is backed by green looks great, we can see the new background around the talent, the rest of it looks a little strange, don't worry, we can fix this.
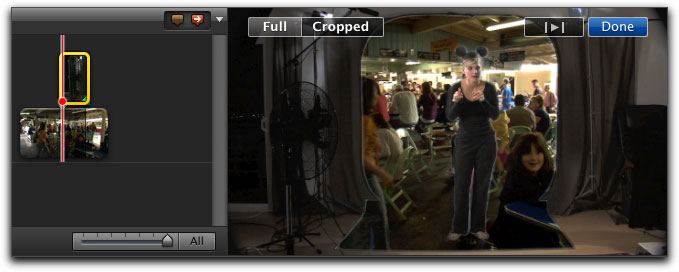
In the Viewer, click on the Cropped button. There is now a white bounding box around our subject with circular handles in each corner. This box is what we call a Mask or Matte. What it does is exclude parts of the image from view. The same process that takes the green colored background and makes the green transparent.
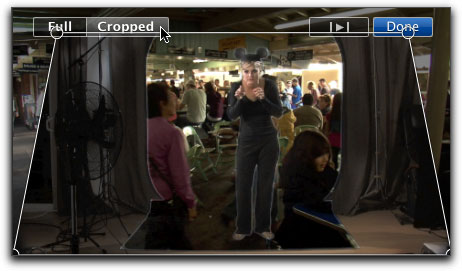
What I need to do is to click on each of the corners and drag in until the white border of the box is over the green background. As you drag the border inwards, you'll see more and more of the background showing through.
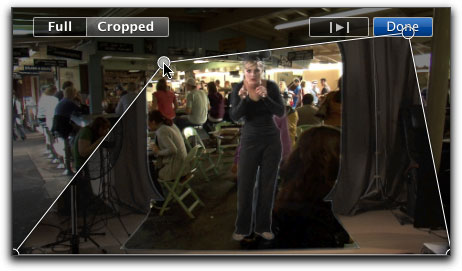
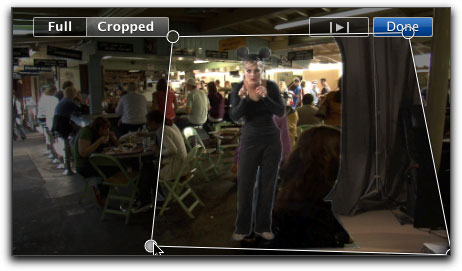
The point is that any area that is outside of the white bounding box will become transparent and will allow the background of the clip beneath to show through.
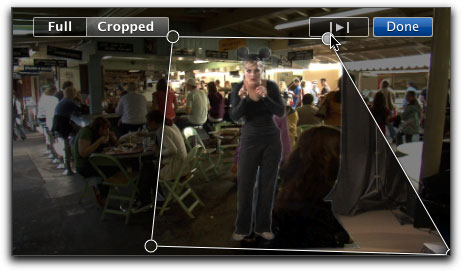
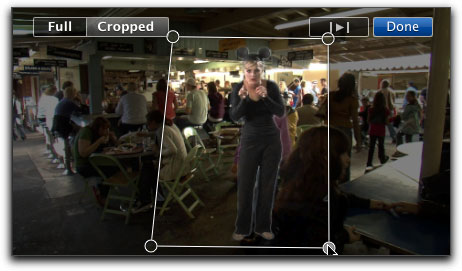
Finished.
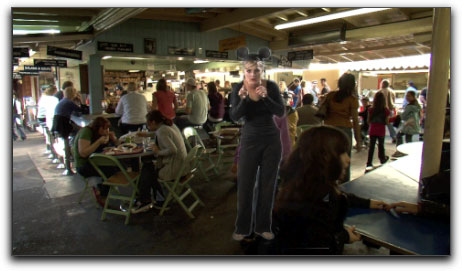
Double clicking on the green screen icon in the Edit Project window, will open the Inspector, which provides another green screen option. 'Background' can be used to pull a better key, if the last frame of the video clip is just the green screen background without the foreground subject included. iMovie will subtract the green screen background without the subject from the green screen with the subject to produce a better (cleaner) green screen effect.
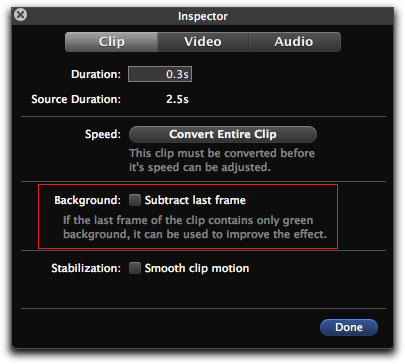
Themes
When we open a new Project, we are given the option of selecting a Theme for our movie. Even if we decided not to use a Theme and select None, below left, we can always add a Theme at a later time. From the File menu > Project Properties > General tab, as shown below right. With Themes, iMovie applies a visual style to our movie by using different templates and filling the templates with art from the video in our Projects. There are several to choose from, photo album, a bulletin board, a comic book, a scrapbook, and filmstrip. Each Theme has its own title page, transitions and text to give it a special finished look.
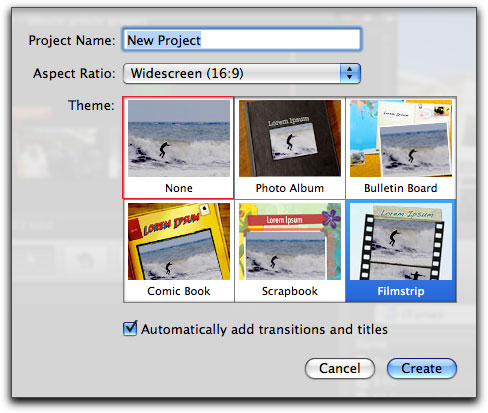
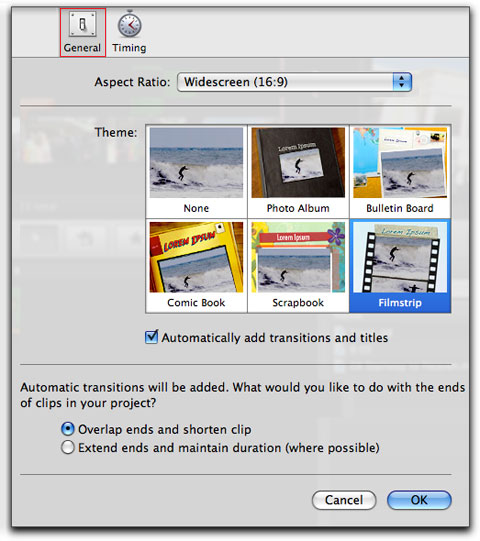
The image on the left is a starting title page, that iMovie made using the Scrapbook' theme, and the opening shot from the first clip in the Project. The image to the right is of a transition, which iMovie created using art from the clips that come just before, and just after, the transition. This is a special Theme transition and is not available from the iMovie Transition palette.


The starting and ending pages have areas where you can enter your own text. You access the text boxes in the pages in the same way you work with Titles in iMovie, double click on the Text icon and enter text in the Viewer.
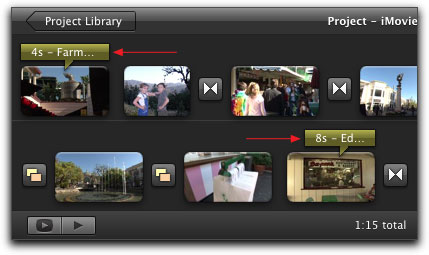
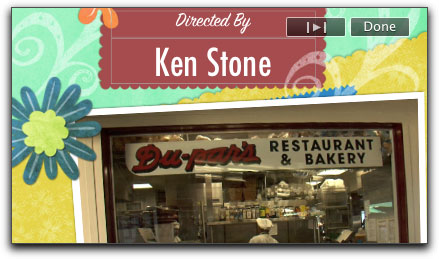
iMovie uses the first frame of the video clip, as the source for its art when it builds transitions. You can change the frames that iMovie uses. This is kind of amazing. Click on a transition, the Edit Project window will change and orange numbers will be added to the clips just before and after the transition. At the same time in the Viewer, each of the images is now numbered and the numbers correspond to the numbers back in the Edit Project window.
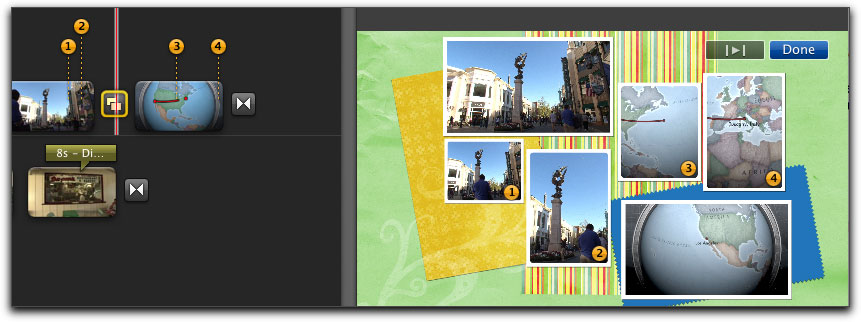
You guessed it, in the Edit Project window, click on a number and drag. As you drag in the Edit Project window, the photo, in the corresponding number in the Viewer is changing too. As you skim over frames in the Edit Project window, those frames are being displayed in the Viewer. Below I'm in the Edit Project window dragging number 2 to the left, as I pass over each frame, that frame is displayed in the Viewer window in item number 2.
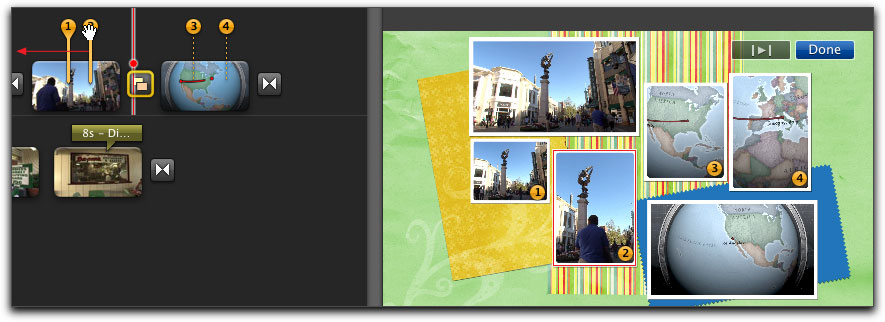
You can always turn the Theme off or choose a different one. File menu > Project Properties > General tab and choose a different Theme or select 'None'.
Share
When you have finished with your Project it's time to move it out of iMovie. Select the Project in the Project Library and chose a destination from the 'Share' menu. As you can see, there are a number of different export options. I tested the iDVD export and the process worked properly. As shown below right, Export QuickTime with Conversion is also an option and all of the formats and codecs available to QuickTime are available for export from iMovie.
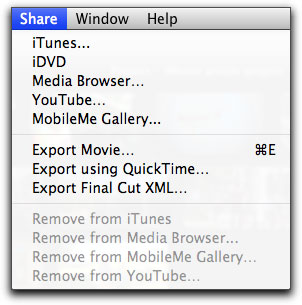
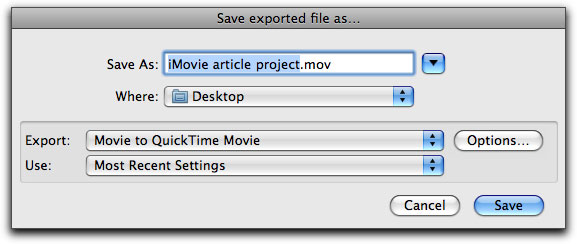
You can export from iMovie to FCP as a XML file, when you choose this export option, a dialog box displays what can and can not be exported as XML.
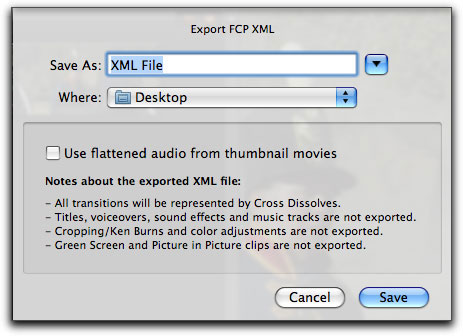
Final Thoughts
iMovie is very intuitive and easy to use, despite the fact that it has some very advanced features, features that it would be nice to see incorporated into Apple's other editing application, Final Cut Pro. iMovie is a very modern editing application and it works in a much more visual way than editing applications that were first created over a decade ago. This graphical aspect of iMovie is more persuasive and powerful than one might first suspect. And don't let the fact that iMovie ships in the iLife package and comes free on new Macs, fool you, this is an amazingly modern and capable editing application.
iMovie looks and works differently than the more traditional "Professional" editing applications, but it has the tools. You won't see terms like 'Ripple, Roll, Slip and Slide', but these tools are there. For example, in the Edit Project window, you can do 'Ripple' edits. Placing the cursor on edge edge of a clip and you can change the duration, longer or shorter, by dragging the selection handles. When you change the duration of a clip, or even delete the clip, the following clips automatically 'ripple' to accommodate the change.
I mention that iMovie is very graphically oriented, you do have to learn to read the clues. When working in the Event browser, after you have selected a portion of a clip, place the cursor into the selected area and you can get two different icons for two different functions. Placing the cursor into the middle of the selection and you get a grabber hand icon, you can click and drag the clip to the Edit Project window, below left. Place the grabber hand at the bottom of the selection and the grabber hand now sports a left-right arrow, click and you can do a Slip edit, moving the selection over a different section of video without changing the duration of the selection, below right.
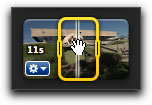
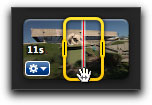
When you drag a clip from the Event browser into the Edit Project window and place the clip over an existing clip, a menu appears. At the top of the menu are five edit commands, 'Replace' and 'Insert' are self-explanatory, but 'Replace from Start' and 'Replace from End', actually use the 'three point editing system,' a feature found in all 'Professional' editing applications.
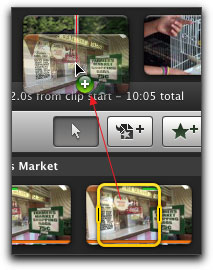
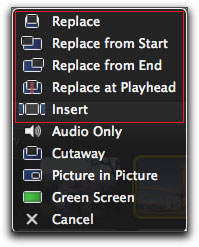
iMovie has a very powerful and fast 'Edit' tool that would be very useful when going through large amounts of video. Select the Edit tool in the tool bar, when you place the cursor over a clip in the Event browser, you get the thin red vertical pointer. As you skim through the clip, the selected area becomes yellow, of course, as you skim, you view the video, frame by frame, in the Viewer window. When you release the mouse button, the area that you have selected, the area in yellow, is automatically cut into your Project. After the selection has been made, iMovie places an orange bar into the clip in the Event browser, representing that section of the video that has been used.

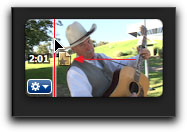
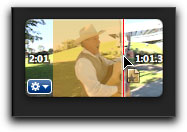

One thing that I really like about iMovie is the fact that it displays visual information about your video clips. In the Event Browser, shown below, iMovie marks the video clips with colored bars, visual cues that provide us with information about that clip. Orange means that the clip has been used. Red is for rejected, blue for keywords and green for favorites. To work with certain groups of clips, we can filter or sort by these colored bars. We also have the ability to move out of the way or even 'trash', those clips ('Rejected') we really have no need for.

The clips in the Edit Project window display icons and the different icons tell us what has been done to the clip. Image Stabilization, Video Adjustment, Effect filters, Speed changes, Audio adjustment, Cropping and even the duration of the clip. It's great having that information readily available. Double click on an icon and the Inspector for that icon will open.
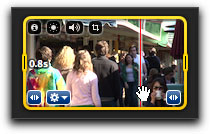
iMovie provides us with the Clip Trimmer window, a great tool, but an even more amazing tool is the Precision Editor. This is a very powerful way to perform very exact trims between two clips, it is powerful because of its graphical nature. It even works with a transition between the two clips you are trimming. The Precision Editor is also used to trim audio tracks, great for making L-cuts (split edits). As you skim the pointer across a video track, each frame is displayed in the Viewer window. When you see the exact correct frame for your edit, just click with the mouse, iMovie completes the edit for you. The Precision Editor is one of the most compelling features of iMovie. I do wish that I could surgically implant the Precision Editor into Final Cut Pro.

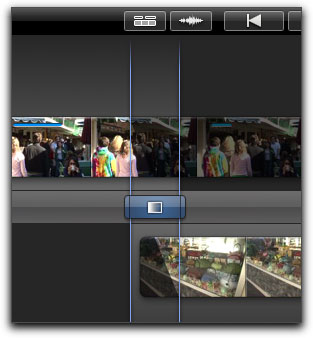
The iMovie interface is clean and straightforward and while there are other interface elements, drop-down windows, these are kept out of the way until needed and when finished, they go back into hiding. Another example is the Inspector, which when needed, shows up, but disappears when not in use.
Markers, both chapter and informational, are well implemented. The type of marker is color coded and the content of the marker is always visible in the Edit Project window, navigation to any marker is easy through a menu. You can click on a marker icon and drag it to a new location, however, the markers are also 'pinned' to the clip, so that if you click on the clip and reposition, the marker moves with it.

While iMovie does not use the term 'Media Manager', it has tools and abilities that do exactly this. You can consolidate, delete or move projects and media to different hard drives. Events can be split or merged together. Clips can be color coded, sorted, searched for or trashed. The Event Library allows the sharing of video assets between different Projects and the Event Library has organizational tools of its own. Control click on a clip in the Edit Project window and select 'Reveal in Event Browser' or 'Reveal in Finder'. Do the same for a clip in the Event Browser and you get 'Reveal in Finder'.
iMovie has 'Real Time' abilities throughout the application which is remarkable. When looking for a video effect for a clip, just moving your cursor over the different effects in the Video Effects palette, plays the video, with the effect, in Real Time, in the Viewer window. This is without applying the effect or any need for render. Video adjustments, animated titles, transitions, animated maps, themes, green screen, voice overs, music and sound effects, all are in Real Time too.
I don't know if you have figured it out yet, but I am truly impressed with iMovie and I know that when I go back to working in Final Cut Pro, I'm going to be missing a lot of iMovie 09's amazing features.
Enjoy,
--ken
P.S. You may have noticed that this article is rather large in size. If you feel that you may want to return to it in the future, but don't want to go through a long download again, you can easily save it to your desktop. For Macs, when the article has fully downloaded, contol click anywhere in the Browser window and select 'Save Page As'. In the Save window, select; Format 'Web Archive'. This will only take a second and you'll have the article saved on your Desktop at about 10.5 Megs.
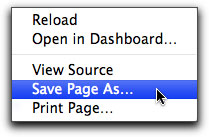
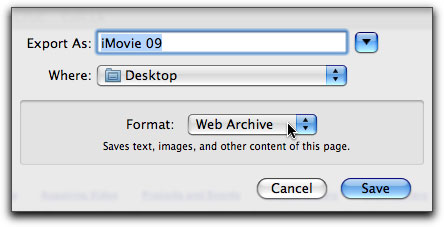
copyright © www.kenstone.net 2009
All screen captures, images, and textual references are the property and trademark of their creators/owners/publishers.