
LiveType December 15, 2003
The Fundamentals of LiveType
By Steve Martin

LiveType December 15, 2003
The Fundamentals of LiveType
By Steve Martin
Sit through any movie trailer or watch a TV commercial and you can't help but notice the seemingly endless ways type is made to fly, spin, float and dance across the screen. Animated type is the domain of motion graphics - an art form that has come into it's own in the past ten years due to fast desktop computers and low cost compositing applications. And while our Macs keep getting faster, the actual process of creating motion graphics can sometimes be painfully slow. This is because animation itself is inherently slow.
LiveType answers this problem by giving you a library of pre-animated effects and visuals that can be quickly and easily modified to suit your own visual tastes. In addition, the process of keyframing has been greatly simplified in that you no longer need to spend hours "endlessly tweaking" your effects in order to get your desired result. LiveType is a killer app because you can create eye-popping motion graphics in the fraction of the time it takes to create them in other apps.
With this article my goal is to "lift the hood" on LiveType an show you how to get the most out of this app and in the process, show you some cool new features that were added in the 1.1 release.
Setting your Project Properties
Before you begin creating your animations, you will want to set your project properties to match your target frame rate, resolution and pixel aspect ratio. From the Edit menu, choose "Project Properties"
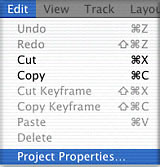
If your target output is DV, then you will want to change the preset to NTSC DV 3:2
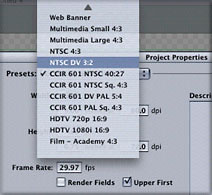
This pop-up list also gives you other output presets from multimedia settings (web or CD) to HDTV (Hi-Definition television) and film. The important thing to remember is you want to set your preset before you begin building your animations not afterwards; otherwise all your graphic elements will need to be manually readjusted in the Canvas window.
Steve's Huge Tip:
If you use the Place Background Movie feature from the File menu, then import a DV QuickTime movie to place into your project, the project properties will be automatically set to match the resolution of the clip. Pretty cool.
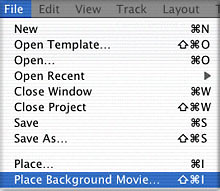
You also have an option for rendering fields. If the ultimate destination of your movie is video you will want to check the "render fields" box for smooth playback of your animations.

However, checking this box is not always required especially if you have titles with little or no motion. In fact, by keeping the box unchecked, you reduce your render time by 50 percent. My suggestion is to render some tests, then bring the movie into Final Cut Pro and output the movie to video to see how it looks. If the video looks odd, then render again with the render fields check box enabled.
The "Upper First" checkbox is an option for field order to accommodate various applications and hardware configurations.
As for the "Upper First" check box, it is interesting to note that DV is lower field ordered not upper, and the inclination would be to uncheck it. However, movies rendered from LiveType then brought into FCP seem to have no problems with their field order, so I'm a bit mystified as to why this option even exists.
The LiveType Work Environment
LiveType presents you with four main windows - the Canvas, the Timeline, the Media Browser, and the Inspector. The Canvas and the Timeline should be instantly familiar to Final Cut Pro users as these windows not only have the same name as their Final Cut Pro counterparts, they also perform similar functions. The Timeline is the primary window for building your LiveType animations.

Like most compositing apps, digital content is added one track at a time in vertical fashion and effected over time through the time-honored process of keyframing. That said, I want to point out that LiveType has a unique approach to keyframing which in my opinion, places the app in it's own category - but more on that later.
Tracks in LiveType can consist of both animating and non-animating digital content. This content can be added from the Media Browser or placed into a composition from an external source such as a QuickTime movie or a Photoshop file. I should take a moment to point out that as of this version, LiveType does not support layered Photoshop documents. This means that any layers that exist in the Photoshop you intend to use in LiveType will essentially be flattened; however, with their alpha channel retained.
New Timeline Widgets
A new feature that was added in the 1.1 releases is these little icons identifying each track as a LiveFont, Photoshop file, a texture or a movie. This may not seem like a big deal, but their inclusion does help in locating things when you are working with numerous tracks.
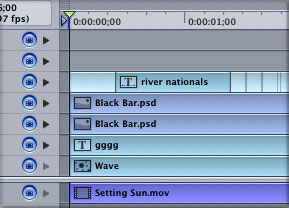
There's also a timesaving feature that allows you to option-click on an effect disclosure triangle and instantly reveal all the purple effect bars for every track you have them applied to.

The LiveType team also added a "snapping" button at the lower left hand corner of the timeline that functions exactly the way the snapping button functions in Final Cut Pro - allowing you to align clips in the timeline with more precision. The snapping button even shares the same keyboard shortcut (the letter n).

The Canvas Window
Now let's turn our attention to the Canvas window. The Canvas window displays the visual output of the timeline at the current playhead location. You move through a LiveType timeline the way you would in Final Cut Pro -either by dragging the playhead or pressing your spacebar to play the movie (once it's been rendered to RAM). By default, the background in the Canvas window displays a checkerboard pattern, which indicates areas of transparency or alpha channel.
As you add text, objects, and other graphics to your timeline from the media browser, they will be placed against this transparent background allowing you to output a finished movie that will cleanly composite your LiveType movie over video or other content in your FCP timeline.
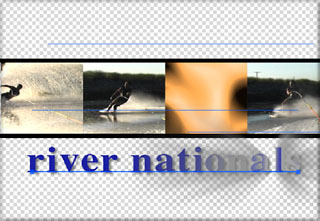
Because the alpha channel is necessary for compositing your animations in Final Cut Pro (or other QuickTime compliant apps), LiveType will only render into a codec that supports the alpha channel. Therefore, your only choice when rendering your LiveType movies is the Animation codec. Once you import your rendered movie into FCP and drag it into a timeline for compositing, you will need to do a render pass to play it back.

That said, rendering in FCP will be quick because the bulk of the rendering has already taken place in LiveType. If you are using a Cinewave card from Pinnacle, you will be able to play your LiveType movies in real time without having to render them.
LiveType Media Management
To begin building your movie in LiveType, you begin with the Media Browser. The Media Browser is similar to Final Cut Pro's browser and DVD Studio Pro's Palette in that it places at your fingertips all the digital assets necessary to build your LiveType movie. Here you will find fully animated typefaces called LiveFonts, motion backgrounds called textures, and a special category of visuals LiveType calls "Objects".
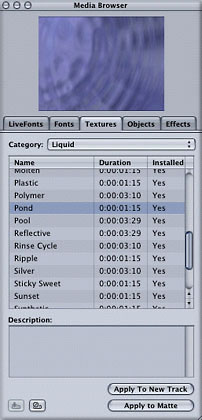
The files the Media Browser references reside in the Application Support folder at the Library level of your hard drive. When you run the installer from your LiveType data discs, the installer creates a folder called "LiveType" with 8 folders inside it - all of which LiveType draws from to create it's visual magic.
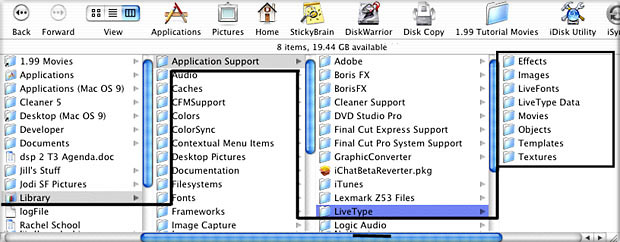
The folder that does the heavy lifting is called "LiveType Data". The LiveType Data folder is essentially the media LiveType uses to build your movies. It's the largest of the 8 folders consuming nearly 8 gigs of drive space. Therefore, you will want to know about some options you have with regard to managing your media.
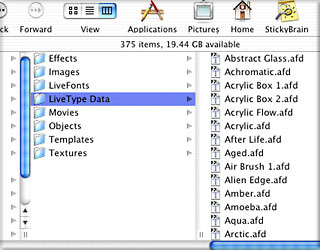
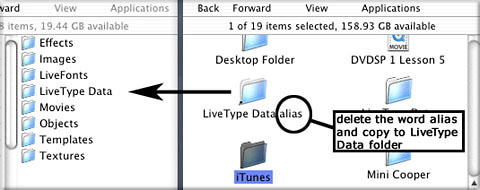
Option One is to place the LiveType Data folder on another drive. This is the method I prefer because I can have the media reside on a removable firewire drive that can be quickly swapped between my Powerbook and my G4 tower. To do this yourself, you will need to copy the LiveType Data folder to the target drive, and then make an alias of the copied folder by hitting Apple-L on your keyboard. Remove the word "alias" from the folder name, and then drag this folder into the LiveType folder in your Application Support folder.
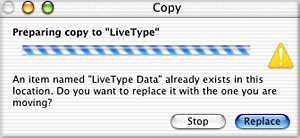
You will get a warning telling you that a LiveType Data folder already exists at this location and you are about to replace it. Click "replace" to overwrite the original folder with the alias.
The next time you launch LiveType, the alias will direct the app to look in the LiveType Data folder that you copied to the other drive.
A second option is to not install the LiveType Data on your drive, choosing instead to pull the media files from the LiveType Data Discs when you need them. Media that does not reside on your hard drive has the word "no" displayed in the column labeled "installed". Conversely, a "yes" means the media has already been installed.
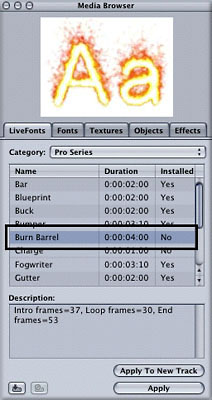
Assuming you choose not to install the media, you will see a "no" for every Livefont, texture and object displayed in the media browser. The cool thing about LiveType is you do not need to have the LiveType Data installed on your drive in order to get work done. Whenever you add a texture, object or Livefont to your timeline, LiveType displays a proxy image of the off-line media file. The proxy image has no motion characteristics but you can change its style, timing, image attributes, and even add effects as if it was the real thing.
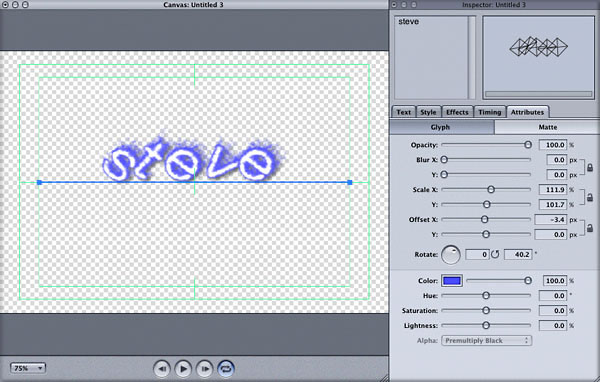
At any time during the creation process you decide you want to work with an actual media file, you simply click the item in the Media Browser you want to install, and then click the "Install LiveType Data" button in the lower left corner of the Media Browser window.
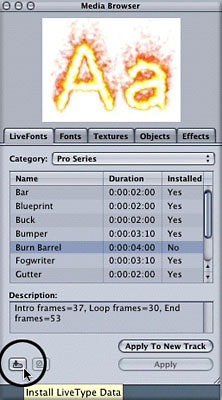
A window will pop on your screen telling you to insert the LiveType Data disc the media resides on.

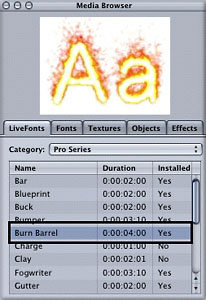
After placing the disc in your DVD-ROM drive, the media file is located then copied to the LiveType Data folder. Once copied, the Media Browser will display a "yes" in the installed column indicating the file is now online.
LiveFonts vs. Fonts
There are essentially two categories of type in the Media Browser - animated type called "LiveFonts" and static type called "Fonts" There are some noteworthy differences between these two text categories you will want to know about. First, LiveFonts are really animated movies not type objects in the traditional sense. When you apply a LiveFont to a track and begin typing, the "characters" you see on screen are really individual movies that have been "mapped" to specific keys on your keyboard. This means that while you can change certain attributes of LiveFonts such as color, scale, and motion timing, you will not be able to change the typeface itself.
Also, because LiveFonts are rasterized movies, they have the potential to degrade when scaling. The online manual claims they tend to degrade at scale percentages above 500 %. In my opinion, they still look amazingly clean at scale percentages pushing 800 %.
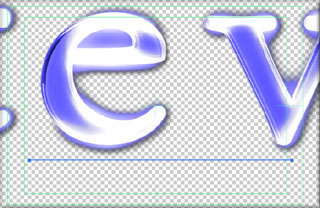
Fonts on the on the other hand are nothing more than a library of installed system fonts and as such, are handled by LiveType as vector data. This means, scaling won't be an issue and your text will look crisp and clean at any scale. Keep in mind, that should you choose to work with LiveFonts, your render time will increase do to the fact that you are essentially rendering individual movies for each character including their alpha channels.
A note about "Glyphs"
The LiveType manual defines the term "glyph" as "a single character on a track" but the definition extends beyond that. Glyphs in LiveType parlance can also refer to objects, textures and even imported elements. For example, a Photoshop image can be thought of a single character "glyph" in LiveType. As long as you remember that glyphs in LiveType are nothing more than the "primitive" building blocks of any track and not necessarily type symbols, you should now get some sleep.
Adding Text to the Timeline
Adding Fonts or LiveFonts to the timeline is simply a matter of selecting a font, then choosing either "Apply to New Track" (which creates a new track in the timeline), or choosing "Apply" (which adds the font to an existing track in the timeline).
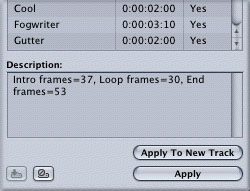
After you've applied your font, you begin typing in the text input box of the inspector. The Canvas window displays your text as you type while the timeline shows you a graphical bar representing your text over time.
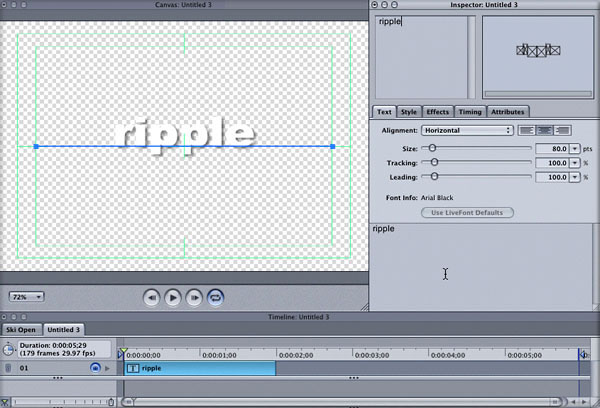
If you look closely in the Canvas, you will notice that all the glyphs are sitting on a blue horizontal bar called a track. A track is a virtual "container" for every character you type. The track metaphor is especially powerful because you can control and animate each character independent of the track it belongs to.
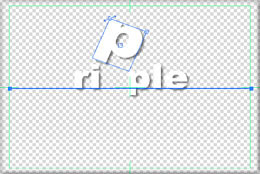
Here you see the "P" glyph scaled and rotated above its base track. To reset a character to its default location, just select it and hit Apple-R on your keyboard.
The Inspector
Once you've added your text, you begin making changes using the Inspector. The types of changes you can make to a track are listed as five tabs across the window. Text properties such as size, tracking and alignment are changed in the text tab, while properties such as drop shadows, glows, and outlines are changed in the styles tab.
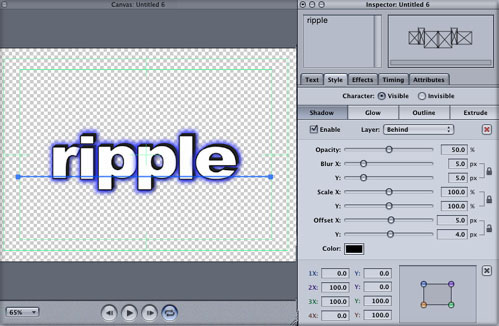
The Attributes tab allows you to change the track's opacity, blur, scale, offset (screen position), rotation and color.
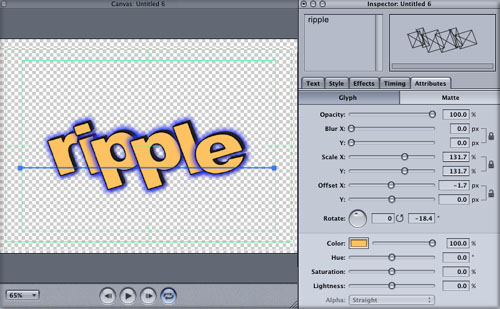
There is an additional button in the Attributes tab called "Matte" The matte button allows you to "fill" your text characters with a movie, background image or animated texture from your Media Browser.
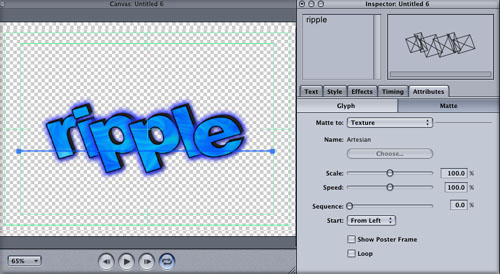
The two remaining tabs, Effects and Timing, are used for altering any keyframed effects you have applied to your track as well as adjusting the speed, duration and sequencing of your effects, which I'll cover next.
Adding Effects
The basis of any animation is of course keyframes, and LiveType has given us a revolutionary way of working with them. You begin by selecting the track in the timeline you want an effect applied to, then selecting the effect from among the numerous pre-keyframed effects found in the Effects tab of the Media Browser. Of course you can also create you own effects from scratch, but that's for another article.
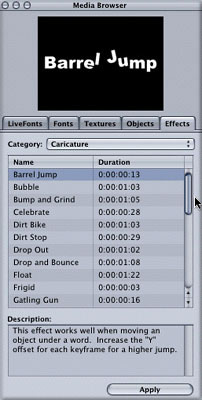
A big improvement in Version 1.1 is that you can now choose which glyph (or glyphs) on a track you want the effect applied to simply by dragging a marquee around them. Blue bounding boxes appear over the characters currently selected for the effect.
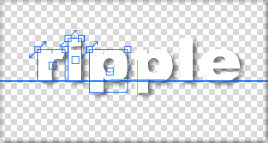
In the timeline you will see a purple bar representing the effect. Two inward facing triangles represent the start and ending keyframes for the effect. Every effect has a minimum of two keyframes. Effects that have additional keyframes display diamonds.

If you want to see what parameters are applied at a given keyframe, just select the keyframe then click the Effects tab in the Inspector. All the effects applied to a given track are listed in the window with their parameters listed in the active parameter list.
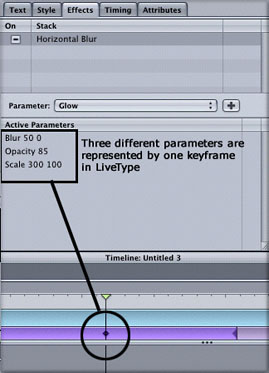
In terms of keyframing, here is where LiveType makes a radical departure from other animation apps. If you look at the parameters listed for the horizontal blur you can see 3 parameters - blur, opacity and scale - all applied to the same keyframe. This is a radical method because it simply cuts down on the number of keyframes that must be hunted down for the purpose of modifying or moving. When you move a single keyframe on the effect bar, you are really moving a "container" keyframe for all parameters applied at that keyframe. This is a timesaver of huge proportions.
You can also add additional parameters at a given keyframe by clicking the parameter pop-up and choosing a new parameter from the menu. To add that parameter to the active parameter list, you will need to click the "plus" button.
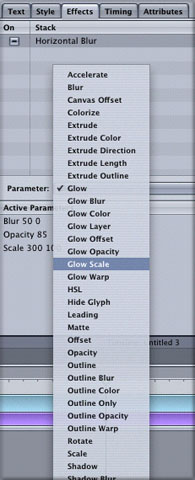
To edit a parameter's value, just double-click the parameter name and a parameter input box will pop up where you can enter a new value.

Un-assigning effects to glyphs
Here is a text track with 2 different effects applied to it. Let's say you wanted the horizontal blur effect applied only to the first word and not the second. Start by selecting only the glyphs that make up the second word - in this example, the word "training". In the effects tab, you will see a check mark indicating that the horizontal blur is currently applied to these glyphs.
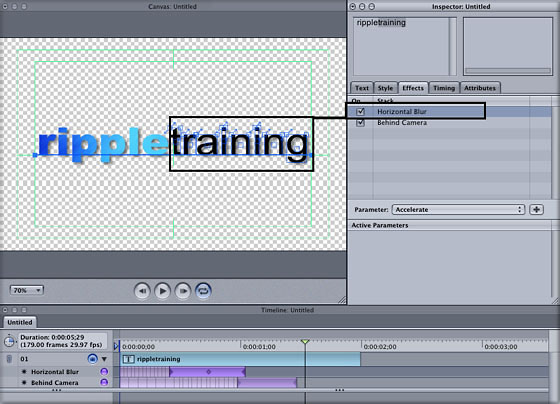
If you uncheck this box, the horizontal blur will be un-assigned from the word training, but left on for the word ripple. To re-assign the effect for those glyphs, just click the check box to turn it back on.
It is also important to understand that when you select an effect track (purple bar) and make changes in the inspector, you are making changes to the animation. When you select a track you are only making static changes to the composition.
Copy and Paste Keyframes in 1.1
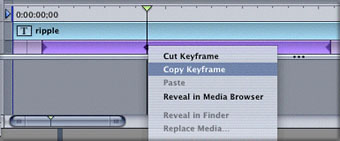
A new feature in LiveType 1.1 will allow you to control-click on a keyframe and copy it for the purpose of pasting it somewhere else on the effects track (or perhaps a different track).
Tweaking your Animations
Because bars in the timeline represent both the media and the effects themselves, it is very easy to change their timings or durations simply by dragging. Here is a timeline with many text tracks with applied effects

To change the duration of a static text track, just drag the edge of the track the same way you would trim a clip to shorten or lengthen it in Final Cut Pro. Because of the new snapping feature, you can precisely align the edges of these three text objects with the out point marker.

You can also do the same thing with effects tracks either by dragging their edges to alter their durations or moving the entire track itself to a new location.

Timing Adjustments
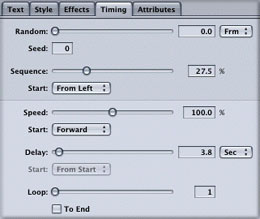
If you need further adjustment of the speed, duration or looping characteristics of a track, you would do this in the timing tab of the inspector. One of the more powerful features in LiveType is the Sequencing slider. By changing the sequencing of your effect, you can change the rate at which each individual character gets acted on by the effect, allowing you to quickly change the how your type enters and exits the frame.
Placing a Background Movie
If you want to compose your type and graphics over a background movie you will use the "place background movie" command in the file menu.
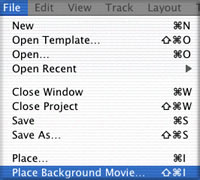
Once you've located your movie, LiveType will place it below the background bar in the timeline. Anything below the background bar will not be rendered into the final movie, unless of course, you want it to be.
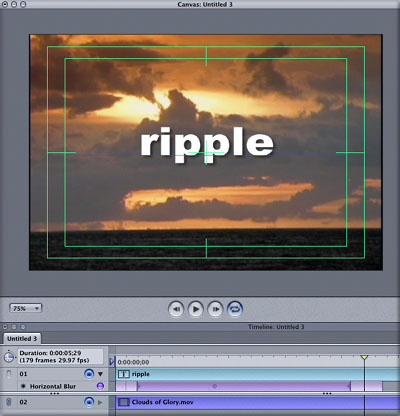
As you work, you will most likely be doing some test renders to see how your animations are coming along. You can set in and out markers on your timeline that defines for LiveType what frames to render to RAM for playback.

If your renders are taking a long time, you can reduce this by changing the render quality to draft in the project properties window. In the next version, I'm hoping Apple adds a render quality button on the Canvas, because as of this version, the only way to change the render quality is through the project properties window. When you are ready to output your movie, you choose Render Movie from the file menu.
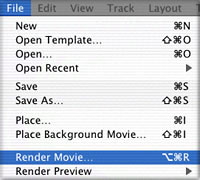
Before naming and saving your movie to disc LiveType presents you with some options at the bottom of the save dialog window. Here you can choose to render the background with your movie or leave it out. In most cases you will want to leave this unchecked if you are planning on bringing the movie into Final Cut Pro for compositing.

Well that about wraps it up. Hopefully some burning questions have been answered for you on your way to creating your next TV commercial, music video, or film title sequence. If you are interested in really getting under the hood in terms of hands on tutorials, you can visit my website and download some killer LiveType tutorials on how to create everything from animated lower thirds to DVD motion menus. Please email me if you have any questions. Steve@rippletraining.com. And thanks for reading...

copyright © www.kenstone.net 2003