March 17, 2008

 
One Man Doco Crew in Uganda
Equipment and Technique
Contact Matthew Clift through his website - www.mattclift.com

By Matthew Clift

 
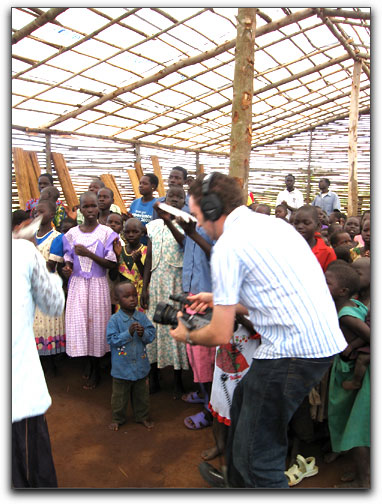
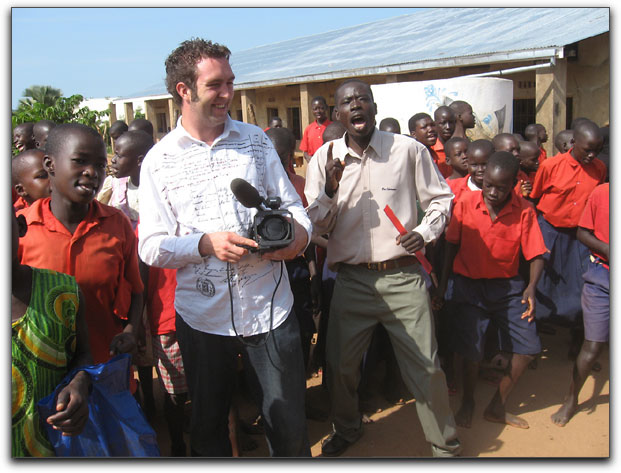
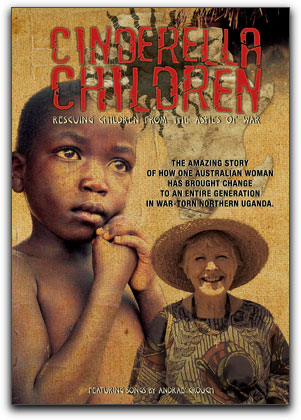
In mid-2007 I was approached by the pastor of the church I attend about the possibility whether I could volunteer my time to film and edit a documentary they wanted to produce. The catch was that it would involve traveling to a hostile area of Uganda and that I would be the only crew. However, the cause behind the documentary was something I couldn't refuse. In 1992, Irene Gleeson, an Australian grandmother, sold all she had and moved to Uganda to setup an orphanage for children made orphans by a AIDS and a 20 year civil war. By 2007 the organization she set up had grown to the stage it was caring for over 7000 children daily and it was our hope that by creating a documentary about her, we would be able to build awareness of the organisation and in turn raise funds so she could assist more children.

Although for many years I have made my living from video production, I knew I was getting out of my depth for a production of this size. In preparation for the shoot, of huge benefit to me was simply reading articles in forums and filmmaking sites. Now with the documentary complete and receiving great feedback, I want to be able to offer advise from what I learnt for other doco makers.

The trailer of Cinderella Children can be viewed here.
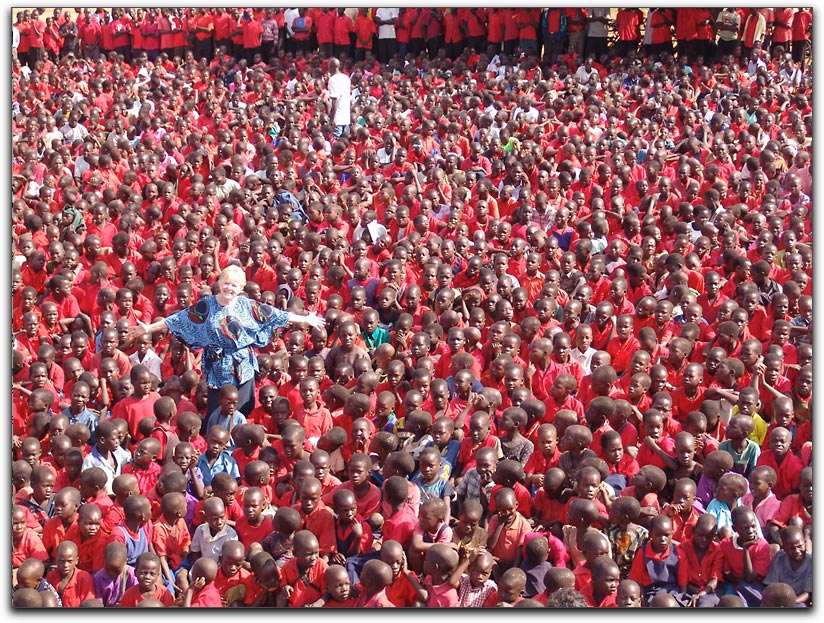
A One Man Crew...
I once read that if you try to do more than one job in the production process, something will suffer. Although there is no doubt there are many benefits to having a large crew, with today's equipment, it is more than possible for one person with a limited budget to produce a high quality feature length doco.

Before you embark to complete a one-man crew production I will stress though the importance of practice. This is essential as there is a bit of an art to be learnt in simultaneously monitoring audio, checking luminance and ensuring the shot looks aesthetically good at the same time. I have made many mistakes in the past (primarily with audio as it seems to be for many filmmakers too), so you need to know how to get things right first time as often with docos there are no 'take twos'.

However most of all, don't let budget deter you. Some of the most creative projects made have been created on small budgets and the improvisation required to get the shots can be the thing which makes such projects great. You would be amazed what can be made with a DVX100 camera and an old Powerbook 12" laptop with Final Cut Pro... I was!
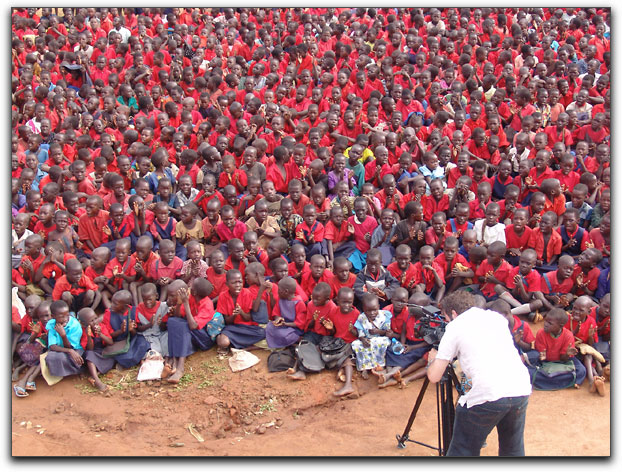
 
Equipment List, Techniques & Tips

By far the hardest part of creating Cinderella Children was knowing what to take. Where I was going there was no option for going back home or to the video equipment hire shop for something I forgot so I had to get the equipment list right. I tried extensively before leaving to find a list of items that were recommended for a one-man doco shoot but unfortunately I had no luck. Therefore I thought there would be benefit in providing a list of what I took, why I took it and a review as to how it performed in the field.

Camera Gear
2 x Panasonic DVX100AE cameras

Really there is no reason for this camera choice except that because the project was being funded by the church I go to, this was the model of cameras they owned. However, I love the DVX100AE (and the HVX202 if you want widescreen) for its features and fantastic picture. 16:9 would have been better but no viewer so far (who isn't a filmmaker) has ever mentioned (or probably even noticed) that the finished product is in 4:3. My advise is never forget that a good story which has been well shot and put together is more important than whether something is in 16:9.
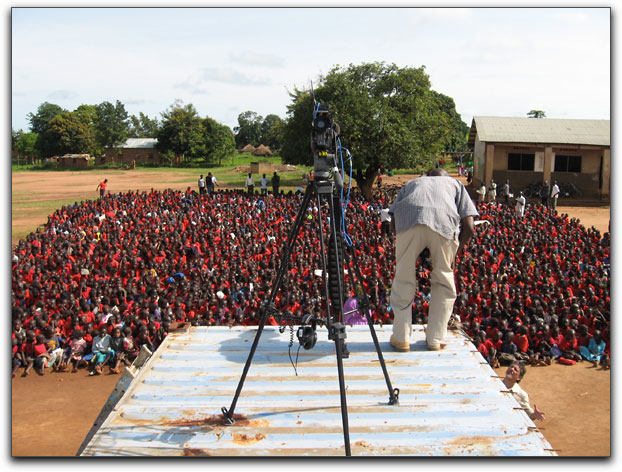
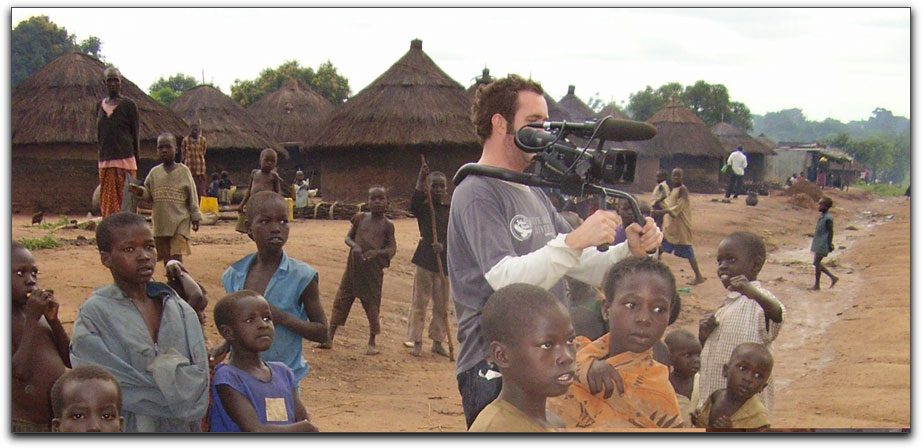
TIP - Using two camera at once.
Why did I take two cameras? Well there was the main purpose of having a backup camera, however I envisioned and successfully used the second camera to simultaneously record an alternate angle for the main protagonist's interview. Here is an example Cinderella Children excerpt - Irene.

To achieve this camera technique I first placed the main camera on a tripod and ensured that the subject was correctly in shot. So I could monitor the first camera while operating the second hand-held camera, I ran a video feed from the first camera to a small cheap portable LCD TV. I then simply hit record on both cameras, clapped my hands on screen of both cameras (as a simple form of a clap-board) so I could sync everything up in post, and began recording. During the interview I found it quite easy to operate the second camera to get the shaky second camera look I was after whilst being able to glance down at the LCD tv to ensure the subject was still correctly in shot on the main camera. I ran the main audio sends into the main camera and ran an additional mike to the second camera so I could easily sync up the two clips in post. Although I was holding the second camera, I monitored the audio from the main camera by headphones throughout the shoot.

4 x batteries and 2 x chargers.
The second charger was a backup charger as last year I had a Panasonic charger all of a sudden stop charging (it does happen). If shooting overseas make sure you have the right adapter for their power outlets along with making sure your charger can take their electricity (and check whether they even have electricity!).

Polarizer filter
A polarizer can make blues and greens look richer, but it makes the picture darker so you need more light and you can't technically do panning shots without some colour issues. I probably used the polarizer 10% of the time to get some nice steady scenery shots.

TIP - Panning shots with a polarizer.
A simple tip, don't pan with a polarizer. This is something I didn't actually know before leaving but I discovered it whilst reading a film textbook afterwards. As most of my shots were relatively quick on screen I didn't find that there was enough colour variation to make any of the footage unusable. However, if you were after magnificent scenery shots in long slow pans you will probably run into trouble if you use a polarizer.

Rain Jacket for DVX100AE
This was another item I hired so I was prepared for any bad whether which is one of the key things for docos in remote areas. Always try to think ahead of anything that could happen so you don't lose any shooting days as everyone of them is valuable. Fortunately I did not need to resort to using the jacket in my shoot.

Lens tissue and Lens cleaner
Absolutely essential for any shoot and even more so in dusty environments such as Africa. Make sure you take more than you need. In a bit over a week of filming I went through a full book (100 sheets from memory) of lens paper.

Tape Heads Cleaner
Very important for dusty environments and for general maintenance.

50 x Mini DV tapes
I know it sounds obvious but the point is that I took more than what I needed. I always kept these in waterproofs sealable bags for protection from dust.

TIP - Mini-DV tapes don't mix well iwith other brands.
Did you know that each brand of tape has a particular 'oil' on the tape which remains to some degree on your cameras tape heads after you have ejected it. Some oils do not mix well at all with other oils and when you use different brands of tapes in your camera, the oils can mix and you can sometimes get dropouts or even large unreadable parts of your tape. The best way to ensure this doesn't happen is by only using the same brand and type of tape and using a tape cleaner before and after using another brand of tape. Due to the wear and tear a tape cleaner does on your camera you can see why it is good to stay with one type of tape.

Camera Support Miller DS5 tripod
I am a fan of using a tripod as opposed to trying to hold a small camera steady which in most cases ends up looking like a home movie. The DS5 is not the smoothest tripod but it was light and quick for setting up.

Spiderbrace
I got a Spiderbrace especially for this documentary thinking that it would get better shots for where I had to go handheld. I still found myself reverting back to the tripod or even straight hand held as I like to be able to constantly adjust the zoom and focus controls which is very difficult to do when using the Spiderbrace.

 
Audio

TIP -Should I use an external mixer?
I did not use any external mixing devise for the production. In my opinion it is just another thing to setup and another link in the chain that can go wrong. When you think of how many meters you need to monitor as it is, the last thing you want when you are on your own is to add something else for you to setup and monitor. As an editor I once was given many hours of footage where the audio was beyond repair because the camera person decided to use an external mixer but missed some settings on the mixer which was not obvious by the camera audio levels.

There are benefits to using an external mixer, but these were minimal in comparison to the benefits of not using it in my situation. I fed all audio directly into the 2 x XLR jacks on the DVX100.

2 x Letrosonics 185 Wireless Transmitter and Receivers (Lapel Mics)
No piece of equipment gave me as much frustration as these two mics. This isn't so much the fault of the brand or type of mics but just the complexity of working with wireless lapel mics.

The Letrosonic mics were chosen primarily due to budget and availability reasons. They were inexpensive to hire and I knew we would not be doing much wireless lapel work. VHF meant their range was not the best but they helped out with the few times I needed to do some distance from the presenter.

TIP - Wired or wireless lapel mics?
When I use two wired XLR lapel mics I only have two audio level controls to monitor and adjust being the two camera XLR inputs. However with wireless mics in addition to these inputs you have to monitor and adjust the sensitivity on the transmitter and the AF output on the receiver. That means if you have 2 x wireless mics on separate channels you effectively have to adjust 6 different audio settings along with worrying about everything visually related! Getting one setting wrong can result in distortion or unclear sound which usually can not be picked up by any issues with the levels represented on the camera.

I read a great quote once which said 'my wired will always sound better than your wireless' - how very true. The postproduction work needed on the wireless mics I used in comparison to the others was quite substantial and it required a professional sound mixer to sweeten their sound to something which I would be happy to release.

You need a good reason to want to use wireless mics if you are on your own. I would not recommend using them unless you have had a lot of practice in various difficult situations using wireless lapel mics such as high wind, walking and filming at the same time, etc. Also keep in mind radio frequencies of other countries where your radio mic frequencies may be illegal to use.

1 x Sony ECM 77 Wired Lapel Mic
My favourite wired lapel mic. It simply gets great results every time. Almost all interviews were used with this mic.

TIP -Have a backup audio channel.
When conducting an interview it is amazing how often an interviewee can complete almost the entire interview with the audio levels at a relatively constant volume to then destroy it (technically) by loudly laughing or yelling which in turn distorts the volume. To alleviate this problem on one person interviews I usually just use one lapel mic which I then run through both channels of the camera. This can be done on most cameras by putting the mic into one of the XLR jacks and then by either switches on the camera or options in the camera menu, routing that audio from that one channel through both channels 1 and 2 simultaneously. Once this is setup I run one of the channels at the normal volume for speaking and the second at a much lower level. In postproduction I then use the standard level channel for most of the interview but I have a backup channel I can revert to if needed if the audio clilps during louder sections.

1 x Sony ECM 44 Wired Lapel Mic
This was the backup wired mic. It is much larger and there was a noticeable drop in quality in audio from this mic in comparison to the ECM 77. 1 x Sennheiser ME66 with Rycote Softie

The only shotgun mic I have ever used therefore I can't make much of a comparison to other shotgun mics. However, you need a good shotgun mic for general atmos (ambient sound) and situations where you have multiple people talking. I had it on my camera with a Rycote softie whenever I was filming non-interviews (e.g. scenery, action, etc) and I even found it surprisingly good for capturing unplanned interviews in close proximity whilst being mounted on the camera. It can distort in very high noise environments (including indoor singing with percussion as we found out) and you need to remember that this is not reflected on the camera audiometers. The Rycote Softie does not work as soon as there is anything more than a mild breeze but was suitable enough for what I needed.

TIP - How to capture good atmos (ambient sound).
Getting good atmos can be very difficult as you often have the mic mounted on the camera. That means you can sometimes hear cany adjustment of camera controls or even the movement of the camera itself as do a pan. The easiest way to get around this is to put the camera on a tripod, tell everyone around you who isn't atmos to be quiet, and push record for 60 seconds. This way you can get good clean atmos you can put behind the footage you get.

However what happens if you want to get good clean atmos sound whilst videoing something that is noticeably in time to the sound (e.g. singing)? In my case I used the ME66 on a small mic stand with a long XLR lead to capture both the audio and visuals of a small singing group. This enabled me to get different shots of the children simultaneously whilst getting consistent audio which was free from camera noise and changes of volume when I moved closer to the signers.

 
2 x Microcat Windjammers for Lapel mics
These were 'just in case' items for the lapel mics. These are meant to stop a tornado for lapel mics however they have to be worn on the outside of the clothing and look like you are wearing a poodle on your coat due to their size. We didn't need them but I'm glad we took them just in case.

2 x Sennheiser headphones
The most important part of the audio kit. The second pair were backup headphones.

TIP - Always use your headphones.
You would never shoot video by only looking at the luma level and not looking at the viewfinder picture, therefore you should never record audio by only looking at meters. You must listen to the audio as you record to ensure you get good clean audio throughout your shoot.

Batteries
Stacks of alkaline AA batteries for the wireless mics and the ECM44 which cannot work off Phantom Power.

Small Mic Stand with Rycote Pistol Grip
This was great for many applications as outlined in the above tip regarding obtaining good atmos. In addition, for very important features interviews I used the ME66 on a stand under the interviewee in conjunction with recording them using a lapel mic (ECM77) on the other channel. This provided a very rich sound when mixed together in post.

Various XLR leads
Multiple short and long XLR leads for all the various situations which arose.

Other Goodies
Part of the joy of lapel mics is working out how to mount them. I am a fan of keeping them outside of the sight of camera which is easy on close up shots but normally means beneath clothing for everything else. Therefore I had gaf tape (essential), scissors, kids woolen gloves (have a look at the tip below) and tiestraps (for holding the bit of the glove on). I use the method of the two triangles for mounting lapels under clothing as I find it gives the best results. There are a few tutorials on how to do this on the net. In my pack I also kept a supply of tools and wire in case repairs were needed.

TIP - Inside clothing lapel windsock.
This is a trick I got off the web which I have found quite useful for various shoots. When mounting a lapel mic under clothing using gaf tape you can still sometimes get wind noise or find it hard to mount whilst still getting enough space for clear sound to come through. One way around this is to buy small children's woolen gloves, cut off the fingers and use these as small windsocks. To secure them to the mic I just use a tiestrap and I find this creates an easy surface to gaf tape the mic to the skin and clothing.

Lighting

Frezzi Minifill 12v Light with Batteries and Charger
I think this added 10kg to my baggage but it was worth it. The main reason was there was no electricity where we would be filming. I used the light for special lighting effects in some reenactments at night and for filling in shadows in a few daytime interviews. An example of using this light for a night reenactment can be seen in the teaser at 0:21 and 0:32.

Diffusion Gel and Daylight Correction Gel
I didn't know if I would use this and in the end I didn't (primarily as the minifill had a glass daylight correction filter you use). I had an idea of possibly using it over windows to make light softer, etc but in the end this never eventuated. Ambient daylight was used for almost all interview shots.

TIP - Easy night (blue) looking shots.
Here is an easy way to get a night (blue) looking shot whilst using a tungsten light and some daylight correction gel / filter. Quite simple but always effective, just put you daylight correction filter over your tungsten light source. Then film using your standard tungsten 3.2K white balance setting and you will get a nice blue moon looking lighting. There are many ways you can experiment with your white balance for your look, but on the fly this is an easy way to get good results. In post production I then pushed the white balance over to green to get a more eerie effect which can be seen in the excerpt mentioned in the Frezzi Minifill section.

White pieces of cardboard
With no electricity where would be filming this was one option I thought of for being creative with getting reflections from the sun. In the end I didn't end up using these either.

Misc

Small LCD TV with battery and charger
This was a cheap little portable DVD player which had RCA in. This was an inexpensive way of being able to look at footage at night on a larger screen then the camera viewfinder. I also used it to monitor important shots whilst I couldn't be behind the camera (for example when I was using two cameras simultaneously or I was conducting the interview myself). Of course, the brightness and colour on this monitor was not accurate by any means but it was good for the purposes above and also helped where careful focusing was required on important interviews.

Shot List, Tape Log and Release Forms (with clipboard and pens)
All obvious but all very important for legal and practical reasons. Keeping these filled in assists greatly in post production when you can't remember how to spell some of the more tricky spelling of names.

Powerboard and Extension Leads - charging of equipment

Still camera
SD images are in most cases not of a high enough resolution for printing (i.e. DVD covers, posters, etc) so a still camera was used to get promotional shots for down the track.

Backpack
A large backpack which could fit the two cameras, all tapes and audio components

TIP -Look like a tourist.
The decision to use a standard backpack as opposed to a film case was very deliberate. In Uganda (and many other places in the world), the last thing I wanted to do was to look like a small TV crew and in turn draw unwanted attention to myself both in the airport and in rural areas. My goal was to more like a backpacker or a tourist which meant I was less of a target in more ways then one.

 
Other tips that are worth mentioning (some are Uganda / Africa specific)

Dust
I have never experienced so much dust. You couldn't really see it, but you saw its effects. It got in the tripod, it covered the lens within hours, it was everywhere. I have heard that many photographic forums have mentioned this problem in relation to shooting in Africa too. You can't really avoid the dust so the best thing you can do is to be careful and ensure you clean the equipment and lens very regularly. Also, keeping all tapes in sealed plastic bags assisted.

The Sun
I didn't know this, but the sun is very different in other parts of the world. I don't know many reasons why, but to some degree I had to relearn very quickly how to shoot in these conditions. The polarizer also appeared to work differently. In most circumstances it wasn't an issue, but it was noticeable and required slightly different technique to get the shots I was after.

You Only Get One Chance
This is one of main things I have learnt from doing this documentary. For example we went for a leisurely trip into town and I decided to not take my camera. On that trip there were some very impressive shots and we also ran into a high profile figure who gave a great testimony about the schools we were featuring in the documentary. If I had the camera I could have got this clip but although we had hoped to arrange to meet him again, this never eventuated. If there is the opportunity to film something or to go somewhere with your camera, go for it as you may not have another chance and you don't know what may happen in the future.

Post-Production
Although this article mainly focuses on production, I thought it would be beneficial giving a bit of info about the post-production of the doco.

All post-production was completed using Final Cut Studio. The only exception to this was the sound mix which was outsourced as I was fortunate enough to have enough budget to do this. I could have completed the sound mix myself using Soundtrack Pro however I know my limitations and do not believe that Soundtrack Pro can compete with an extensive Pro Tools setup with multiple hardware and software plugins. For the investment which was made into filming and editing, I did not want to sell the finished doco short by having a sub-standard sound mix. I did a rough mix using Final Cut Pro for preview purposes but provided the raw unaltered audio as separate channels to the audio mixer to do the sound mix from scratch.

 
Conclusion

Above is what worked for me, however every situation is unique and it is essential you do your own research. I hope this article helps you in preparing and shooting your next production.

To find out more about Cinderella Children, the doco which is referred to in this article, please visit www.cinderellachildren.com

 
About Matt Clift
www.mattclift.com

Matthew Clift is a Brisbane based filmmaker who has produced projects for clients ranging from not-for-profit organisations to government departments and multinational companies. At the age of 25, Matt has worked as a freelance video producer and has also worked in roles of journalism and marketing. He also holds a Bachelor of Arts with a double major in psychology and is currently completing his Masters of Business.

As a filmmaker, Matt is unique, being experienced in all major components of filmmaking including directing, producing, filming and editing. This skill range has led Matt to great opportunities to complete full productions from start to finish. Matt has a passion to impact the media in innovation and professionalism with relevant projects. Aside from film, he is an active musician. He and his wife Katie live together in Brisbane, Queensland.

[Top]

copyright © Matthew Clift 2008

© 2000 -2008 Ken Stone. All rights reserved. Apple, the Apple logo, Final Cut Pro, Macintosh and Power Mac
are either registered trademarks or trademarks of Apple. Other company and product names may be trademarks of their respective owners.

All screen captures, images, and textual references are the property and trademark of their creators/owners/publishers.