Revised December 3, 2007
May, 16, 2005
By Ken Stone
Partitioning a hard drive is the process of dividing a hard drive into separate, discrete sections, called 'volumes'. You can create up to 16 different partitions on a hard drive, each one can be of different size and format, even including the 'MS-DOS' format for use with PCs on a network. With hard drives getting bigger there are reasons why you might want to partition a hard drive. Partitioning can be used for organization purposes, i.e., each volume could be used as a media (scratch) drive, each for a different FCP Project. I typically partition into two volumes, one for FCP Captured media, the second for DVD SP projects, for Builds and MPEG 2 encoded files. With FireWire external hard drives reaching one Terabyte in size, partitioning the drive can make project and file management much more manageable.
Formatting
When you purchase a new hard drive for your Mac, either SATA/ATA (internal) or FireWire (external) the box that the drive comes in will likely tell you that the drive will run on both Macs and PCs. This is true, but because the drive is formatted for cross platform compatibility, some stability and facility issues could arise. It is possible that your new cross platform hard drive could have a 2 gig file size limit. Using the drive for FCP (and encoded files for DVD SP) could cause problems. 2 gigs is good for about 9 minutes of DV capture. Capturing clips longer than 9 minutes could result in the captured clip being broken into separate files. So ... whether you intend to partition your hard drive or not, you really should reformat your new hard drive for the Mac. If your new hard drive is FireWire and you intend to use it with both Macs and PCs, then leave it as is and do not reformat.
Tiger and Leopard
The process of formatting and/or partitioning a hard drive is exactly the same for both Tiger and Leopard. However, the Disk Utility interface has change a bit from Tiger to Leopard.
In Leopard
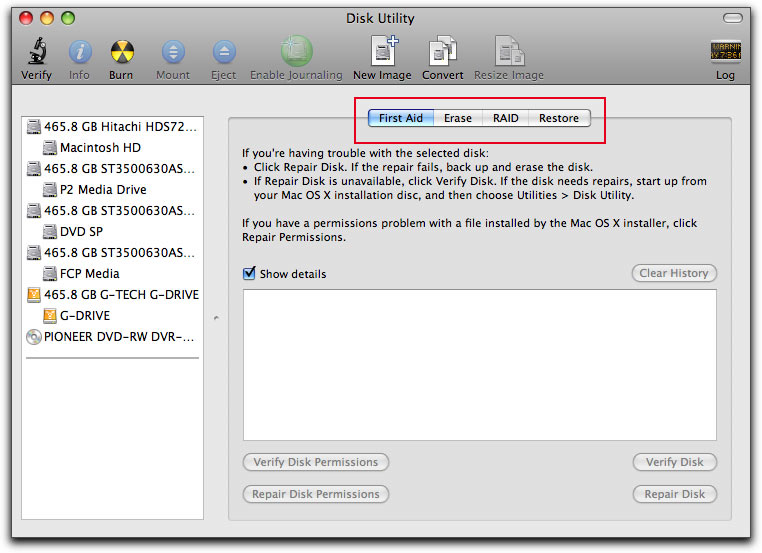
When you launch Disk Utility in Leopard, it opens in default, with no drives selected in the left hand column. If you will look at the tabs near the top of the Disk Utility window (red box below), you will notice that the tab 'Partitioning' is not available as it was in Tiger.
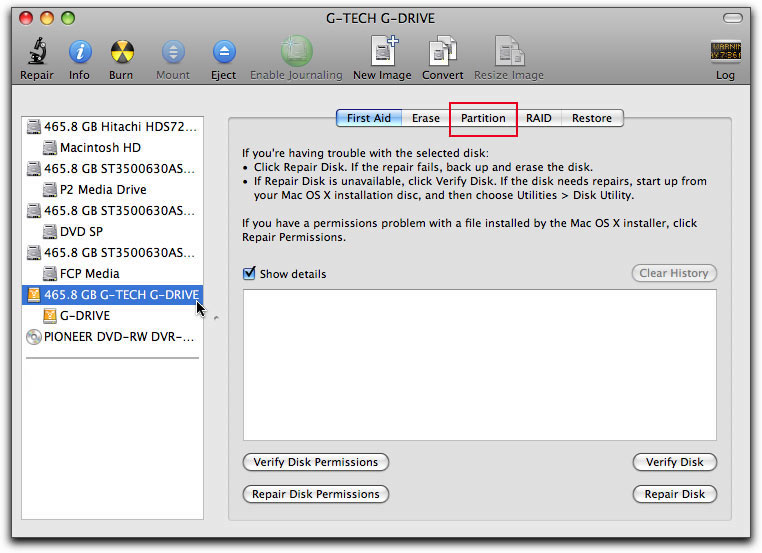
Select the hard drive that you wish to partition in the left hand column. Once you have select a hard drive to partition, the Partition tab will now appear along with the other tabs near the top of the window, (red box below).
In the Partition tab, my Disk Utility is shown below. You will note that both the Name and Format sections are grayed out, (red box below). This is because the drive that I have selected has already been named and formatted and is currently in use. These option will become available once we have set the new partition scheme. Also note that the "Mac OS 9 Drivers Installed" box is checked. Unless you have a specific need for OS 9 drivers, leave this box unchecked.
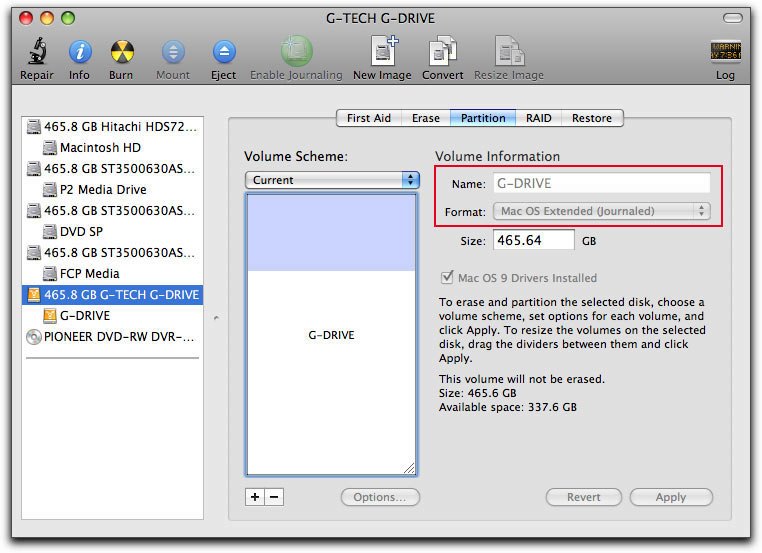
In the Partition tab select the number of partitions that you want from the 'Volume Scheme' drop-down menu. As shown below, I have selected 2 partitions.

Once you have set the number of partitions in the Volume Scheme' drop-down, select one of the partitions. When a partition is selected, as noted by the blue bounding box, (red arrow below), you will notice that both Name and Format, (red box below) have now become available for this partition.
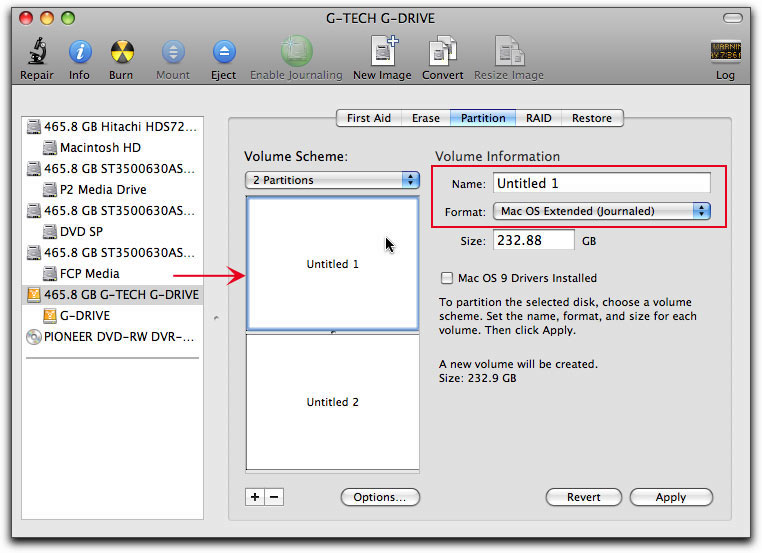
Name your partition and then select your format. You'll want Mac OS Extended (Journaled) for a partition that you will want to serve as a boot (start-up) volume. Select Mac OS Extended (No Journaling) for volumes that will be used as media or data storage drives. You can change the alloted size of the partitions by dragging the little button found between the the partitions in the Volume Scheme section, up or down, (red arrow below).
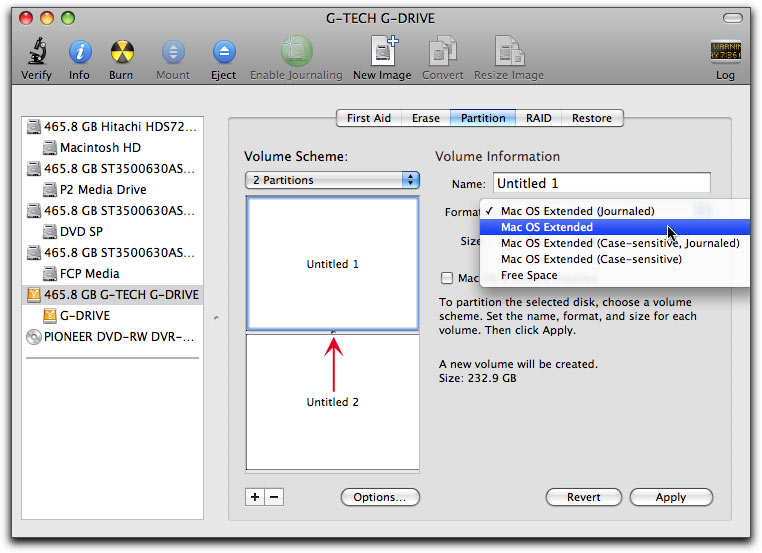
Select each partition and then name and set the format. When you are done, click on the 'Apply' button.
In Tiger
If you are going to partition your new drive you can skip down to the Partition section below, as when you partition your hard drive, you will reformat the drive during the partition process.
1. After you plugin your new hard drive and attach it to your Mac via a FireWire cable, the hard drive will mount on your desktop.
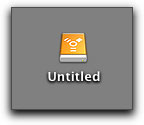
2. Open Disk Utility. Applications folder > Utilities folder > Disk Utility. Select the hard drive in the left hand column and click on the Erase tab.
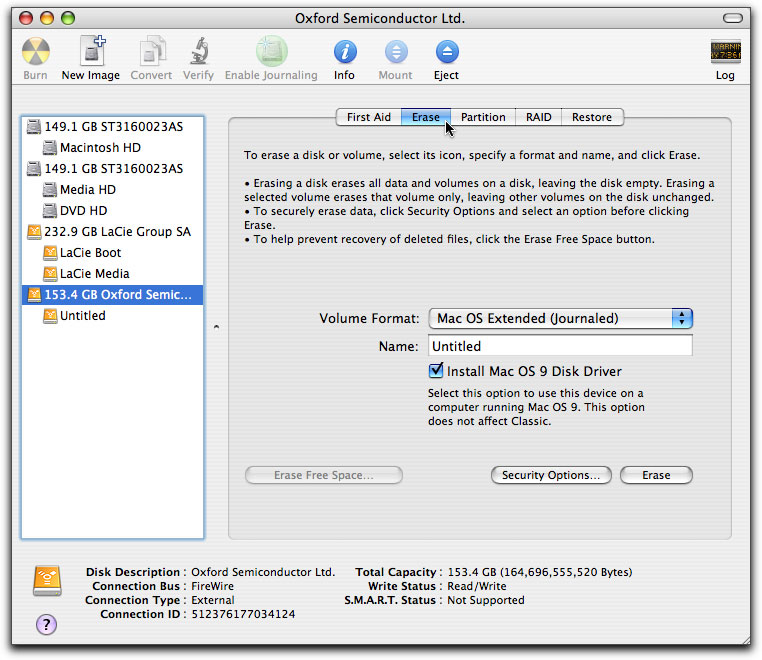
3. In the Volume Format drop-down menu, select Mac OS Extended (Journaled) if you plan to place the Mac Tiger operating system on this drive to make it a bootable drive. Select Mac OS Extended if you plan to use the drive as a media (capture scratch) drive.

4. Name the drive.

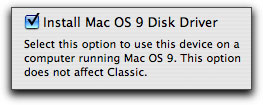
5. Install Mac OS 9 Disk Driver
There is an option to Install Mac OS 9 Disk Drivers. If you plan on using the hard drive with a Mac booting from OS 9, or believe that this might be a possibility, then select the checkbox to install the Mac OS 9 drivers. You do not need to install the Mac OS 9 drivers to use the disk with the Classic environment.
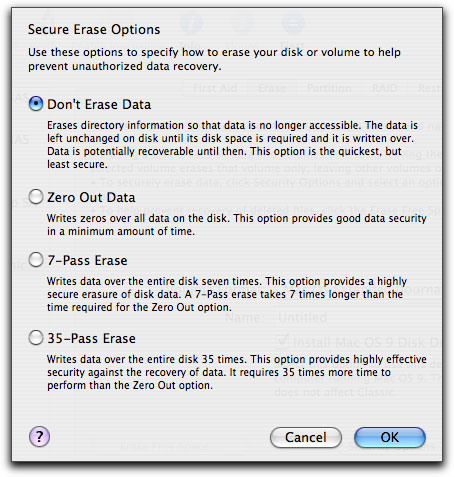
6. Security Options. When the default setting 'Don't Erase Data' is used, only the Directory information (information used to locate files on the hard drive) is erased leaving the actual files intact. This means, that for awhile, there is the possibility of recovering files. Over time the files will be over-written with new files thus destroying the data. For the paranoid there are three additional settings to insure that no data can be recovered from the hard drive.
7. Once you have selected the format and have named the drive, click on Erase. You will be presented with the 'Are you Sure' dialog box. Note that the volume still has the name 'untitled' because the process has not yet run. After 'Erase' the name will change to your new name.
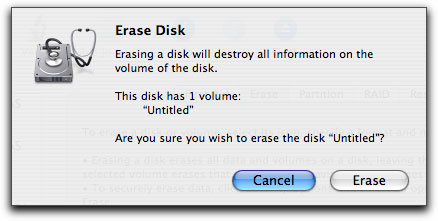
8. Click the Erase button again. The Erase process will take just a minute to erase and reformat your new drive.
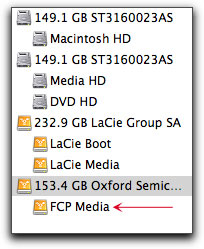
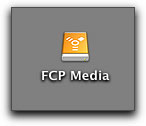
Partitioning
With the new drive mounted, open Disk Utility. Applications folder > Utilities folder > Disk Utility. Select the hard drive in the left hand column and click on the Partition tab. The drive will be displayed as one volume, 'Untitled'.
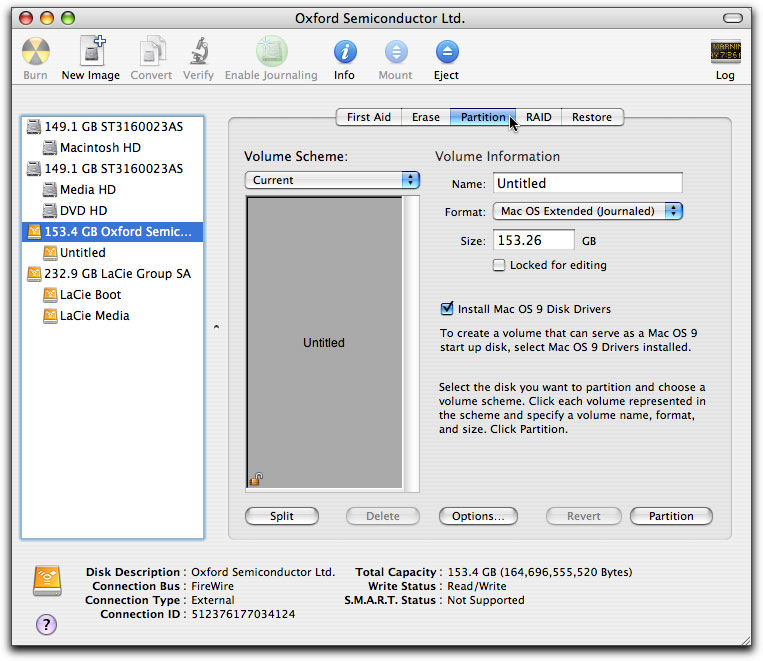
1. In the 'Volume Scheme' drop down, select the number of partitions you want to have. For this example I have selected 2 partitions.

2. Click in the top partition box to select it. Enter a name for this partition (External Boot) and from the 'Format' drop down menu select "Mac OS Extended Journaled". We do want Journaling turned on for a boot drive or volume.
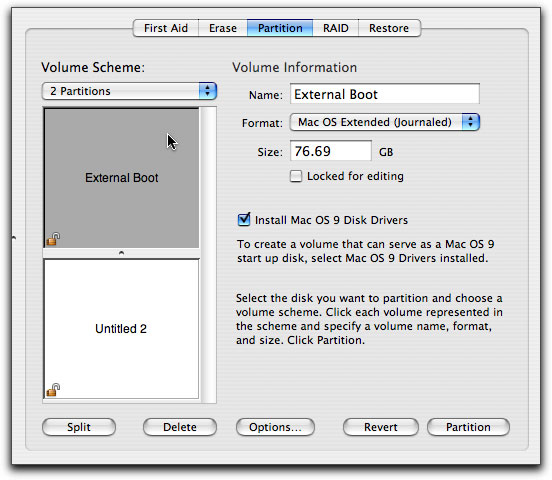
3. I have the "Install Mac OS 9 Disk Drivers" box checked. These drivers should be installed for machines that can boot into OS 9. If OS 9 drivers aren't present on the drive, you can't mount that drive from a machine running OS 9. If you want to boot into OS9 from this drive, or access it while booted into OS 9 from another drive/partition, its imperative that you install OS 9 drivers when you initialize or partition. Even for systems that don't boot into OS 9 it is a good idea; its possible to mount such a drive via Firewire T mode from another machine, which can come in handy in rare maintenance situations. It doesn't hurt to have those drivers there, and you never know when you might need them.
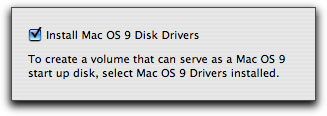
4. Now select the second partition, give it a name and set Format to Mac OS Extended (Journaling off) as this volume will be used as a Capture Scratch drive. Note that Mac OS 9 drives are installed on this volume as well.
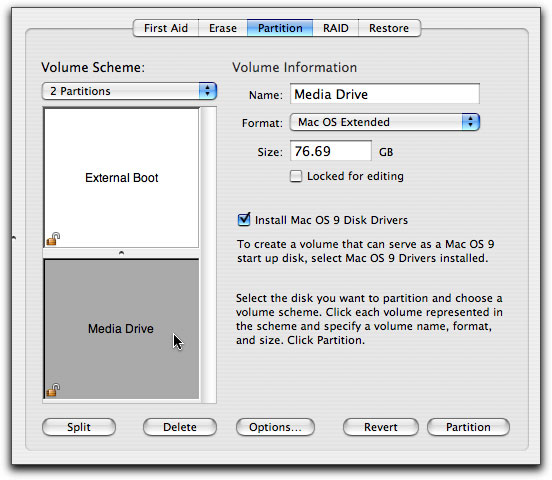
5. Now it's time to size each of the partitions. Place your cursor in between the two partitions, it will turn into a up/down arrow. Click and drag up or down to change the size of the partition, (red arrow below). As you drag, the new size of the 'selected' partition will be reflected in the 'Size' box, (blue arrow below).
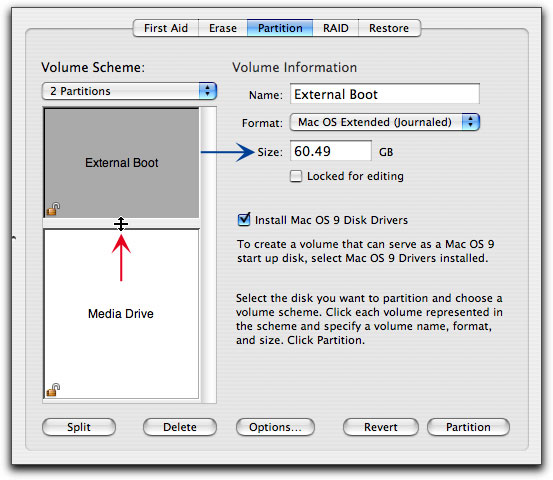
6. Repeat the above process for each of your intend partitions. Once you have set partitions, named, sized, and selected formats, click on the Partition button. Your drive will be partitioned. This process will only take a few seconds. Be aware that when you partition a drive all information on that drive will be lost, so be sure to back up any data that you wish to preserve.
Journaling
When Journaling is turned on for a drive or volume, a continuous record (a journal) is created by the Mac OS, of the work that you do, i.e., opening, saving , deleting files, etc. If your Mac crashes or goes down do to a power failure, upon reboot, Journaling will help the Mac OS to get back up and running.
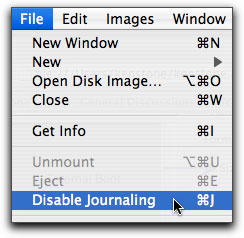
You can turn Journaling on, at any time, for any drive or volume. In Disk Utility, select the drive in the left hand column, then, from the Disk Utility tool bar click on 'Enable Journaling' (below left). Once a drive or partition has Journaling turned on, the only way to turn it off would be to open up disk utility, select the drive you want to turn journalling off, then hold down the option key and click the file menu - now the 'disable journaling' option will be available (below right).

Ignore Ownership
When you have finished formatting and partitioning your new hard drive, there is one more chore. If you plan to use this new drive as a 'media drive' for storage rather than as a Mac OS X System boot drive, you may want to insure that all files on this drive will always be read-write accessible to everyone (all Users), even when the drive is moved to a different Mac. This is important for Firewire hard drives being used as media (scratch) drives for FCP and other apps, as it will make the drive and its files accessible (read-write) on any Mac. To accomplish this, select the hard drive icon on the desktop and 'command i' from the keyboard which will open the 'info' dialog box. At the bottom of the window, make sure that the 'Ignore ownership on this volume' box is checked. If this drive is to be used as a Mac OS X System boot drive, never select "Ignore ownership".

Cryptic Error Message
There have been some reports of problems when attempting to re format some drives (Western Digital). If you have a new drive and attempt to re format the drive as Mac OS Extended, you could get an error message that says "unknown error with the partition map". This problem can occur because of the differences between a PPC and Intel Mac. Here is the work around.
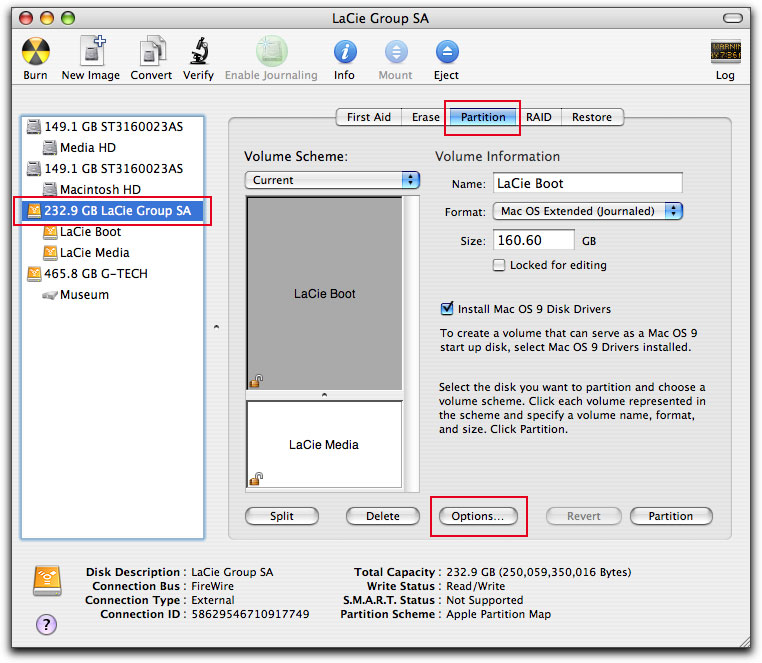
Open Disk Utility and select the drive in the left hand column (the device not the volume) and then click on the Partition tab. In the Partition tab, click on the Options button.
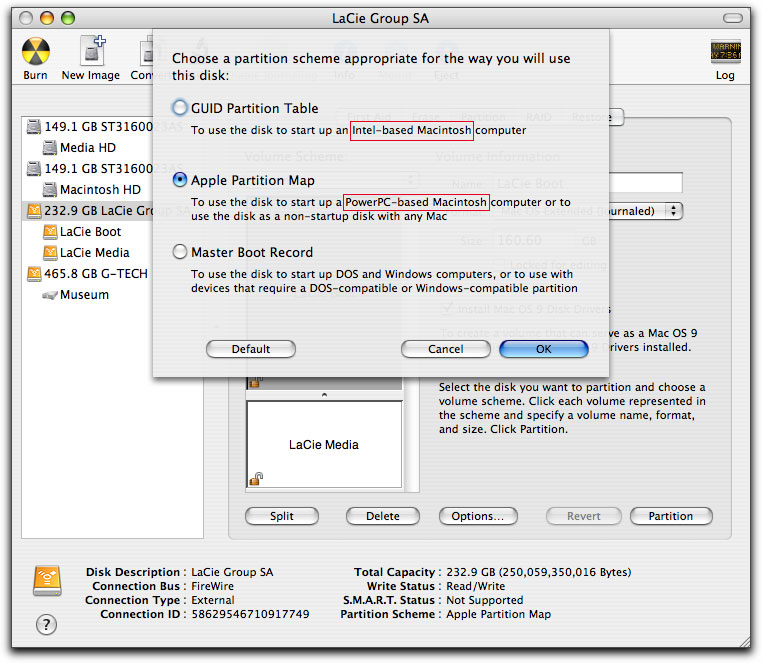
In Options you'll see several choices, the first "GUID Partition Table" is for Intel-based Macs. The second choice "Apple Partition Map" is for PowerPC-based Macs. Select the choice that is appropriate for the Mac you are on, then click OK. You should now be able to format the drive as Mac Os Extended with Journaling on or off.
UNIX. A word of caution, the Mac OS X has UNIX at its core. There is one keyboard item that is reserved for UNIX exclusively. It is the forward slash, (/). Never use the forward slash in the name of a drive or partition, file, folder, bin, project, sequence or anywhere else for that matter.
Enjoy,
--ken
[Top]
copyright © www.kenstone.net 2005
are either registered trademarks or trademarks of Apple. Other company and product names may be trademarks of their respective owners.
All screen captures, images, and textual references are the property and trademark of their creators/owners/publishers.