
Software Review
March 8, 2001
ReelSmart Motion Blur 1.8.1
ReelSmart Video Gogh for After Effects 2.5
Each priced at $89
Review by Ned Soltz
Just because a plug-in is relatively inexpensive or only performs one small function, don't snub your nose at it. One day you may need just what it provides. And fortunately, ReelSmart Motion Blur and Video Gogh are just as close as your web browser and your credit card. Yes, we have two small and specialized plug-ins here from an outfit that understands what non-linear editors need and how to deliver inexpensive products which produce outstanding results.
ReelSmart Motion Blur and Video Gogh are native After Effects plug ins that work in all programs which accept AE plug-ins. In their most recent revisions, note that this also includes Adobe Premiere 6.0. Both work in Final Cut Pro, with a few little tricks that IŐll detail for you.
Both of these filters require that you set Always Render in RGB in your sequence setting (Sequence -> Settings, select Video Processing tab and choose Always Render in RGB). As an aside, you should be aware that FCP still has a few issues regarding RGB/YUV color space. Apple is definitely aware and we can only hope that this will be resolved in subsequent versions of FCP. In short, After Effects standard is RGB rendering. So, when FCP passes a file to an AE plug-in, the plug-in renders in RGB color space. FCP should be able to convert YUV to RGB before processing an AE plug-in filter and then convert it back to YUV values after rendering. It does not. Thus, if YUV rendering is enabled, there is a problem of precision values being lost due to the conversions that are taking place. That might cause flashes or another anomalies in the rendered material.
These issues are not unique to the RE:Vision Effects products. It is simply the fact the RE:Vision understands AE and color processing so well that they are able to articulate the problems. And they are honest enough not to brush them under the rug.
So, now that the preliminaries and the rendering issues are out of the way, a few brief words about two small but powerful filters.
Reel Smart Motion Blur
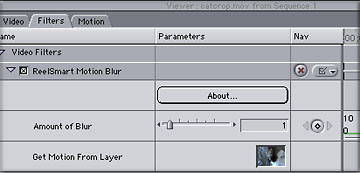
After Effects has the ability to enable motion blur. But it is a global setting and AE calculates the blur that its preset algorithms specify. Reel Smart Motion Blur has the ability to set a variable amount of blur as well as even to remove blur from a clip. The filter works by calculating motion between two successive frames within a clip and then applying blur based upon the motion it has calculated. As a result, it cannot apply blur to a clip which has been modified to a 3:2 pulldown or to any animation on "2's".
Operation is simple. Select the clip and apply the Motion Blur filter (Video Filters -> AE Effects -> RE:Vision -> Reel Smart Motion Blur). The filter, though, requires a video layer from which to extrapolate motion. Since that will be the clip to which you are applying the motion, you need to drag your clip from the Browser to the Get Motion From well. Then, there is only one parameter to adjust. A setting of 0 means no blur, 1 means normal blur, more than one obviously increases the amount of blur and a negative setting removes blur. It's very simple. Then render and check your results. The algorithm is clean and if rendered in RGB color space the output will be clean.
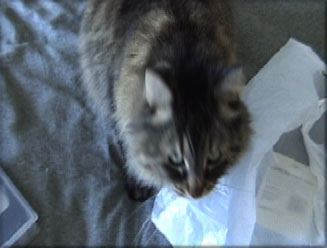
If you need accurate motion blur, Reel Smart Motion Blur can do the trick simply and inexpensively.
Video Gogh
Want that painted look in your videos? Video Gogh can make your videos a Vincent-like work of art (get it? Vincent? Video Gogh?). Video Gogh installs as an AE Filter and installs a QuickTime effect in your system folder. It also includes a standalone application which allows you to drop any QT file onto it and process as described below.
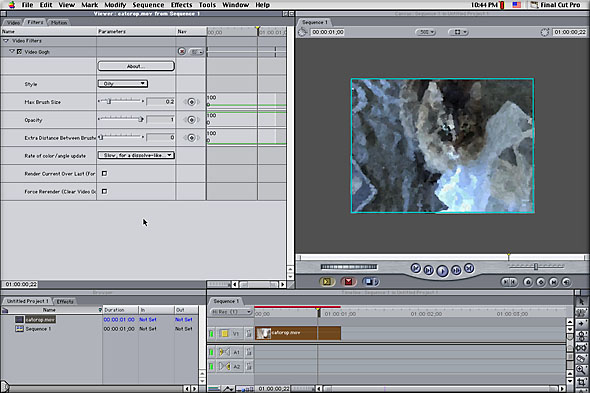
This is another simple one with another little twist. First, apply Video Gogh. It's found in the same place as Motion Blur (Video Filters -> AE Effects -> RE:Vision -> Video Gogh).
You can choose Oily, Chalk or Watercolor as your style of paint processing and change brush, opacity and extra distance between brush parameters. One caution here. Video Gogh renders frames sequentially. So, you must go to the beginning of the clip in the timeline before rendering. Furthermore, you need to clear your buffers of any previews that might interfere with the render. So, before you render, click the Force Rerender box twice (only needs to be clicked once in AE, but twice in FCP). Then render.
One suggestion that RE:Vision Effects makes can also make for a cool effect. Composite the Video Gogh processed footage over unprocessed footage. Apply a transfer mode to the processed footage and check results. You will need to render again, so follow those instructions for returning to the beginning of the clip, click Force Rerender twice and then render.
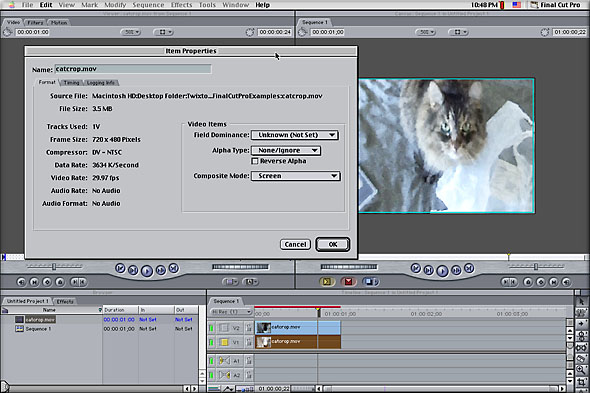
Video Gogh does what it purports to do quickly and for a reasonable price. If you want a true paint processor for video, you might consider Synthetik Studio Artist, which does all three of the paint styles above and more. Note that this is a $300 application program rather than a $90 filter, so the product is definitely not for everyone.
If you merely need to apply oil, chalk or watercolor paint effects to a clip, then this specialized little plug-in is for you.
Download only from www.revisionfx.com
Ned Soltz is passionate about the uses of technology to enhance the creative process. He only wishes that he were more creative. Now that he has a mobile FCP studio on his Powerbook G4, you can catch him on the road at nsoltz@aol.com.
copyright © Ned Soltz 2001
All screen captures, images, and textual references are the property and trademark of their creators/owners/publishers. 
