
January 23, 2006
Creating Subtitles in DVD Studio Pro 4
By Ken Stone
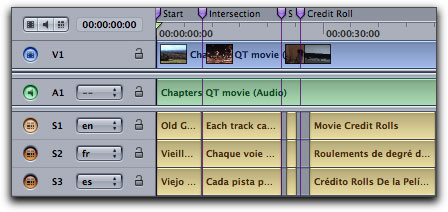
DVD Studio Pro gives us the ability to add subtitles, called Subtitle streams, to our video tracks, with up to 32 different subtitle streams per video track. Common uses for this feature are, foreign language subtitles, Closed Captioning, interviews, directors comments, instructional comments, different versions of text content, simple graphics, (like a logo), and interactive buttons which allow the viewer to make choices while viewing the movie. Using the DVD remote control, the viewer can turn subtitles on or off and select from up to 32 different subtitle streams. In addition, you can create a subtitle stream that will display automatically when viewed (Forced Display).
Setting Text Subtitles
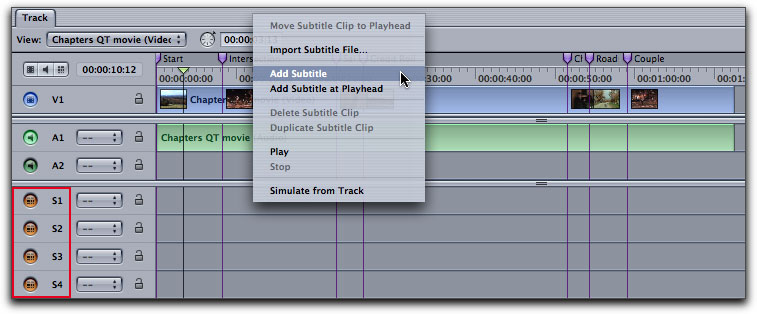
The Subtitle streams (streams look like tracks in the Track Editor) are found in the Track Editor window, just below the audio tracks and are numbered from S 1 to S 32. You can have an unlimited number of subtitle clips per stream. To add a subtitle stream, control click in the S1 track and select "Add Subtitle" or "Add subtitle at Playhead".
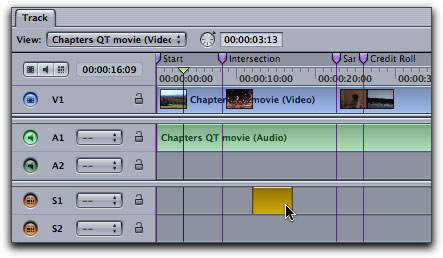
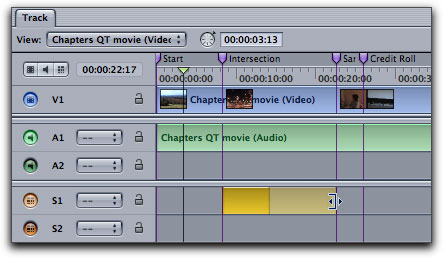
This will place your new subtitle, shown as a yellow clip, in the S1 track with a default duration of 5 seconds, this default can be changed in the DVD SP Prefs > General tab. You can click and drag to reposition the placement of the subtitle. Placing the cursor on either end of the subtitle will turn it into an extension tool, you can shorten or lengthen the duration of the subtitle clip. You can also change the subtitle clip's duration in the Inspector. It should be noted that a subtitle clip can not span a chapter marker, it will be clipped (cut off) at the upcoming chapter marker.
Select the yellow subtitle clip in S 1 to open it up in the Inspector. There are several different ways that you can place text into the subtitle. With the General tab selected, you can type directly into the Text box at the top of the inspector as I have done. You can copy and paste text into this box or you can Import text from a Text Editor by using the "Import Subtitles" button found at the very bottom of the Inspector window. The default font style and size is controlled in the DVD SP Prefs, Text tab. Although the default is set here, you can easily change the font attributes in the Inspector and Font Palette.
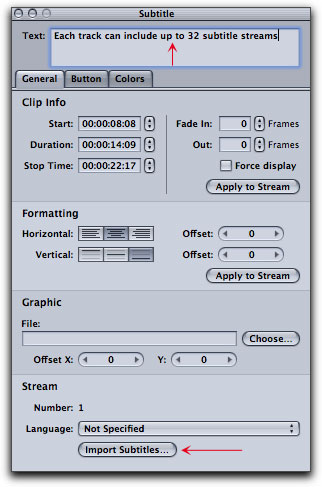
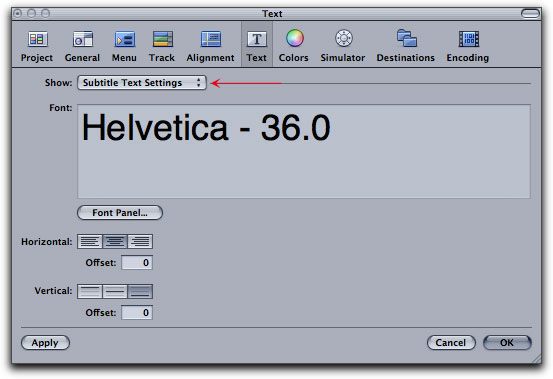
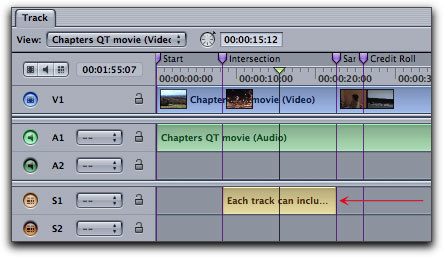
The text that you enter into the text box in the Inspector will be displayed on the yellow subtitle clip provided the Track Editor is zoomed out far enough.
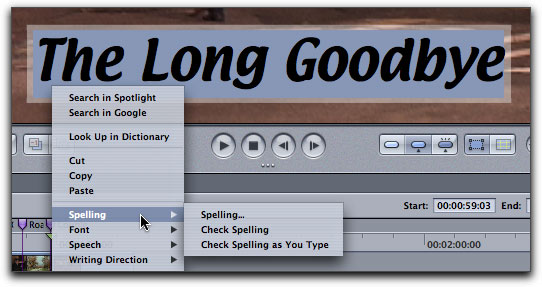
DVD SP has its own 'Spell Checker', Control click on the selected text in the Viewer.
As you type into the text box in the Inspector, the text will appear in the Viewer window. Below, the text is shown at the default font, size, color, color outlines and position.
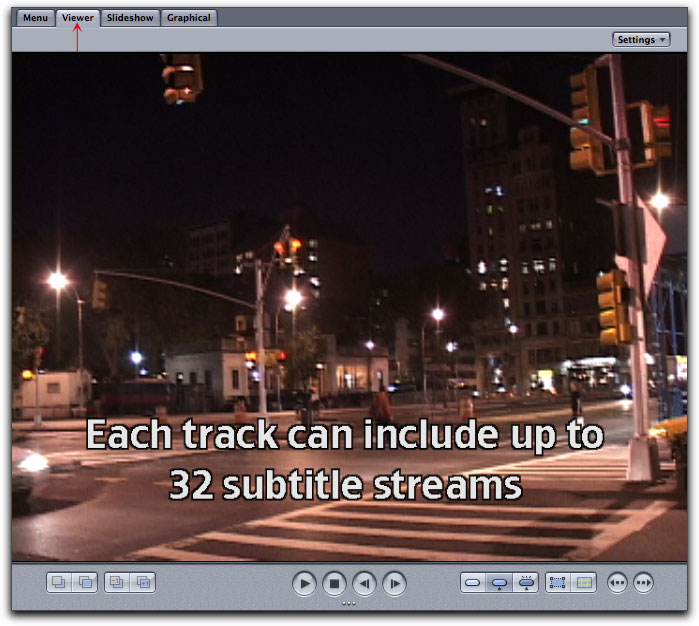
To change the font and/or size of the font, double click on the yellow subtitle clip in the Track Editor. This will turn the text in the Viewer into a standard text selection box. In order to produce readable text for your viewers you should work in font sizes of 24 point or larger and avoid using serif font styles for cleaner text edges.
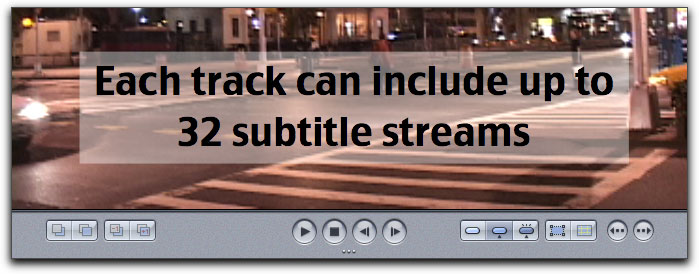
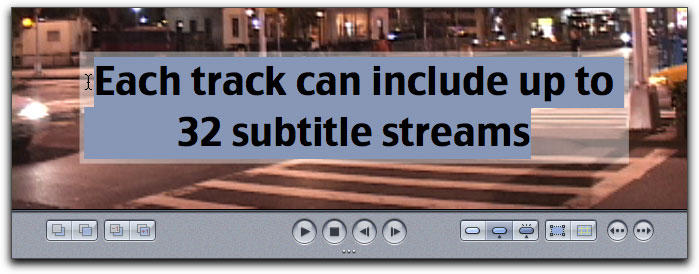
Drag through the text with the I-beam cursor to select the text.
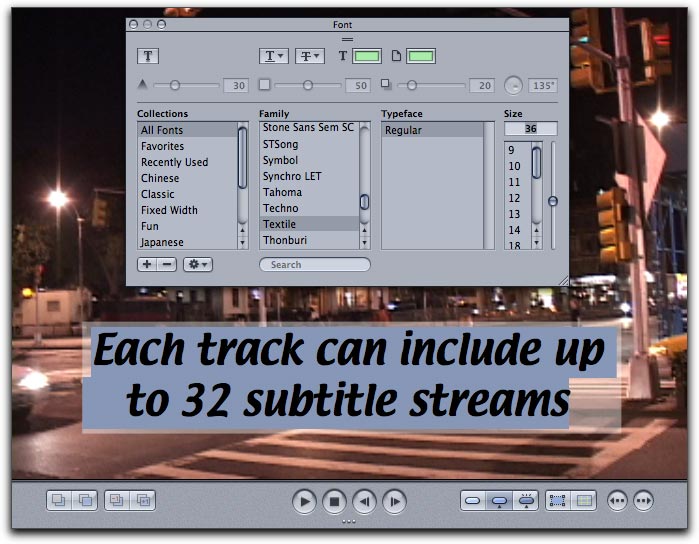
Open the Font Palette. As you select different fonts and sizes, the Viewer will update in real time to display the changes.
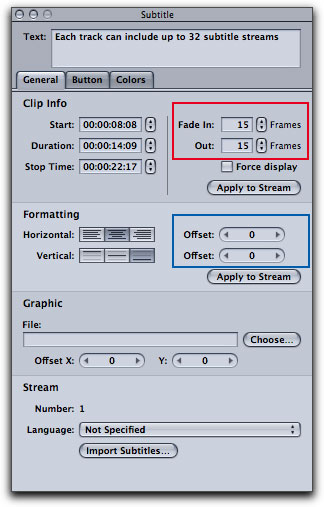
Back in the Inspector, General tab we have additional control over our text subtitles. As shown in the red box below, you can apply a Fade In or Fade Out to the subtitle text. Best to keep the fade time short to around 15 frames or less. In the Formatting section in the Inspector you can select 'Horizontal', flush left, centered, and flush right. 'Vertical', offers top, center or bottom, for basic text placement. Just to the right, blue box, are offset controls for vertical and horizontal positioning that move the line of text one pixel at a time for exact positioning.
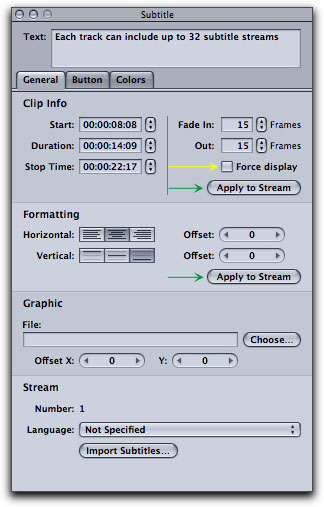
In the Inspector, yellow arrow below, is the feature 'Forced display'. When a person is watching a DVD, the DVD remote control offers the option to turn on Subtitles or select different Subtitle tracks for different foreign language subtitles. If you want your subtitles to be displayed automatically (taking the option away from the remote control) selecting Force display will do just that. 'Apply to Stream', green arrow below, will apply the settings in that section in the Inspector to all subtitle clips that are in the Subtitle stream, in this case, S 1.
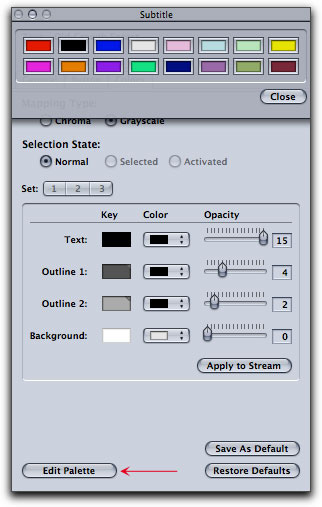
Changing the color of the font and the text boarders is done in the Color tab of the Inspector and not in the Color Palette. In the Text color drop-down menu there are 16 colors to select from. We are not actually limited to these 16 colors, as it is possible to change any or all of these color possibilities in the DVD SP Preference, Color tab or by clicking on 'Edit Palette' button bottom left of the Inspector. There is an Opacity slider which controls the transparency of the text color, from 0 which is transparent to 15 which is opaque. Text opacity can be used to pull down the color intensity of the text but is normally set to 15.
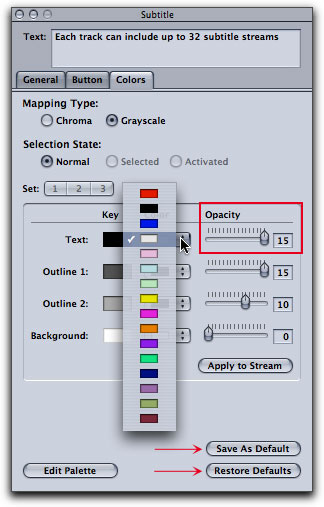
In addition to text color we are offered the possibility of adding two different colored Outlines to the text. These outlines serve two purposes. The first would be to help separate the text from the video background that it is laid on top of. If you have light colored text that falls onto light colored video, a dark outline will help the text stand out and be more readable (or dark text on top of dark video with a light boarder). As each text/video situation is different, you'll have to experiment with the color and opacity of the two outlines to achieve the best look.

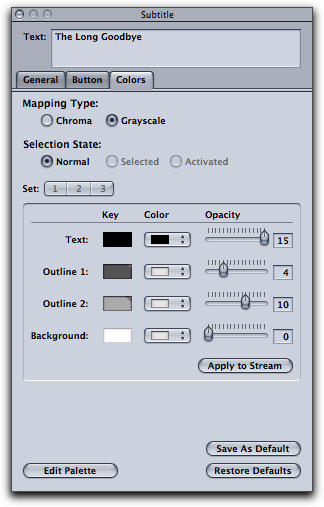
The second is to help with stair-stepped or jagged text edges. By applying the same color as the text to both outlines (1 and 2) but reducing the opacity for each of the outlines, with outline 2's opacity set lower than outline 1, we can create a softer edge to the text, producing a smoothing edge effect. This can help with jagged text but does produce softer looking text.

Text with outline 1 and 2 set to 0 opacity.

Text with outline 1, color black, opacity set to 4. Outline 2, color black, opacity set to 2.
Using Outlines to reduce stair stepping by increasing edge softness is a judgement call.
There is an additional setting in the Color tab of the Inspector, Background. You can select a color from the color drop-down menu to achieve a solid background for your text, or you can adjust the opacity of your background color for a transparent look with text.
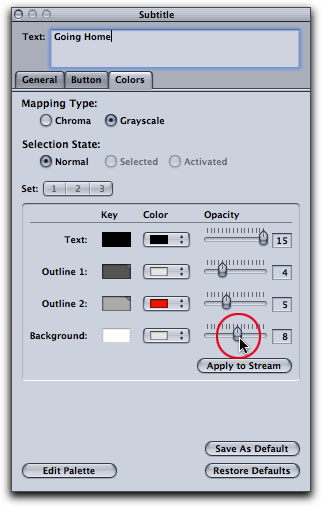
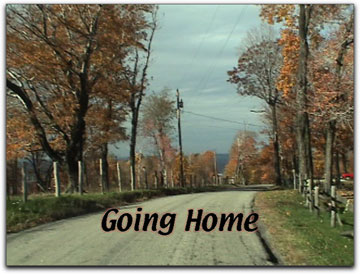
Color white - Background Opacity set to 0
|

Color white - Background Opacity set to 8
|
DVD Studio Pro gives us the ability to have up to 32 subtitle streams per video track. While this ability will be most often used to add subtitles in different foreign languages, this feature can be used to other ends. Additional subtitle streams can be used to display production notes, interviews, directors comments, simple graphics or different versions of text content.
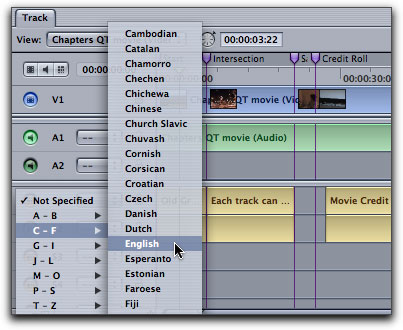
DVD players sold around the world are often set to the language of the country that they are sold in. A DVD player sold in Italy will default to and display an Italian language substream provided that an Italian substream is available on the DVD. DVD remote controls offer the ability to display a 'Subtitle Menu' which will allow the viewer to select the appropriate subtitle stream. In order to offer different languages versions, each substream that is used (S1 S2 S3, etc) must be set to the correct foreign language for that substream. There are two different ways to set the language for a substream. With the S 1 substream selected in the Track Editor, click on the 'Stream Language select' menu and pick your language, in this case English.
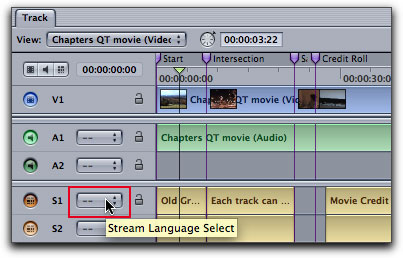
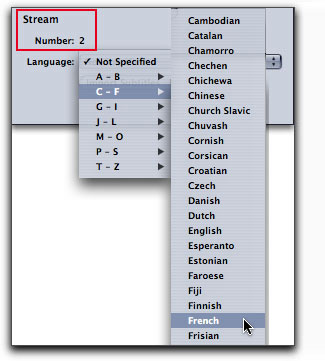
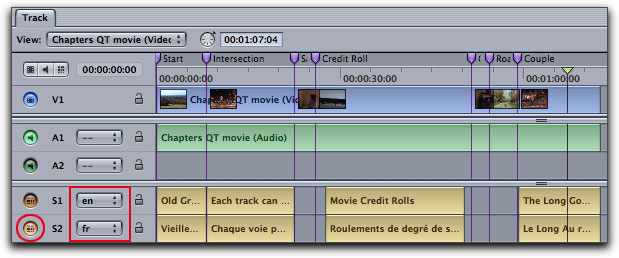
The language can also be set in the bottom section of the Inspector when the substream is selected, below left. In the track editor you will see a two letter abbreviation for each language substream, red box below right. You can play your video in the Viewer and preview any subtitle stream over your video by selecting different orange View buttons (red circle) for each language while the video is playing in the Viewer. This can also be accomplished in the Simulator by selecting different substreams in the 'on screen' remote control.
Adding Graphics to Subtitle
In DVD SP we can add graphics, such as logos, bugs and even art like arrows which might point to a certain place in the video. Graphics that we want to add to a subtitle stream must be Grayscale images in the PICT format. Most often we'll want to prep our graphic in Photoshop. First, resize the graphic in Photoshop, then from the menu bar > Image > Mode > Grayscale, Save As > PICT File. You will get the best results if your graphic is pure white and black. Everything that is white will be come transparent, everything that is black will be visible. Simple graphics will work better than more complex ones.
Add a subtitle clip to your track editor. Select the subtitle clip in the track editor to open in the Inspector. In the Graphic section click on the Choose button and navigate to the graphic you want to import.
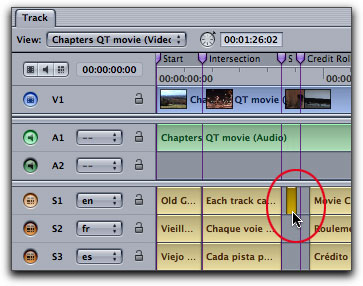
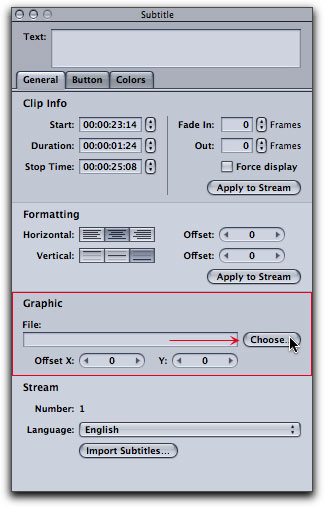
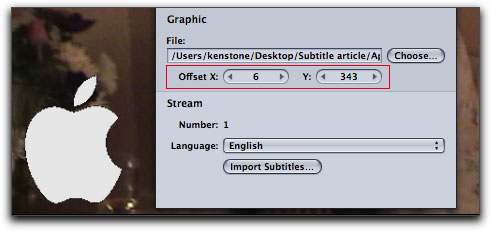
With your Playhead parked on the graphic subtitle clip, the graphic will now be displayed in the Viewer. You will notice that the graphic shows as pure white and will be positioned upper left corner of the Viewer window. In the Inspector, General tab, there is only the Offset X and Offset Y controls, so it does take time to move the graphic to the proper location.
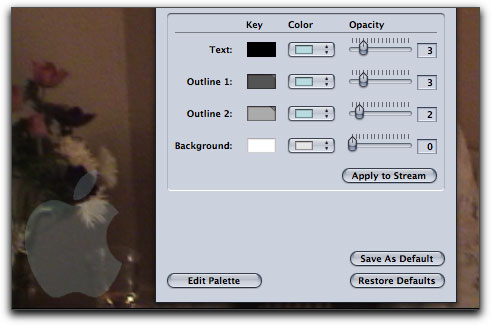
After positioning the graphic, click on the Color tab in the Inspector. I have chosen a lite blue for my color (text) and pulled the opacity down to 3, ghosting the graphic. Then, using the same color for both Outline 1 and 2, small values are entered to smooth the edges of the graphic.
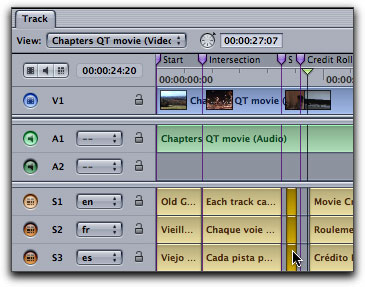
With the graphic subtitle finished, Option drag the graphic to each additional foreign language subtitle stream to duplicate the effect.
Importing Subtitles
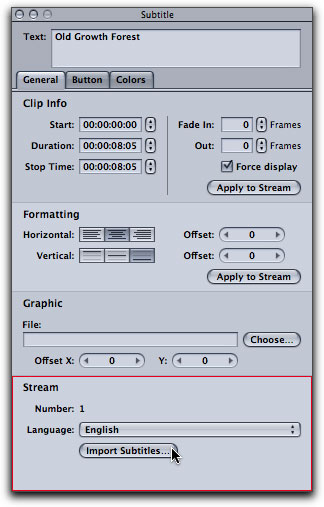
There is another way to bring subtitles into DVD SP, subtitles can be imported. 'Import Subtitles' is found, bottom section of the Inspector window. Select the correct language for this stream and then click on the Import button and navigate to your text file. There are a number of different subtitle file formats and numerous third party applications that allow you to create subtitles in a text editor type app. For long movies, with subtitles that run the length of the movie (or for multiple language tracks), using a third party app for text entry and formatting (font style, size, color, position, duration, fade in fade out, etc.) will be much more efficient. Some of these apps will even generate high quality TIFF files of your text, improving the one screen quality of the subtitles.
Previewing Subtitles
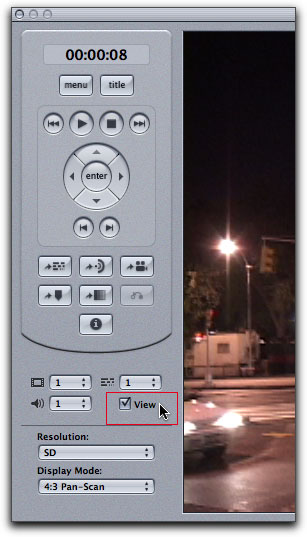
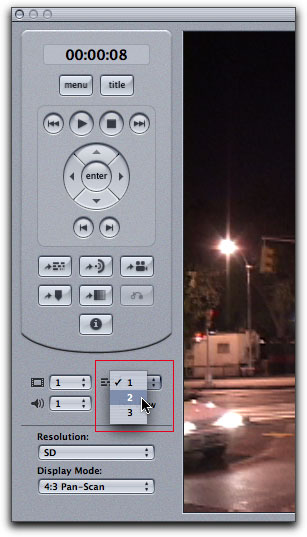
We can test our subtitles using the Simulator, either Control click anywhere in the Track Editor and choose Simulate from Track, or click on the Simulate button, top of the Viewer window. This will open the Simulator window with an on screen DVD remote control. The DVD must be playing in order to view your subtitle work. Start the video and then, if you did not selected 'Force Display' in the Inspector for your subtitles, select the 'View' box in the on screen remote control, below left. The subtitles should now be showing. As the video plays, you can select and view the different subtitle streams from the 'Subtitle Select' drop-down menu, below right.
Conclusion
When we test our DVD in the Simulator, it is important to remember that we are not testing muxxed (MPEG 2) DVD material but rather DVD SP is simulating how it might work. This is not the best way to test a DVD for functionality. When a DVD goes through the Build and Format process, things change and can work differently from the way they worked in the Simulator. Case in point. I said that if a subtitle clip extends past a chapter marker it will be cut of at the chapter marker. If you do extend a subtitle clip past a chapter marker and test in the Simulator (or play in the Viewer), it will play past a chapter marker. But when the DVD is muxxed, a subtitle clip, will indeed, be clipped or cut off at the chapter marker.
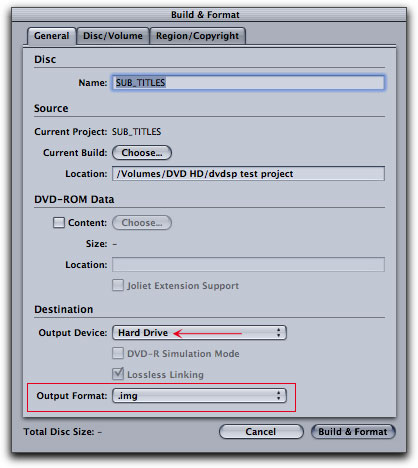
I do use the Simulator to preview my DVDs as I author them, but I test my DVD before burning by creating a Disc Image. In the Build and Format window, select 'Hard Drive' in the Output Device window. After setting 'Hard Drive' the Output Format will change to .img (Disc Image). After Building and Formatting my DVD, I open the Disc Image in the Apple DVD Player and test. As a Disc Image is a finished DVD, testing this way is a much more accurate way to evaluate a DVD's performance. Use the Subtitle button on the Apple DVD Player remote control to change subtitle streams. If you change subtitle streams while the DVD is playing, the change will not occur mid-subtitle clip but when the next subtitle clip is reached.

For those of you who are wondering about the amount of space that subtitles will take up on the DVD, and if the bit rate settings need to be changed because of the inclusion of subtitles, don't worry. After muxxing, each subtitle clip uses only 5k of disk space.
Having the ability to add subtitles to our DVDs is great, though I don't know how often this feature will be used by most people. But, because we can not copy-protect a DVD burnt in our Macs (copyright protection can only be added when a disk is replicated and not burnt), having the ability to add a logo (watermark) to our DVD video offers some degree of protection.
Enjoy,
--ken
[Top]
copyright © www.kenstone.net 2006
© 2000 -2006 Apple
Computer, Inc. All rights reserved. Apple, the Apple logo, Final
Cut Pro, Macintosh and Power Mac
are either registered trademarks or trademarks of Apple. Other
company and product names may be trademarks of their respective
owners.
All screen captures, images, and textual references are the property and trademark of their creators/owners/publishers.


